Administrative Dashboard
Posit Workbench includes an administrative dashboard with the following features:
- Monitoring of active sessions and their CPU and memory utilization
- The ability to suspend, forcibly terminate, or assume control of any active session
- Historical usage data for individual Workbench users (session time, memory, CPU, logs)
- Historical system statistics (CPU, memory, active sessions, system load)
- Searchable Workbench server log (view all messages or just those for individual users)
- The ability to lock users, preventing them from signing in to Workbench
- The ability to configure select Workbench settings directly in the UI (for more information, refer to the Configuration Manager section)
The dashboard can be an invaluable tool in understanding Workbench server usage and capacity as well as to diagnose and resolve problems.
Note that at this time, historical monitoring is not available for sessions spawned via the Job Launcher.
Enabling the dashboard
The administrative dashboard is accessed at the following URL:
http://<server-address>/adminThe administrative dashboard is disabled by default. To enable it you set both the admin-enabled and admin-group options. The admin-group is a requirement for giving users administrative access. For example:
/etc/rstudio/rserver.conf
admin-enabled=1
admin-group=rstudio-admins
You can specify a single group as the above example does or a comma-delimited list of groups. For example:
/etc/rstudio/rserver.conf
admin-group=server-admins,rstudio-admins,domain-adminsNote that changes to the configuration will not take effect until the Workbench server process is restarted.
Administrator superusers
You can further designate a certain user or group of users as administrative “superusers.” Superusers have the following additional privileges:
- Suspend or terminate active sessions
- Assume control of active sessions (e.g. for troubleshooting)
- Login to Workbench as any other user
Administrative superusers do not have root privilege on the system, but rather have a narrow set of delegated privileges that are useful in managing and supporting Workbench. You can define the users with this privilege using the admin-superuser-group setting. For example:
/etc/rstudio/rserver.conf
admin-superuser-group=rstudio-superuser-adminsNote that as with the admin groups above, you can specify a single group as the above example does or a comma-delimited list of groups. For example:
/etc/rstudio/rserver.conf
admin-superuser-group=rstudio-superuser-admins,domain-adminsChanges to the configuration will not take effect until the Workbench server process is restarted. Admin superusers can also be added via the command line. See Adding users to the user database.
User impersonation restrictions
The ability to login as other users and assume control of existing sessions is not available if you are authenticating with SAML SSO, OpenID, or Proxied Authentication. This is because these authentication mechanisms use a different user-identity mechanism which isn’t compatible with the way that user session impersonation is implemented.
Workbench log time zone
You can control the time zone in which the Workbench server logs are displayed in the admin dashboard by the use of the admin-monitor-log-use-server-time-zone option. For example:
/etc/rstudio/rserver.conf
admin-monitor-log-use-server-time-zone=1Setting this option to 1 will display the Workbench server logs in the system’s time zone. The default value of 0 will display the log times in UTC.
Licensing considerations
If you have been granted a license which has a limit on the total number of users that may use Workbench (i.e. named user licensing), you will need to control user access to Workbench. Each unique user that signs in to Workbench will count against your available user limit. If too many users sign in and attempt to use Workbench, new users will be denied, as the license limit will be reached.
If this occurs, please contact sales@posit.co to purchase additional users.
For more information on licensing, see License management.
Configuration Manager
Preview
This feature is in preview. Preview features are unsupported and may face breaking changes in a future release. Any issues found in the feature will be addressed during the regular release schedule; they will not result in immediate patches or hotfixes.
We encourage customers to try these features and we welcome any feedback via Posit Support, but we recommend that the feature not be used in production until it is in general availability (i.e., officially released as a full feature). To provide feedback, please email your Posit Customer Success representative or sales@posit.co and specify that you are trialing this feature.
The Configuration Manager, located in the Config tab of the administrative dashboard, simplifies managing and making changes to your Workbench configuration.
Unsupported environments
The Configuration Manager is unavailable if Workbench is running behind a proxy.
The Configuration Manager is disabled if:
- Workbench is running in a container (e.g., Docker, Kubernetes, Singularity)
- Workbench is running in a load-balanced cluster
- Any of the files the Configuration Manager can modify are read-only
The Workbench server logs indicate the reasons the Configuration Manager is disabled.
Manageable settings
The Configuration Manager can modify the following settings:
Distributed workloads
Posit Workbench users can run computationally expensive or long-running R or Python scripts as standalone Workbench jobs. For more details, refer to the Job Launcher section of this guide.
Distributed workloads allow you to set limits to Workbench jobs using:
- User and group profiles: define memory and storage usage limits per user or per group
- Resource profiles: assign resource limits for one or more users
With the Configuration Manager, you can easily configure resource limits and resource profiles for users and groups.
Using the Configuration Manager
There are three general steps to using the Configuration Manager:
- Make changes
- Review changes
- Deploy changes
When the Configuration Manager deploys changes, Launcher reloads its configuration files without restarting. If Launcher detects a problem with the new configuration, no changes apply to the running system.
UI elements
The Configuration Manager is designed to be intuitive with easy-to-use UI elements. In this example, an administrator uses the Configuration Manager to make changes to a Slurm resource profile:
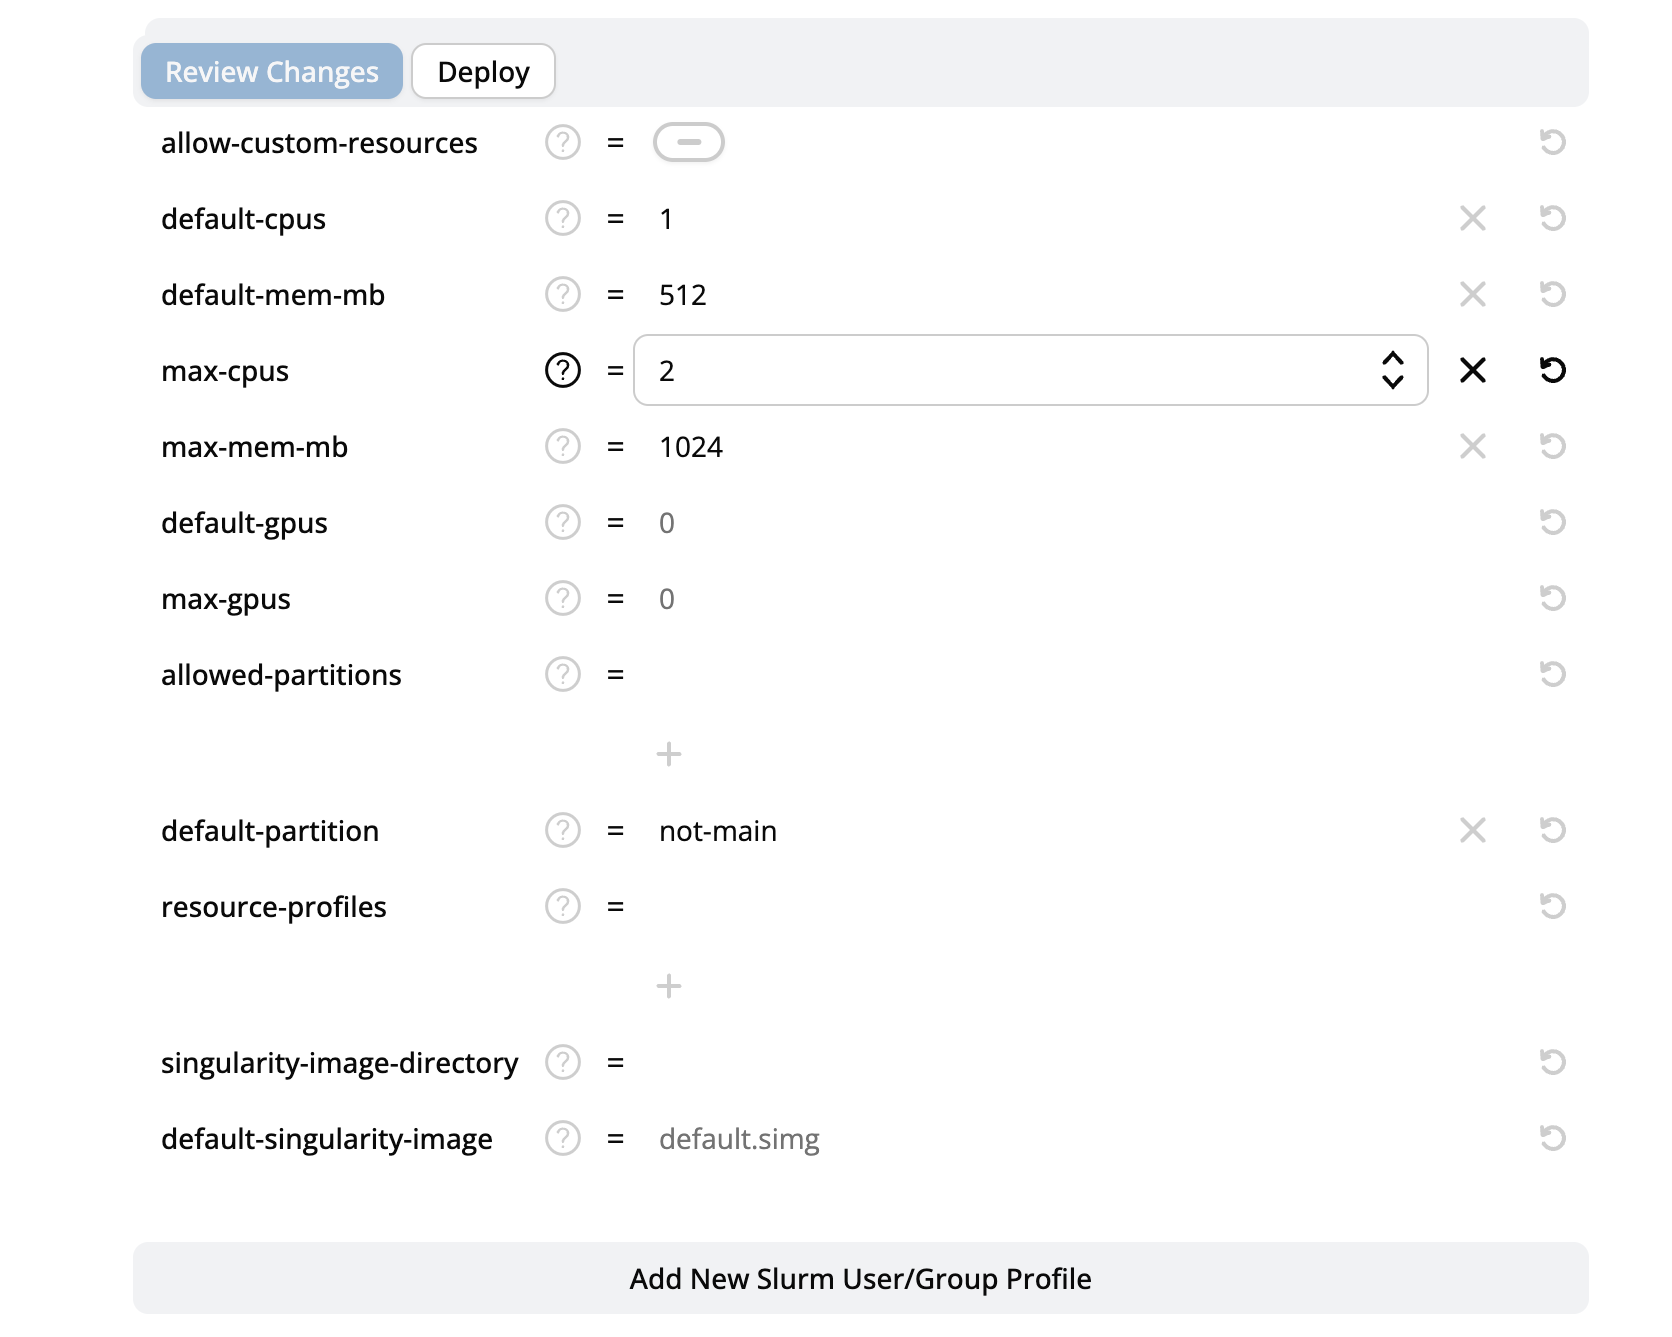
| UI element | Function |
|---|---|
| Clear |
Removes any user-input data from the field. If a field is cleared, your configuration will fall back to using the system default. |
Reset changes  |
Reverts the field back to the last known value. |
Question mark  |
Provides more information about the field, including its default value. |
| Add New | Adds new configuration sections (only available in some configurations). |
| Review Changes | Allows you to view a summary of your changes before saving, including any new, updated, or removed sections and fields. The system also validates these changes for correctness and highlights any errors that must be corrected before saving. |
| Deploy | Makes your changes take effect. |
Troubleshooting
By design, the Configuration Manager only allows users to enter correct values. At no time should a service crash as a result of using the Configuration Manager. If you make a mistake, you should be able to correct it, save, and deploy your changes.
Known limitations
Limitations to consider when using the Configuration Manager include:
- The Configuration Manager can only modify fields it recognizes. Unrecognized fields generate warnings that do not prevent saving and deploying. Unrecognized fields can only be modified by editing the configuration file directly. This is common for Slurm configurations that specify GPU limits with dynamic field names. See the
max-gpus-<type>field in Slurm User and group profiles for more information. - The Configuration Manager is unable to determine whether the displayed changes shown in the UI are currently deployed.
- Existing comments in the configuration files could be lost when using the Configuration Manager. Refer to the Configuration comments section for more details.
Rolling back changes
If you are unable to revert changes using the Configuration Manager, you can manually update the configuration files. If you are uncertain what values to change, you can roll back changes by copying a backup file. Workbench automatically creates these backup files, as outlined in step 1.
Step 1. Locate backup configuration file
When the Configuration Manager deploys changes, or when the server starts/restarts, the system creates a backup of each active configuration file. This file:
- Is in the
/etc/rstudio/directory (or wherever your configuration files are stored) - Has a
.prefix and an.activesuffix
For example, launcher.local.profiles.conf will be backed up to .launcher.local.profiles.conf.active.
Step 2. Copy backup configuration file
To revert to the last known good configuration, copy the backup file to the original file name.
For example, to revert the
launcher.local.profiles.conffile, run the following command:sudo cp /etc/rstudio/.launcher.local.profiles.conf.active /etc/rstudio/launcher.local.profiles.confThen, restart the service to apply the changes:
sudo rstudio-launcher restart
Configuration comments
The configuration files may contain manually added comments, since files managed by the Configuration Manager can also be managed directly by system administrators. When the Configuration Manager saves changes, it attempts to preserve comments where possible. However, there are some limitations:
- If a section is deleted via the Configuration Manager, all section and field comments associated with that section are deleted.
- If a field is cleared via the Configuration Manager, any comments associated with that field are deleted.
- Any comments at the end of the file will not be preserved.
The Configuration Manager treats comments above a section header as section comments, and comments above a field as field comments. For example:
# This comment is attached to the section
# This section defines the small resource profile

[small]
cpus=1
# This is a field comment
# mem-mb defines the memory limit
mem-mb=1024

[medium]
cpus=2
mem-mb=2048

# This is a comment at the end of the file
# This comment will not be preserved
In the above example, if the mem-mb field is cleared via the Configuration Manager from the small section, the resulting configuration file would be:
# This comment is attached to the section
# This section defines the small resource profile
[small]
cpus = 1

[medium]
cpus   = 2
mem-mb = 2048
If the small section is deleted via the Configuration Manager, the resulting configuration file would be:
[medium]
cpus   = 2
mem-mb = 2048
Saved Configuration Manager changes may also cause whitespace changes.