OpenAI
The OpenAI integration allows content running on Posit Connect to access the OpenAI API using a shared API key. When content is associated with an OpenAI integration, Connect sets the OPENAI_API_KEY environment variable, which is automatically detected by the official OpenAI SDKs.
This integration is useful when you want to:
- Share a single OpenAI API key across multiple pieces of content.
- Centrally manage and rotate API keys without redeploying content.
- Audit which content is using OpenAI.
| Component part | Value |
|---|---|
| Provider registration | An API key created in the OpenAI Platform |
| Authentication types | Environment variables |
| Configuration | api_key (sensitive) |
| Credential delivery | Environment variable: OPENAI_API_KEY |
| Content compatibility | Interactive and rendered content; public access and share links supported |
Provider registration
Performed by an OpenAI administrator.
Obtain an OpenAI API key
The OpenAI administrator creates an API key in the OpenAI Platform.
OpenAI API keys should be treated as sensitive credentials. Consider creating a dedicated API key for use with Connect so it can be rotated or revoked independently.
Transfer information to Connect administrator
The OpenAI administrator shares the API key with the Connect administrator.
Authentication types
The OpenAI integration supports only the environment variables authentication type. There is no viewer identity and no service account identity: every content item associated with the integration uses the same API key, and every viewer sees the same behavior.
Because no viewer identity is involved, this integration supports both interactive and rendered content, and both public access and share links.
Connect configuration
Performed by a Connect administrator.
Create the integration in Connect
Using the information from the OpenAI administrator, the Posit Connect administrator creates an integration through the dashboard’s System > Integrations settings. Once the integration has been created in Connect, it is available for use by all publishers. See Access control lists for information on customizing access to specific users or groups.
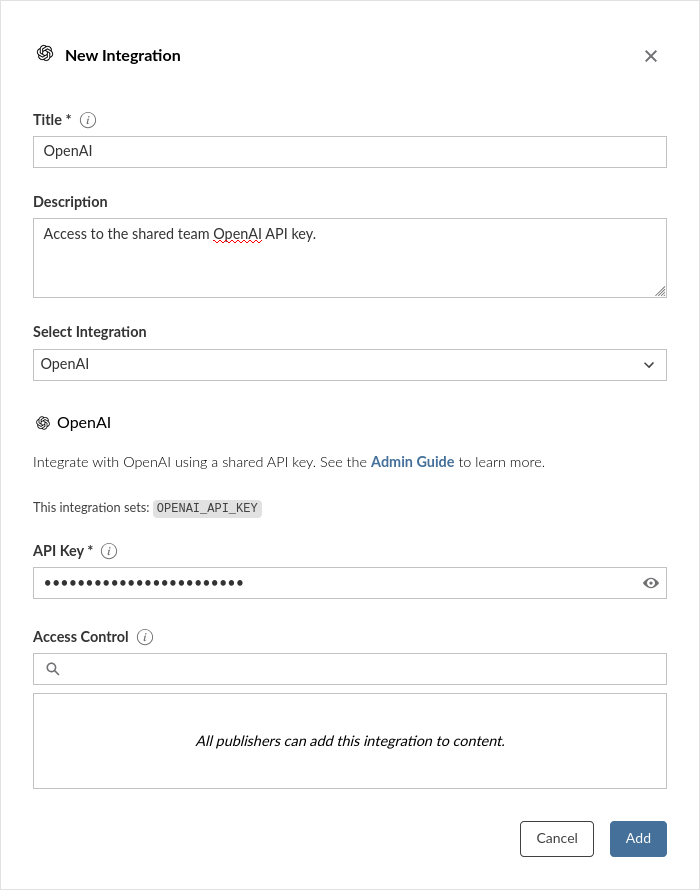
Alternatively, the example below shows how to create an OpenAI integration using curl and the Connect Server API.
Replace connect.example.org with the address of the Connect server.
Terminal
curl -H "Authorization: Key ${CONNECT_API_KEY}" \
  -XPOST https://connect.example.org/__api__/v1/oauth/integrations \
  --data '{
    "template": "openai",
    "name": "OpenAI",
    "description": "A helpful description for publishers to use when choosing an integration for their content.",
    "config": {
      "api_key": "<openai-api-key>"
    }
  }'
# 200 OK
# {"guid": "<integration-guid>", ... }
The api_key field is a sensitive field: it is encrypted at rest and never returned by the Connect Server API.
Credential delivery
Connect sets OPENAI_API_KEY in the environment of every content process associated with this integration, decrypting the stored key at process launch. Content receives the real API key.
Rotating the key is a single edit to the integration. Content processes pick up the new value the next time they start. No redeploy is required.
See Credential delivery for the properties and limits of this mechanism.
Publisher usage
Once the integration is configured, publishers can use it in their content. Most OpenAI client libraries detect the OPENAI_API_KEY environment variable by default:
from openai import OpenAI

# The client automatically uses the OPENAI_API_KEY environment variable
client = OpenAI()

response = client.chat.completions.create(
    model="gpt-4",
    messages=[{"role": "user", "content": "Hello!"}]
)library(ellmer)
chat <- chat_openai()
chat$chat("Tell me three jokes about statisticians")Local development
When developing locally, set the OPENAI_API_KEY environment variable in your development environment, or use a .env file. The content will use your local API key during development and the Connect-managed key when deployed.