General Setup for Google Cloud Platform
Four Posit Connect integrations (BigQuery, Drive, Sheets, and Vertex AI) share a single provider registration: one OAuth Client ID in a Google Cloud Platform project. This page covers that shared registration and then the Connect configuration for each of the four.
| Component part | Value |
|---|---|
| Provider registration | A Confidential OAuth Client ID in a Google Cloud project, plus the relevant API enabled |
| Authentication types | Viewer only |
| Configuration | auth_mode, client_id, client_secret (sensitive), scopes |
| Credential delivery | Token exchange |
| Content compatibility | Interactive content only; public access and share links not supported |
To access Google Cloud APIs without a viewer identity, using workload identity federation instead, see the separate Google Cloud integration.
Provider registration
Performed by a Google administrator.
All integrations that use APIs from within Google Cloud Platform must start with registering an OAuth Client ID.
- The specific API permissions that need to be enabled in the Google Cloud project.
- The corresponding scopes that are passed on to the Connect administrator.
This section walks through the process of configuring an OAuth Client ID in Google Cloud Platform and provides a list of API permissions and their corresponding scopes for the Google Cloud Platform integrations that Connect natively supports.
Create an OAuth Client ID
A Google Cloud Administrator registers an OAuth Client ID within a project by navigating to APIs & Services > Credentials > Create Credentials > OAuth Client ID, selecting “Web application”, and clicking “Create”.
From here, the following items must be configured within the OAuth Client ID:
- Client Secret. The Client Secret must be recorded to be passed on to the Connect Administrator.
- Authorized redirect URI. This should be set as
https://connect.example.org/__oauth__/integrations/callbackwhereconnect.example.orgis replaced with the address of the Connect server.
Google requires Confidential OAuth clients. Public clients are not allowed.
Add API permissions
In the APIs & Services section, the GCP administrator adds the required permissions for the OAuth application. API permissions define the capabilities granted to the user when they request credentials from this OAuth application. These permissions are also referred to as scopes.
If a given API is not already enabled, a Google Cloud Administrator can do so by navigating to APIs & Services > Library, searching for the API, and clicking “Enable”.
| Integration | API Permission |
|---|---|
| Big Query | BigQuery API |
| Drive | Google Drive API |
| Sheets | Google Sheets API |
| Vertex AI | Vertex AI API |
Transfer information to Connect administrator
The Google administrator shares the following information with the Connect administrator:
| Field | Description |
|---|---|
client_id |
The unique identifier of the Google Oauth application. |
client_secret |
The secret string for the Google OAuth application. |
scopes |
The permissions requested by Connect. |
Authentication types
All four integrations support the Viewer authentication type only, using a Confidential client. Because a viewer identity is required, they support interactive content only, and neither public access nor share links.
Connect configuration
Performed by a Connect administrator. One OAuth Client ID can back all four integrations; each is created separately in Connect with the scopes appropriate to its API.
After the Google administrator completes the steps listed in the General setup guide, they pass the necessary information (client_id, client_secret, scopes, etc) to the Connect administrator who follows the instructions in this guide to complete the process of setting up an integration.
Create integration in Posit Connect
Using the information from the Google administrator, the Posit Connect administrator creates an integration through the dashboard’s System > Integrations settings. Once the integration has been created in Connect, it is available for use by all publishers. See Access control lists for information on customizing access to specific users or groups.
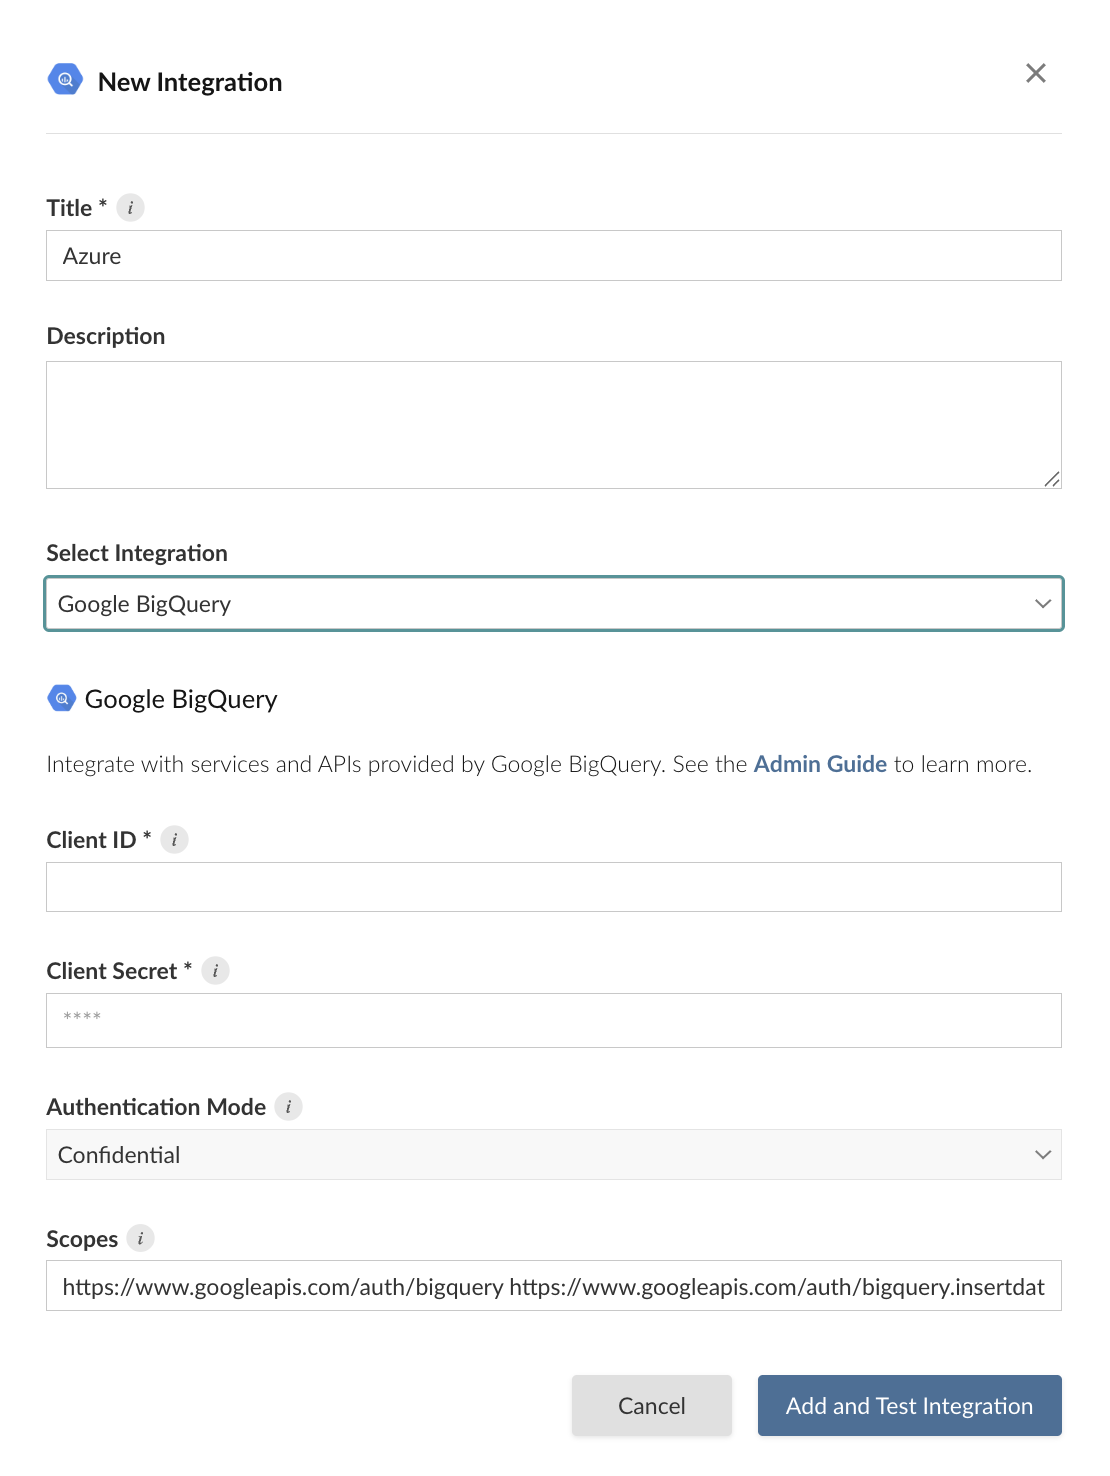
Alternatively, the example below shows how to create a Google BigQuery integration using curl and the Connect Server API. Replace connect.example.org with the address of the Connect server.
Terminal
curl -H "Authorization: Key ${CONNECT_API_KEY}" \
  -XPOST https://connect.example.org/__api__/v1/oauth/integrations \
  --data '{
    "template": "bigquery",
    "name": "Google Application",
    "description": "A helpful description for publishers to use when choosing an integration for their content.",
    "config": {
      "client_id": "<client-id>",
      "client_secret": "<client-secret>",
      "auth_mode": "Confidential",
      "scopes": "https://www.googleapis.com/auth/bigquery https://www.googleapis.com/auth/bigquery.insertdata"
    }
  }'
# 200 OK
# {"guid": "<oauth-integration-guid>", ... }
After the Google administrator completes the steps listed in the General setup guide, they pass the necessary information (client_id, client_secret, scopes, etc) to the Connect administrator who follows the instructions in this guide to complete the process of setting up an integration.
Create integration in Posit Connect
Using the information from the Google administrator, the Posit Connect administrator creates an integration through the dashboard’s System > Integrations settings. Once the integration has been created in Connect, it is available for use by all publishers. See Access control lists for information on customizing access to specific users or groups.
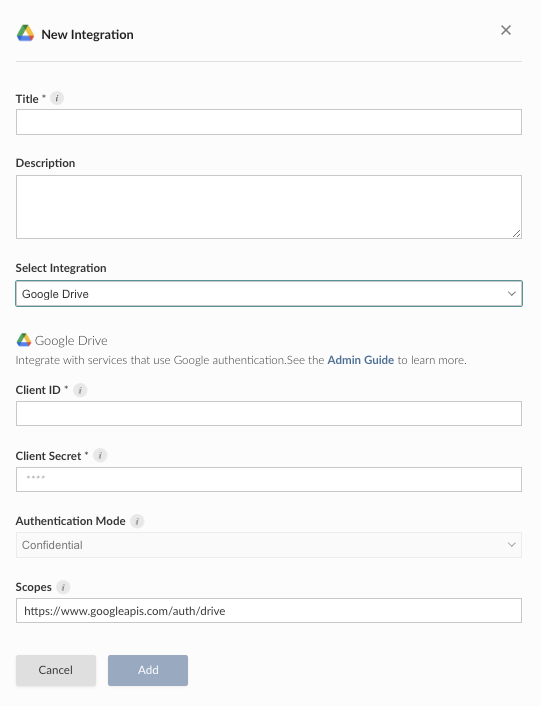
Alternatively, the example below shows how to create a Google Drive integration using curl and the Connect Server API. Replace connect.example.org with the address of the Connect server.
Terminal
curl -H "Authorization: Key ${CONNECT_API_KEY}" \
  -XPOST https://connect.example.org/__api__/v1/oauth/integrations \
  --data '{
    "template": "drive",
    "name": "Google Drive",
    "description": "A helpful description for publishers to use when choosing an integration for their content.",
    "config": {
      "client_id": "<client-id>",
      "client_secret": "<client-secret>",
      "auth_mode": "Confidential",
      "scopes": "https://www.googleapis.com/auth/drive"
    }
  }'
# 200 OK
# {"guid": "<oauth-integration-guid>", ... }
After the Google administrator completes the steps listed in the General setup guide, they pass the necessary information (client_id, client_secret, scopes, etc) to the Connect administrator who follows the instructions in this guide to complete the process of setting up an integration.
Create integration in Posit Connect
Using the information from the Google administrator, the Posit Connect administrator creates an integration through the dashboard’s System > Integrations settings. Once the integration has been created in Connect, it is available for use by all publishers. See Access control lists for information on customizing access to specific users or groups.
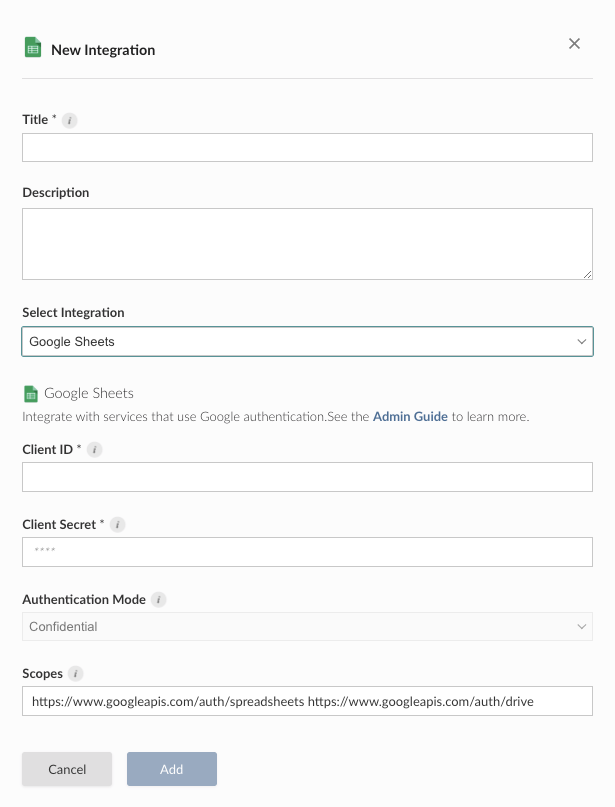
Alternatively, the example below shows how to create a Google Sheets integration using curl and the Connect Server API. Replace connect.example.org with the address of the Connect server.
Terminal
curl -H "Authorization: Key ${CONNECT_API_KEY}" \
  -XPOST https://connect.example.org/__api__/v1/oauth/integrations \
  --data '{
    "template": "sheets",
    "name": "Google Sheets",
    "description": "A helpful description for publishers to use when choosing an integration for their content.",
    "config": {
      "client_id": "<client-id>",
      "client_secret": "<client-secret>",
      "auth_mode": "Confidential",
      "scopes": "https://www.googleapis.com/auth/spreadsheets https://www.googleapis.com/auth/drive"
    }
  }'
# 200 OK
# {"guid": "<oauth-integration-guid>", ... }
After the Google administrator completes the steps listed in the General setup guide, they pass the necessary information (client_id, client_secret, scopes, etc) to the Connect administrator who follows the instructions in this guide to complete the process of setting up an integration.
Create integration in Posit Connect
Using the information from the Google administrator, the Posit Connect administrator creates an integration through the dashboard’s System > Integrations settings. Once the integration has been created in Connect, it is available for use by all publishers. See Access control lists for information on customizing access to specific users or groups.
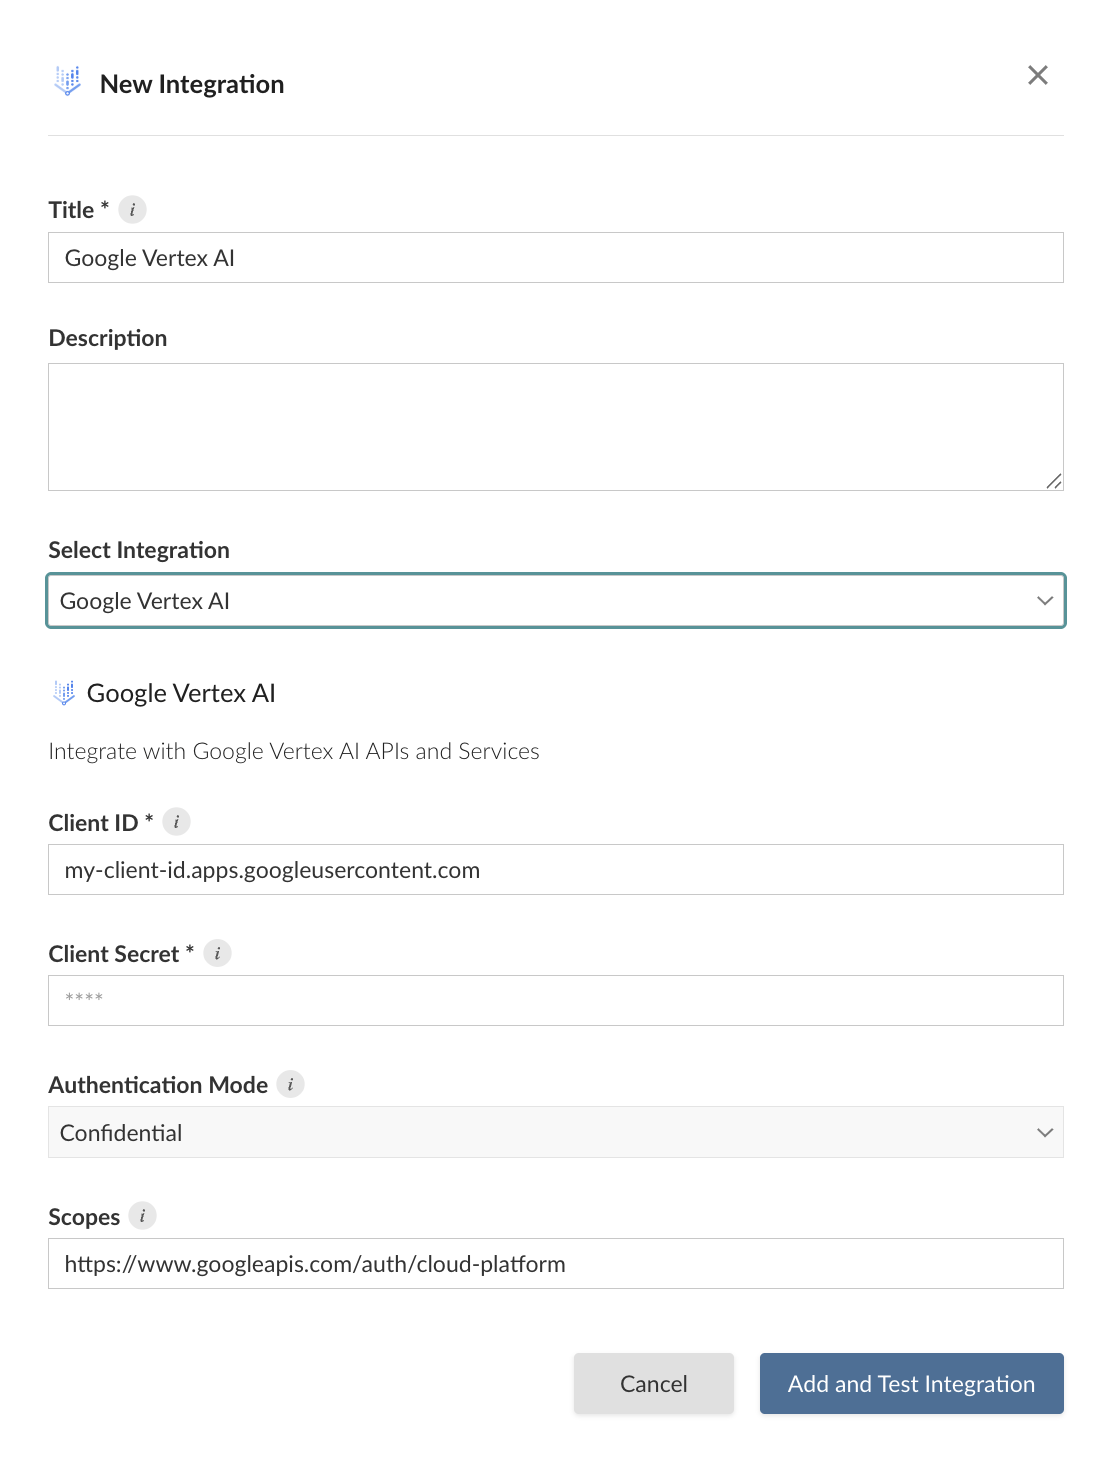
Alternatively, the example below shows how to create a Google Vertex AI integration using curl and the Connect Server API. Replace connect.example.org with the address of the Connect server.
Terminal
curl -H "Authorization: Key ${CONNECT_API_KEY}" \
  -XPOST https://connect.example.org/__api__/v1/oauth/integrations \
  --data '{
    "template": "vertex-ai",
    "name": "Vertex AI Application",
    "description": "A helpful description for publishers to use when choosing an integration for their content.",
    "config": {
      "client_id": "<my-client-id.apps.googleusercontent.com>",
      "client_secret": "<client-secret>",
      "auth_mode": "Confidential",
      "scopes": "https://www.googleapis.com/auth/cloud-platform"
    }
  }'
Credential delivery
Content receives the Google OAuth access token of the viewer through the Connect credential exchange endpoint, presenting the user session token of the viewer as the subject token. The viewer must first complete the login flow for the integration and consent to the requested scopes. Refresh tokens are never delivered to content.
See Token exchange for the general mechanism.
Publisher usage
Before an integration works in content, a publisher must associate it with that content. See Adding integrations to deployed content in the Connect User Guide for the steps. A publisher can also request the association from manifest.json. See Automatically associating integrations.
Once the integration is configured, publishers can use it in their content. See the following cookbook recipes for BigQuery examples: