Snowflake
Configuring a Snowflake integration in Posit Connect allows content to access Snowflake data securely.
| Component part | Value |
|---|---|
| Provider registration | A CREATE SECURITY INTEGRATION of type OAUTH (Viewer), or of type EXTERNAL_OAUTH plus an identity provider registration and a mapped service user (Service Account) |
| Authentication types | Viewer; Service Account via OAuth federation |
| Configuration | account_url, client_id, client_secret (sensitive), scopes, and optionally authorization_uri and token_uri |
| Credential delivery | Token exchange |
| Content compatibility | Viewer: interactive only. Service Account: interactive and rendered. |
Authentication types
Connect supports two authentication types when configuring a Snowflake integration, depending on your use case:
- Viewer: Used when applications run on behalf of the signed-in user. Configured with the Connect Snowflake template.
- Service account: Used when applications run automatically (for example, scheduled reports) without a user present, using a service account. Configured with the Connect Azure or Custom template rather than the Snowflake template, because Snowflake delegates token issuance to an external identity provider for this flow.
These two paths differ enough in registration and configuration that they are documented separately below rather than following the usual component ordering.
Viewer integration
Provider registration
Performed by a Snowflake administrator.
The Snowflake administrator registers an OAuth Application in Snowflake.
The Snowflake administrator adds a redirect_uri for the OAuth application. This redirect is where Snowflake sends the user’s OAuth credentials at the end of the OAuth handshake. This allows Connect to obtain a temporary access token and refresh token from Snowflake.
Connect currently only supports integrations which target Confidential Snowflake OAuth applications. Confidential applications require clients to authenticate with a client secret.
The following example uses Snowflake SQL’s CREATE SECURITY INTEGRATION command to create a new OAuth application. Replace connect.example.org with the address of the Connect server.
CREATE OR REPLACE SECURITY INTEGRATION POSIT_CONNECT
  TYPE = OAUTH
  ENABLED = TRUE
  OAUTH_CLIENT = CUSTOM
  OAUTH_CLIENT_TYPE = 'CONFIDENTIAL'
  OAUTH_ENFORCE_PKCE = TRUE
  OAUTH_ISSUE_REFRESH_TOKENS = TRUE
  OAUTH_USE_SECONDARY_ROLES = IMPLICIT
  OAUTH_REFRESH_TOKEN_VALIDITY = 7776000
  OAUTH_REDIRECT_URI = 'https://connect.example.org/__oauth__/integrations/callback'
OAUTH_USE_SECONDARY_ROLES = IMPLICIT activates the user’s default secondary roles in OAuth sessions. Without it, content runs with only the user’s default role and cannot read objects granted to the user’s other roles.
If your integration lacks this setting, add it with ALTER:
ALTER SECURITY INTEGRATION POSIT_CONNECT SET OAUTH_USE_SECONDARY_ROLES = IMPLICIT;Do not re-run CREATE OR REPLACE on an integration that Connect uses. It recreates the integration with a new client ID and secret, which breaks the Connect integration that uses the old ones.
To obtain the client ID and secret, use the following command:
SELECT SYSTEM$SHOW_OAUTH_CLIENT_SECRETS('POSIT_CONNECT');Transfer information to Connect administrator
The Snowflake administrator shares the following information with the Connect administrator:
| Field | Description |
|---|---|
account_url |
URL of your Snowflake account. |
client_id |
The client ID obtained by querying the security integration. |
client_secret |
The client secret obtained by querying the security integration. |
scopes |
The permissions requested by Connect. See the Snowflake OAuth documentation for information on supported scopes. |
authorization_uri |
Optional. The authorization endpoint URL. When omitted, Connect derives it from account_url. |
token_uri |
Optional. The token endpoint URL. When omitted, Connect derives it from account_url. |
Connect configuration
Performed by a Connect administrator.
Using the information from the Snowflake administrator, the Posit Connect administrator creates an integration through the dashboard’s System > Integrations settings. Once the integration has been created in Connect, it is available for use by all publishers. See Access control lists for information on customizing access to specific users or groups.
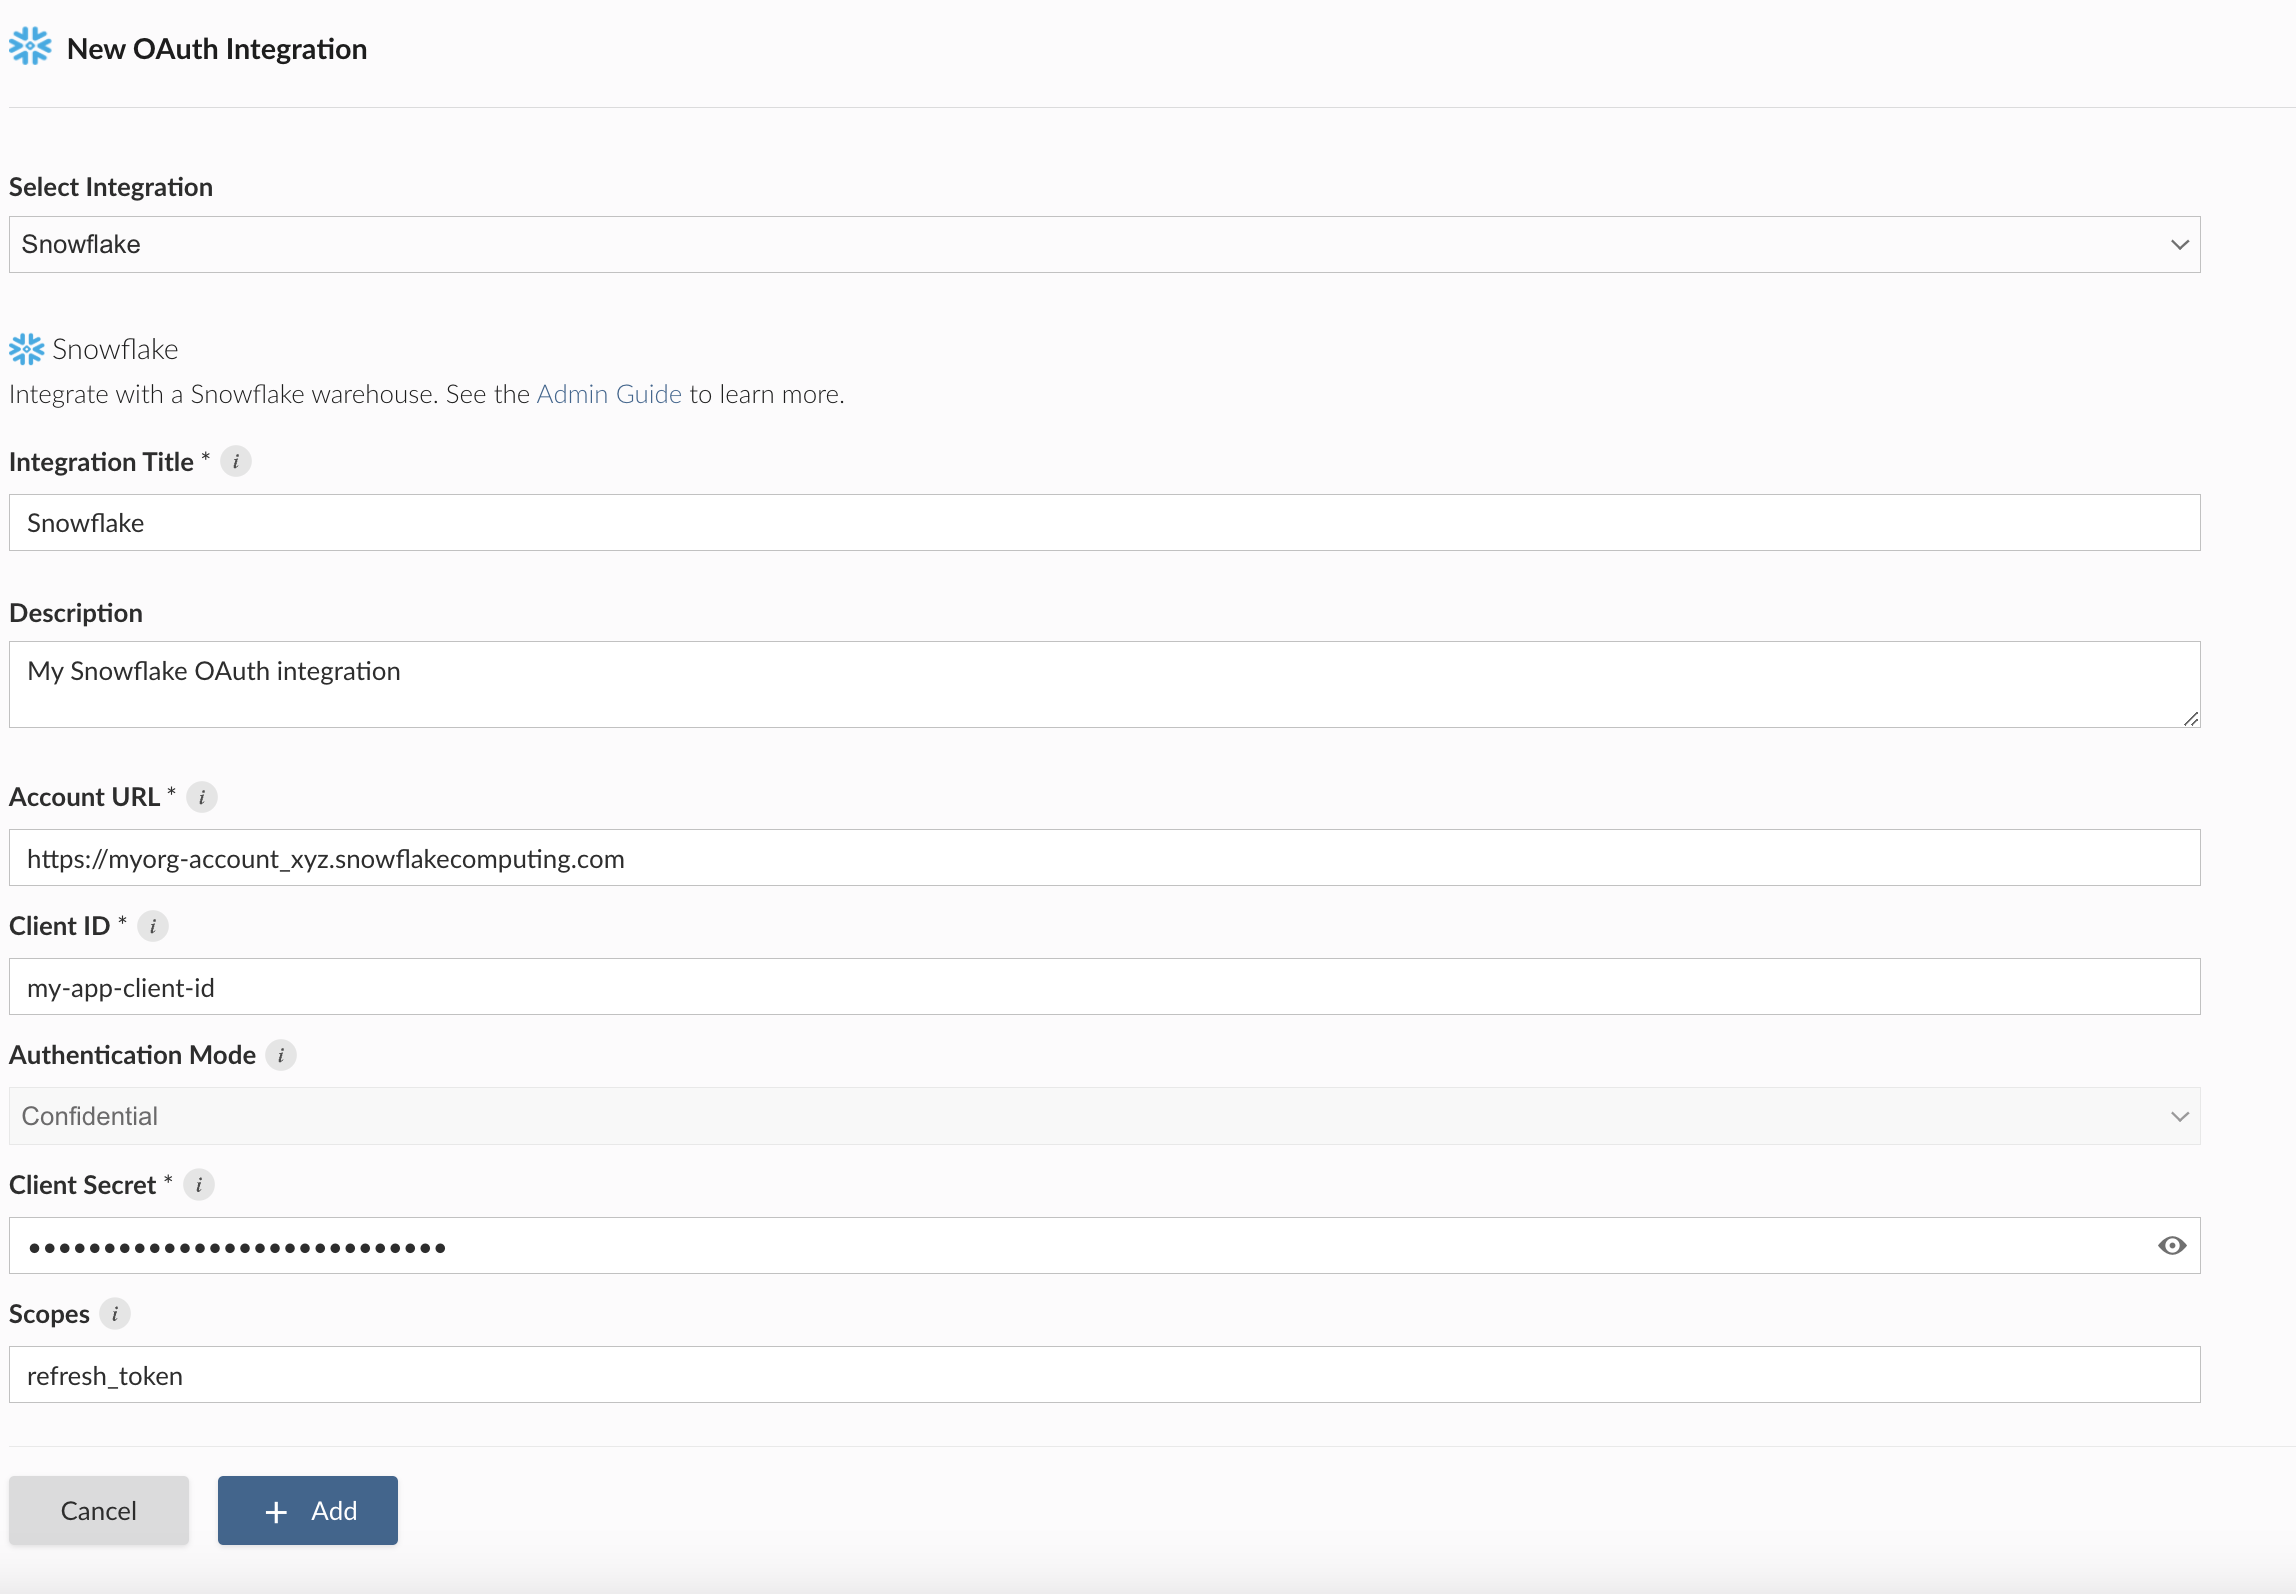
Alternatively, the example below shows how to create a Snowflake integration using curl and the Connect Server API.
Replace:
connect.example.orgwith the address of the Connect server.https://myorg-account_xyz.snowflakecomputing.comwith the Snowflake account URL.
Terminal
curl -H "Authorization: Key ${CONNECT_API_KEY}" \
  -XPOST https://connect.example.org/__api__/v1/oauth/integrations \
  --data '{
    "template": "snowflake",
    "name": "Snowflake integration",
    "description": "A helpful description for publishers to use when choosing an integration for their content.",
    "config": {
      "account_url": "https://myorg-account_xyz.snowflakecomputing.com",
      "client_id": "<snowflake-client-id>",
      "client_secret": "<snowflake-client-secret>"
    }
  }'
# 200 OK
# {"guid": "<oauth-integration-guid>", ... }
Service account integration
Snowflake supports service account integrations through OAuth federation with external identity providers using the client credentials grant flow.
For automated workflows (backend services, machine-to-machine communication, or scheduled jobs) where no interactive user is present, you should use this type of integration.
In this architecture, Snowflake acts as the Resource Server, but it relies on an external Authorization Server (such as Microsoft Entra ID) to issue tokens. Connect authenticates with the external provider, obtains a token, and passes it to Snowflake.
This requires configuring External OAuth in Snowflake.
Provider registration
Configure the identity provider (e.g., Microsoft Entra ID)
You must register two applications in your identity provider:
- OAuth Resource (Snowflake): Represents the Snowflake instance. You will define scopes/App Roles here (e.g.,
session:role:ANALYST). - OAuth Client (Connect): Represents Connect. This application requires a Client ID and Secret and must be granted API permissions to the Snowflake Resource created above.
For a comprehensive guide on configuring these resources in Microsoft Entra ID, refer to the Snowflake community article: OAuth 2.0 Client Credentials Grant to Snowflake with Microsoft Entra ID.
Configure external security integration
The Snowflake administrator must create a security integration of type EXTERNAL_OAUTH. This tells Snowflake to trust tokens issued by your Identity Provider.
CREATE SECURITY INTEGRATION EXTERNAL_OAUTH_AZURE
  TYPE = EXTERNAL_OAUTH
  ENABLED = TRUE
  EXTERNAL_OAUTH_TYPE = AZURE
  EXTERNAL_OAUTH_ISSUER = '<Issuer URL from Identity Provider>'
  EXTERNAL_OAUTH_JWS_KEYS_URL = '<Keys Endpoint from Identity Provider>'
  EXTERNAL_OAUTH_AUDIENCE_LIST = ('<Application ID URI of Snowflake Resource>')
  EXTERNAL_OAUTH_TOKEN_USER_MAPPING_CLAIM = 'sub'
  EXTERNAL_OAUTH_SNOWFLAKE_USER_MAPPING_ATTRIBUTE = 'login_name';
See Snowflake External OAuth Overview for details on other providers like Okta or custom configurations.
Create the Snowflake service user
A critical step in the Client Credentials flow is mapping the token to a Snowflake user. Since there is no interactive user, the token contains a Subject (sub) claim (often the Object ID of the Client in Microsoft Entra ID).
You must create a Snowflake user where the LOGIN_NAME matches this unique identifier exactly.
-- The LOGIN_NAME must match the 'sub' or 'oid' claim from the decoded access token
CREATE USER SNOWSQL_OAUTH_USER
  LOGIN_NAME = '3d63d2ef-abb5-xxxx-xxxx-c72c0652895d'
  DISPLAY_NAME = 'Service Account User';

-- Grant the role specified in the token scope
GRANT ROLE ANALYST TO USER SNOWSQL_OAUTH_USER;
Connect configuration
The Connect administrator creates an integration in Connect.
Important: Do not use the “Snowflake” template in Connect for this flow. Instead, create an integration for the Identity Provider that is issuing the tokens.
- Go to System > Integrations.
- Create a new Azure (or Custom) integration.
- Select the Service Account authentication flow (Client Credentials).
- Enter the
Client IDandClient Secretgenerated for the OAuth Client in step 1. - Ensure the scopes include the Snowflake Resource identifier (e.g.,
api://<snowflake_app_id>/.default).
Once configured, content on Connect will authenticate as the mapped Snowflake user (e.g., SNOWSQL_OAUTH_USER) without requiring manual sign-in.
Credential delivery
Content receives an OAuth access token through the Connect credential exchange endpoint, using the viewer’s user session token for Viewer integrations or the content session token for the service account flow. In both cases the token is presented to Snowflake as a bearer token by the Snowflake connector.
See Token exchange for the general mechanism.
Publisher usage
Before an integration works in content, a publisher must associate it with that content. See Adding integrations to deployed content in the Connect User Guide for the steps. A publisher can also request the association from manifest.json. See Automatically associating integrations.
Once the integration is configured, publishers can use it in their content. See the following cookbook recipes for examples: