Azure (Microsoft Entra ID)
Create application in Microsoft Entra ID
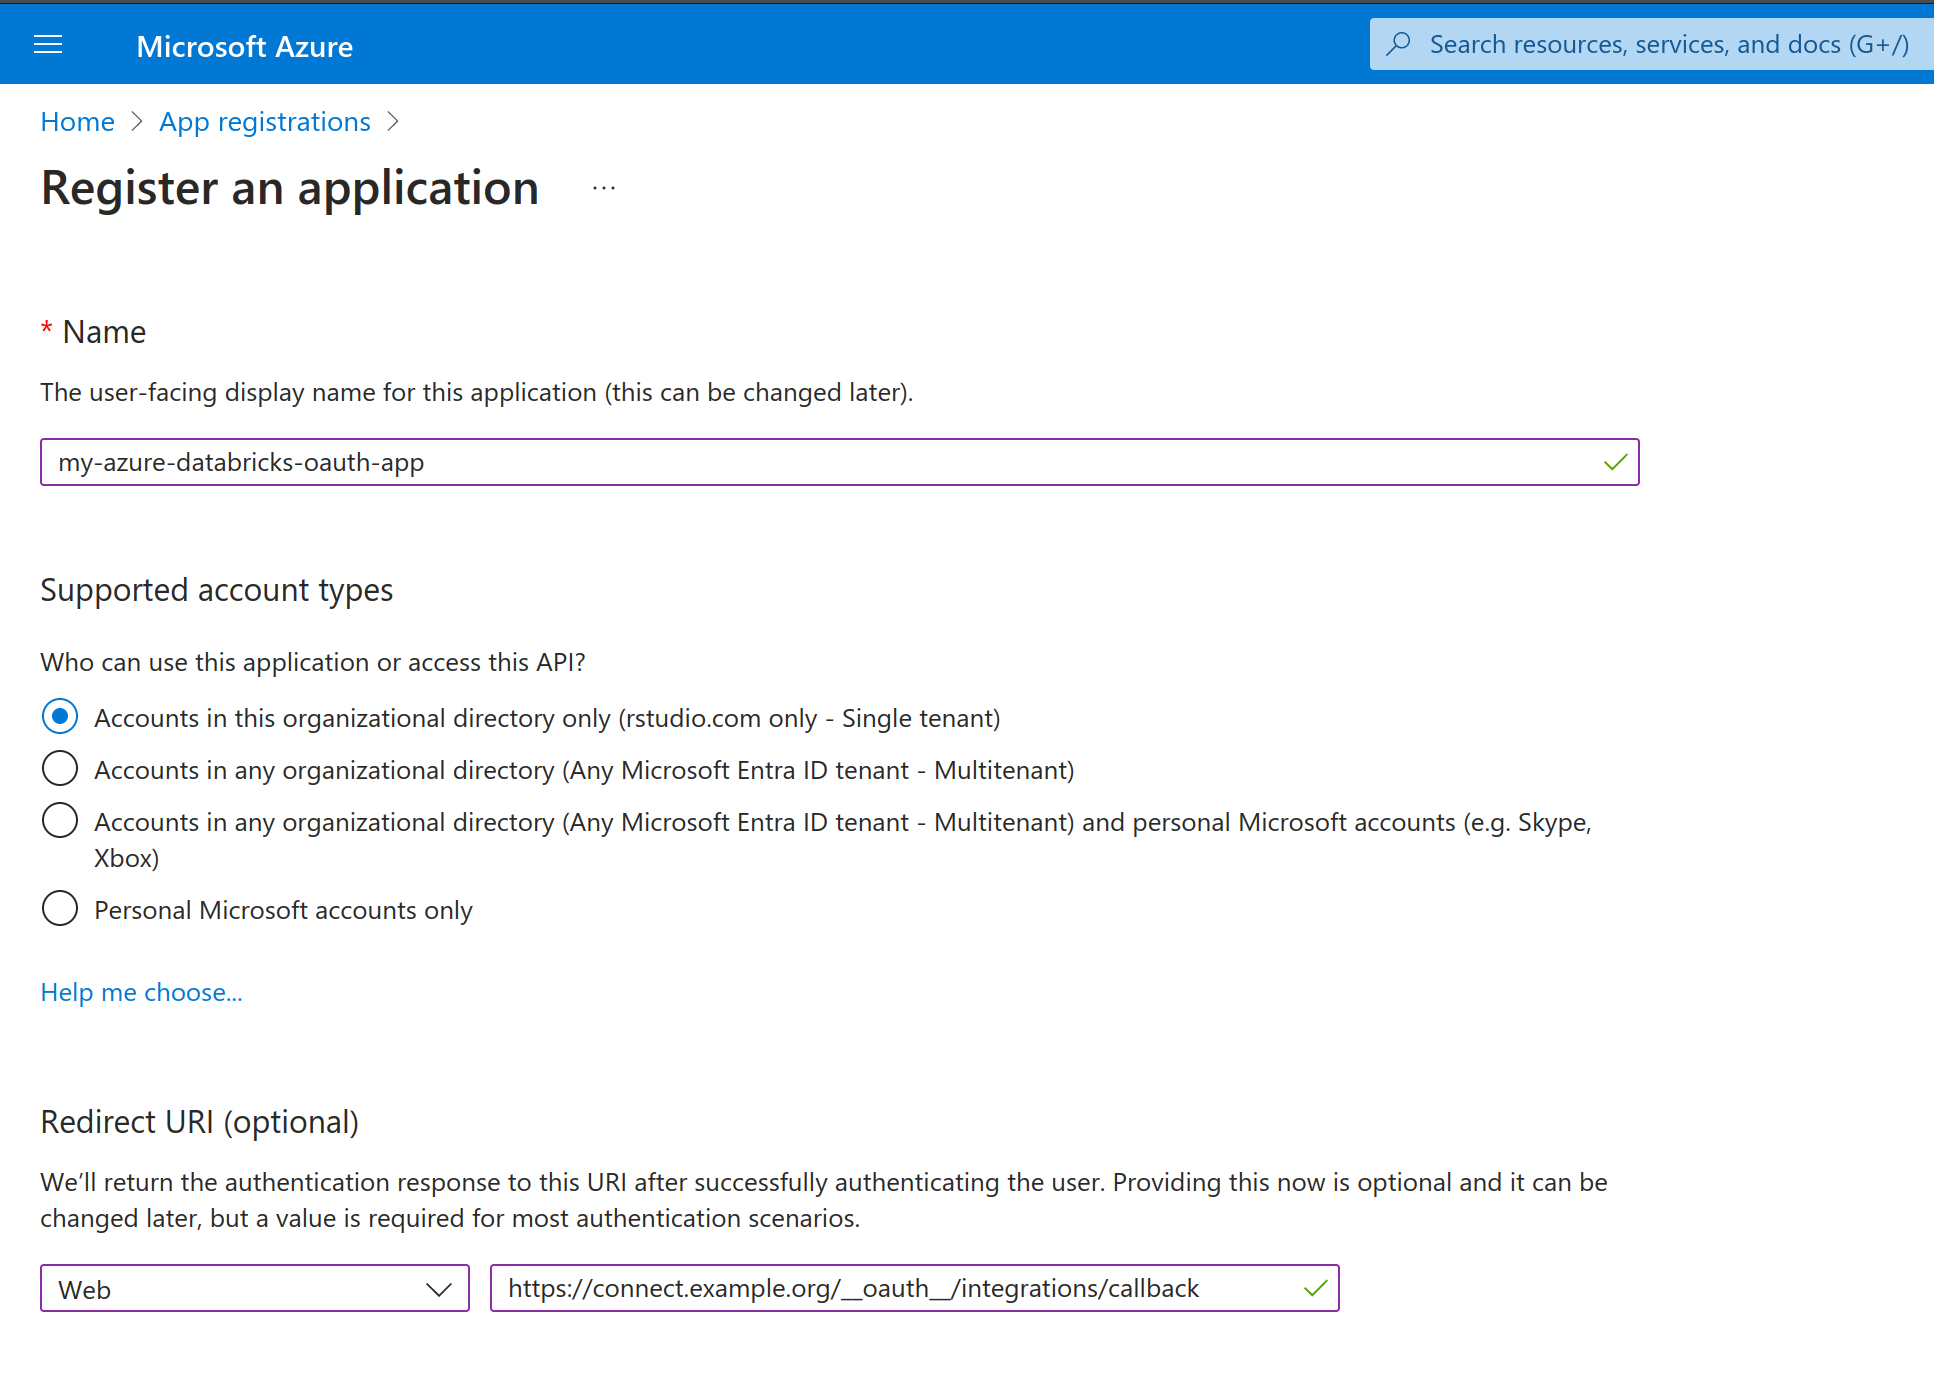
Register application
The Azure administrator registers a new OAuth Application in Microsoft Entra ID. Application registration will have different requirements depending on the authentication type of the OAuth integration in Posit Connect:
Viewer Integration
The Azure administrator adds a redirect_uri for the OAuth application as seen in the screenshot below. Azure sends the user credentials to the redirect_uri at the end of the OAuth handshake, allowing Posit Connect to obtain a temporary access token and refresh token.
The OAuth application is configured with the following redirect URL (sometimes referred to as a callback URL): https://connect.example.org/__oauth__/integrations/callback. Replace connect.example.org with the address of the Connect server.
For OAuth application administrators who prefer to use the same OAuth application for both Posit Connect and Posit Workbench, simply register the Workbench redirect URL (https://workbench.example.org/oauth_redirect_callback) in addition to the Connect redirect URL.
Service Account Integration
Service account integrations do not direct the user through a login flow, so a redirect_uri is not required.
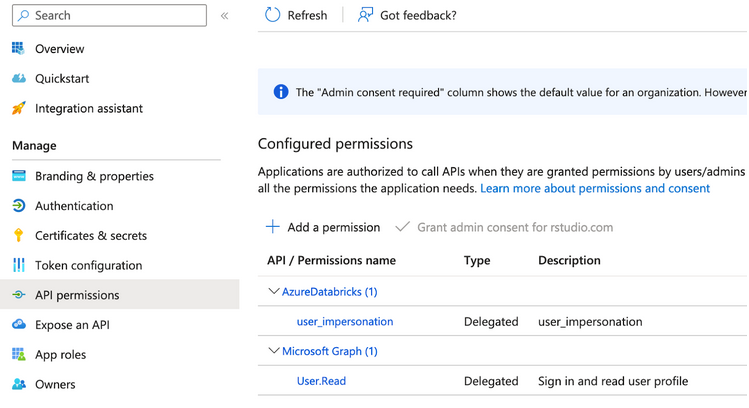
Add API permissions
In the API permissions section, the Azure administrator adds the required permissions for the OAuth application. API permissions define the capabilities granted to the user when they request credentials from this OAuth application. These permissions are also referred to as scopes.
Depending on which permissions are required, the Azure administrator provides additional scopes values to the Connect administrator.
This is also referred to as a Resource App ID in the Azure console. See the Azure documentation to learn more about API Permissions and scopes.
Choose only the permissions that are required by your application.
The AzureDatabricks/user_impersonation permission uses the following scope value 2ff814a6-3304-4ab8-85cb-cd0e6f879c1d/.default. This scope allows Connect to access the viewer’s Databricks resources. This documentation uses the Databricks permission as an example but all Azure API permissions are supported.
To allow users to access their Azure Databricks resources using this OAuth application, add a permission for AzureDatabricks/user_impersonation as seen below:
Setup client authentication
The Azure administrator decides whether this OAuth application requires client authentication. Client authentication requirements will differ depending on the authentication type of the OAuth integration in Posit Connect:
Viewer integration
Viewer integrations support both Public and Confidential OAuth applications. If unsure whether to create a Confidential or Public OAuth application, choose Confidential.
For Public OAuth applications, the Azure administrator enables the Allow public client flows option under Authentication > Advanced settings.
For Confidential OAuth applications, the Azure administrator adds a new client secret under the Certificates & secrets section.
Service account integration
Service Account integrations require a client secret, which represents the service account identity being used by the Connect Server. The Azure administrator adds a new secret under the Certificates & secrets section.
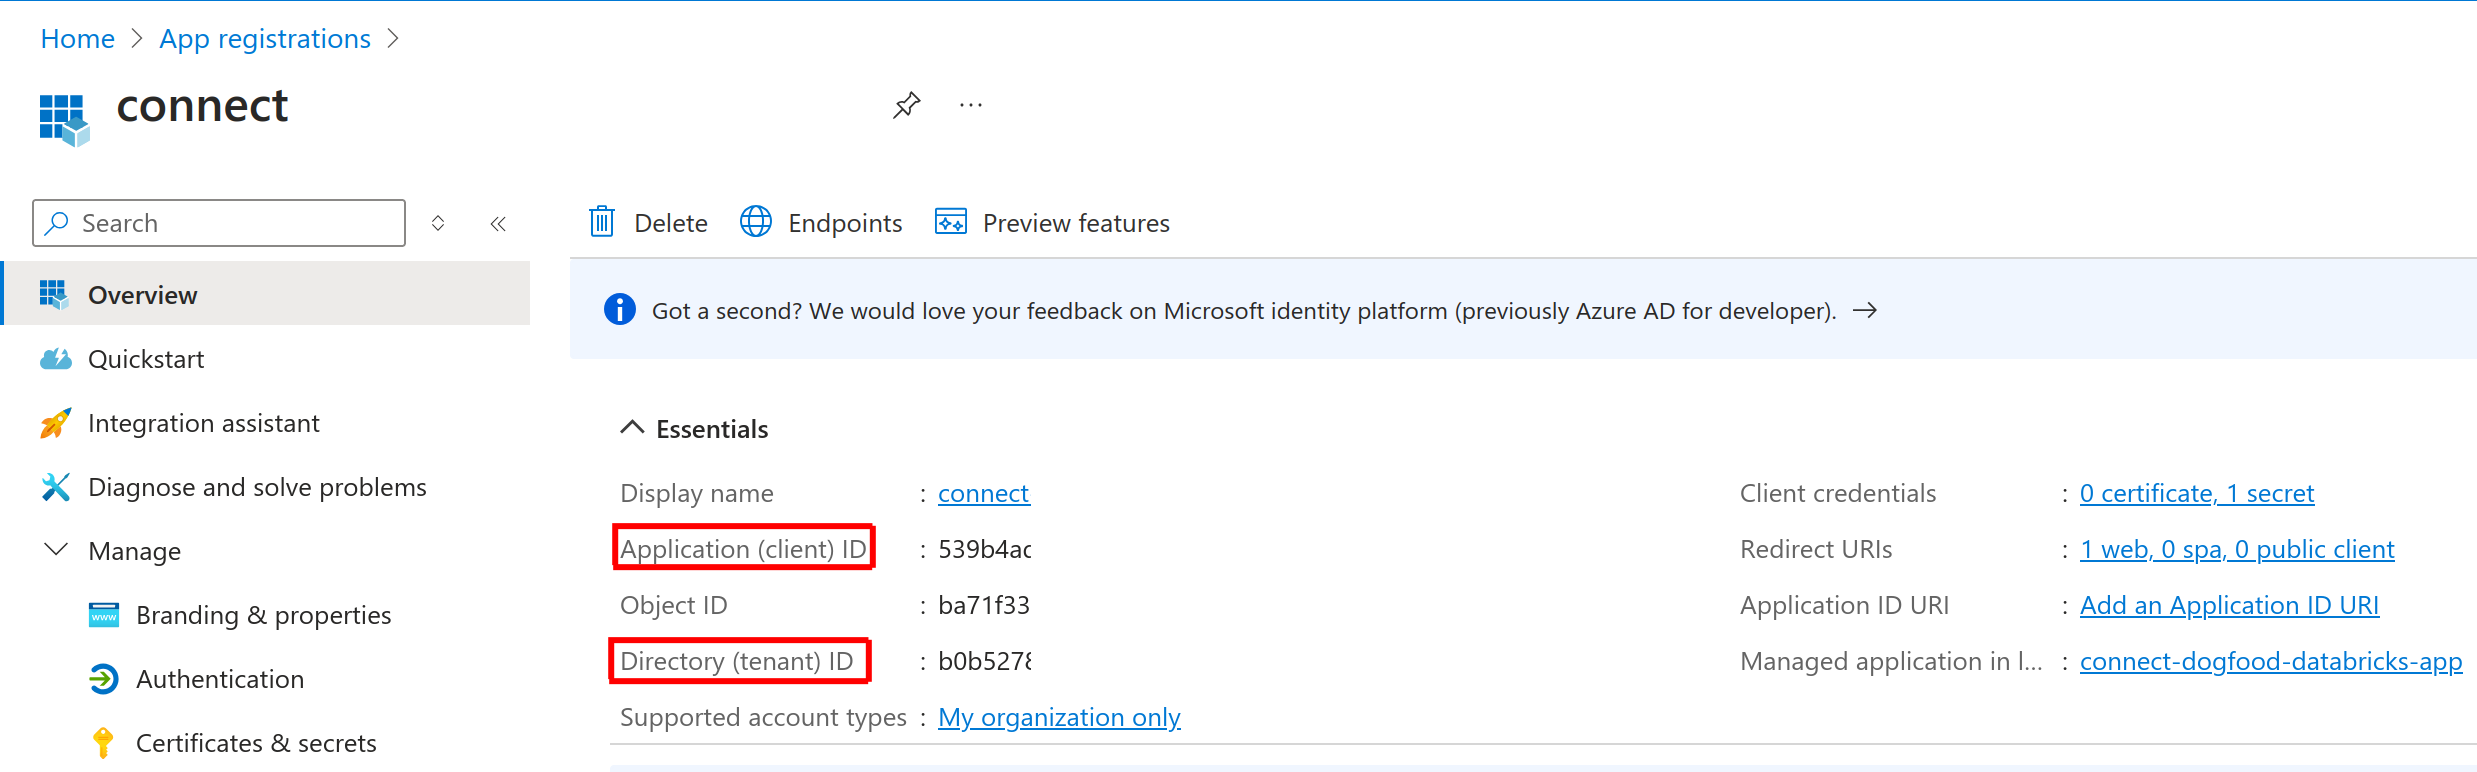
Transfer information to Connect administrator
The Azure administrator shares the following information with the Posit Connect administrator:
| Field | Description |
|---|---|
tenant_id |
The unique identifier of the organization in Azure (Microsoft Entra ID). |
client_id |
The unique identifier of the application in Azure (Microsoft Entra ID). |
client_secret |
The secret string configured under Certificates & secrets. Not required for Public Viewer integrations. |
scopes |
Permissions supported by the OAuth application. Only include the scopes required by Connect. |
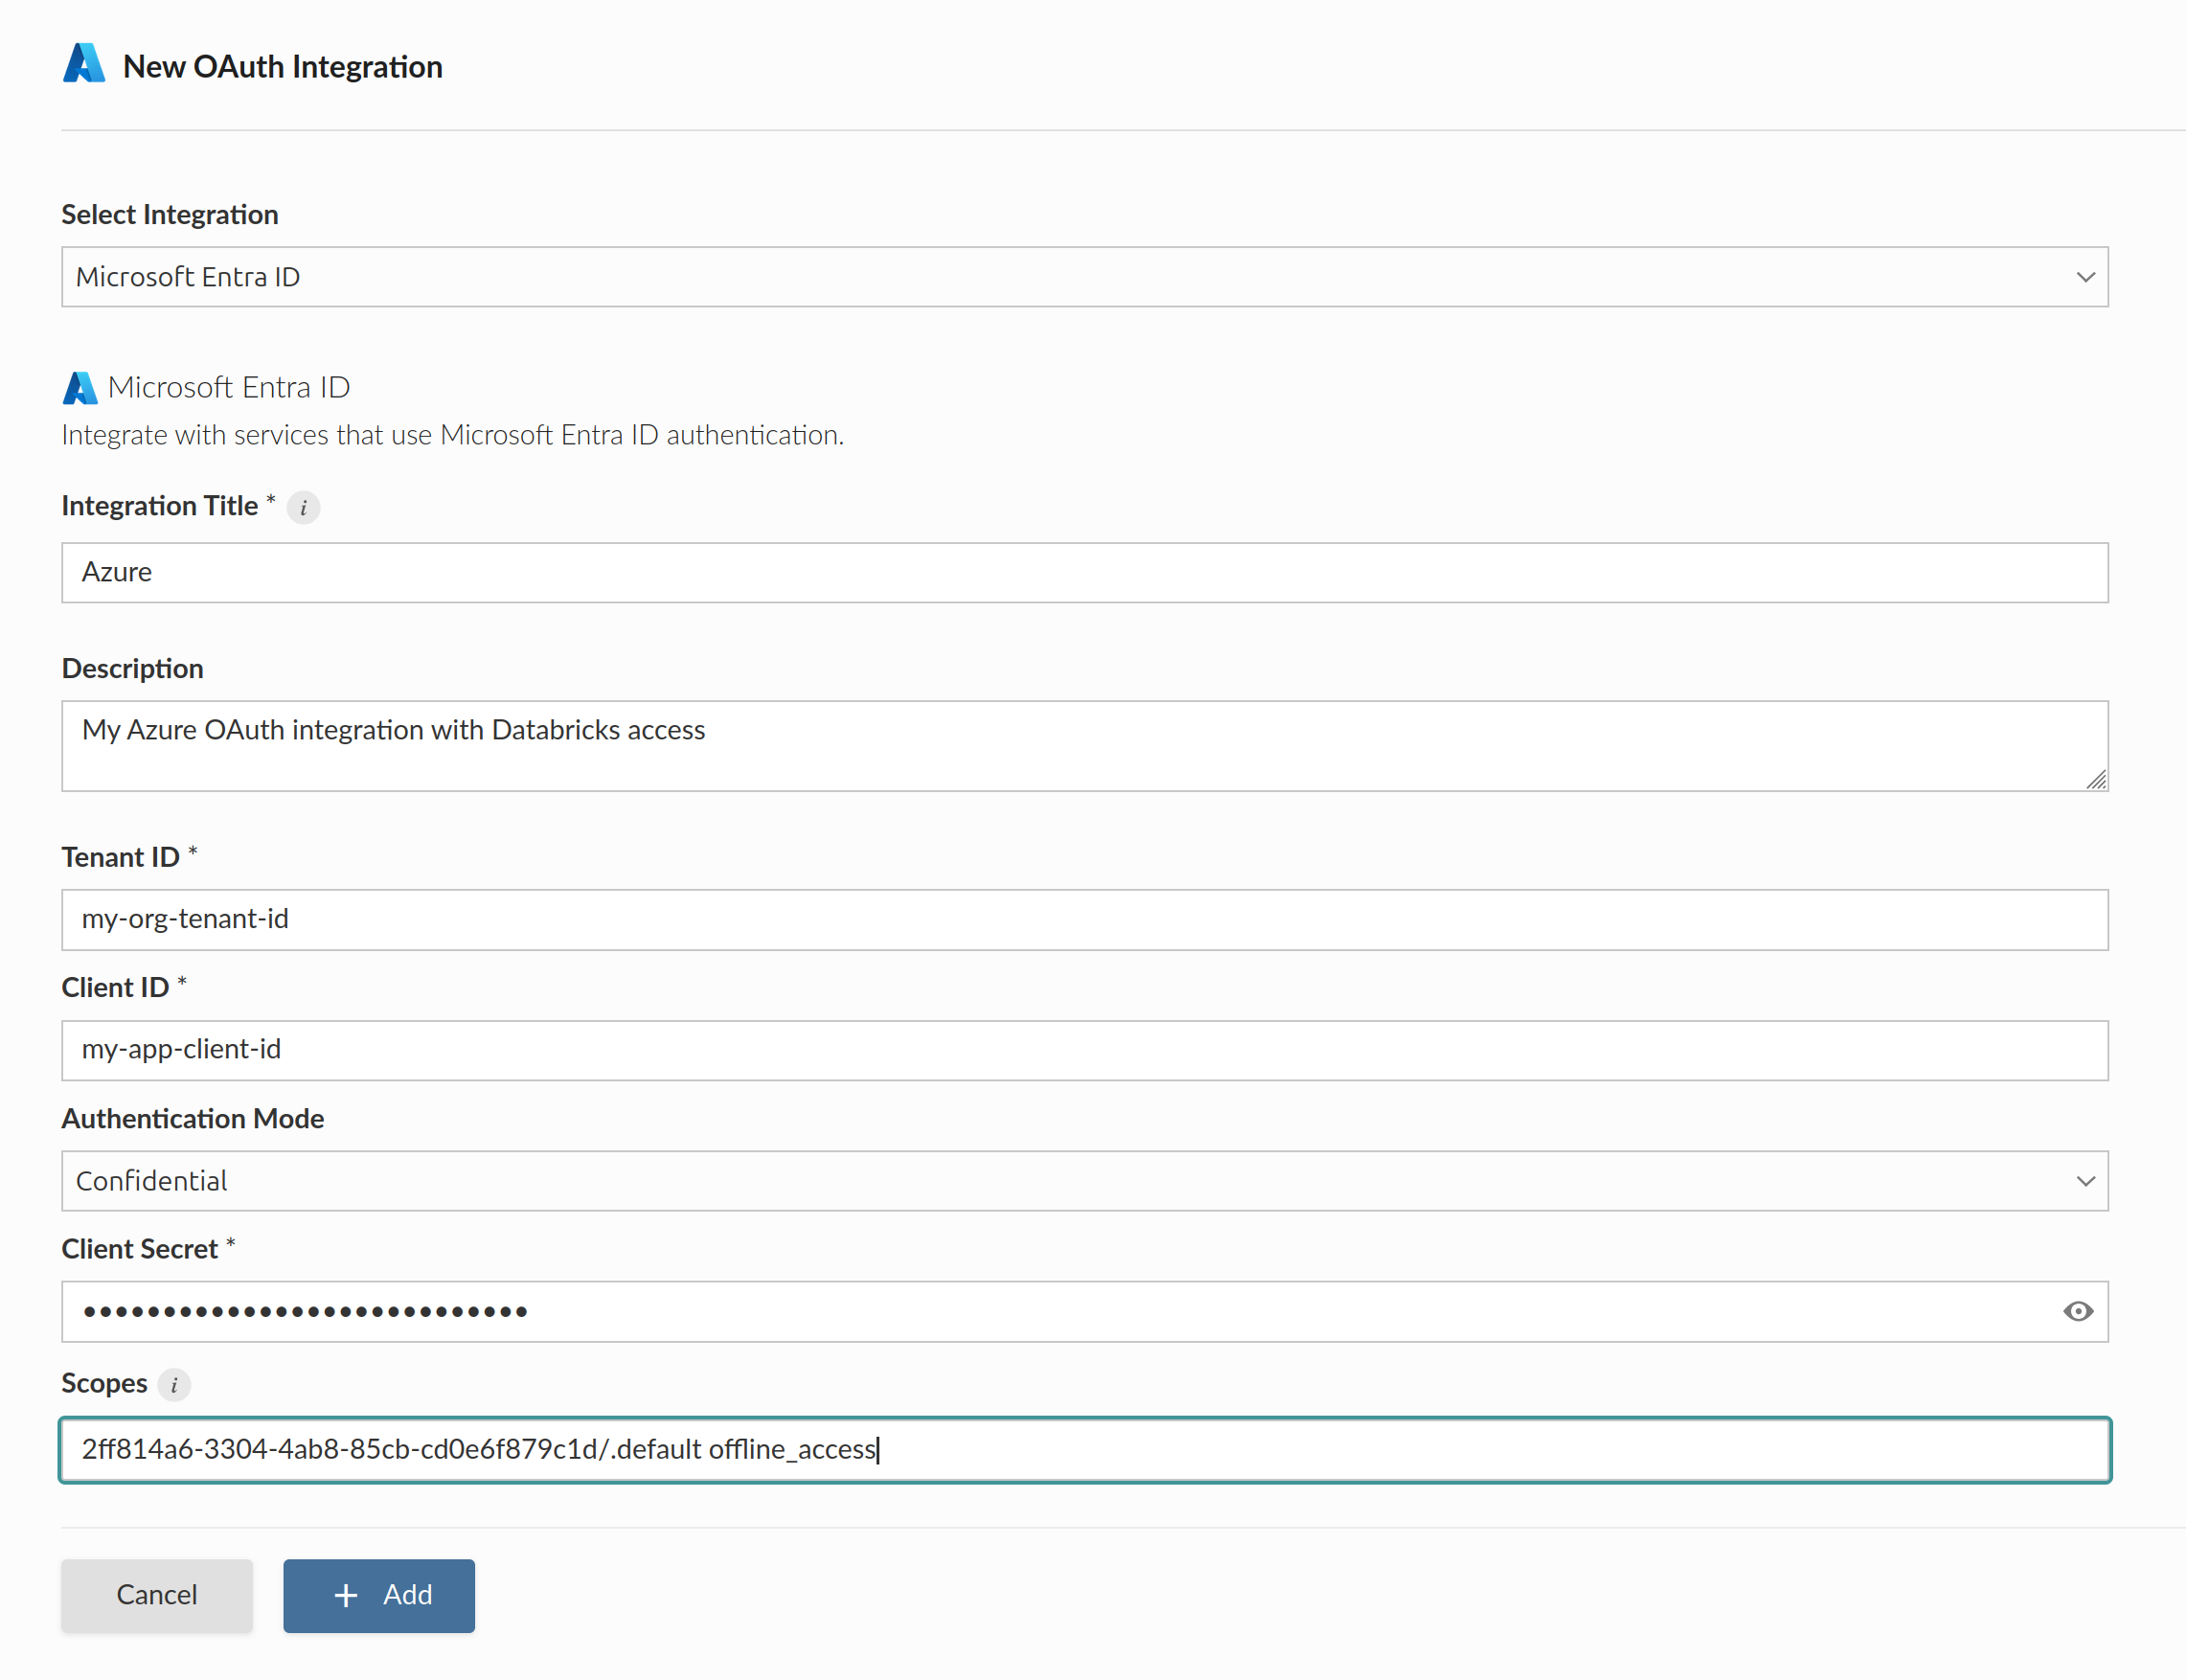
Create OAuth integration in Posit Connect
The Posit Connect administrator creates an integration through the dashboard’s System>Integrations settings. Once the OAuth integration has been created in Connect, it is available for use by all publishers.
The OAuth scope 2ff814a6-3304-4ab8-85cb-cd0e6f879c1d/.default is a reference to the AzureDatabricks/user_impersonation permission that allows deployed content on Connect to access protected Azure Databricks resources.
For more information about defining scopes, see the Add API permissions section above.
Alternatively, the example below shows how to create a Confidential Viewer Azure OAuth integration using curl and the Connect Server API.
Replace connect.example.org with the address of the Connect server.
Terminal
curl -H "Authorization: Key ${CONNECT_API_KEY}" \
  -XPOST https://connect.example.org/__api__/v1/oauth/integrations \
  --data '{
    "template": "azure",
    "name": "Azure OAuth integration",
    "description": "A helpful description for publishers to use when choosing an OAuth integration for their content.",
    "config": {
      "auth_type": "Viewer",
      "tenant_id": "<azure-tenant-id>",
      "client_id": "<azure-client-id>",
      "client_secret": "<azure-client-secret>",
      "scopes": "2ff814a6-3304-4ab8-85cb-cd0e6f879c1d/.default offline_access"
    }
  }'
# 200 OK
# {"guid": "<oauth-integration-guid>", ... }