Available Credentials
The Available Credentials view
The Available Credentials view is part of the Posit Workbench extension sidebar. It displays your Databricks, Snowflake, and custom OAuth integrations, grouped under a heading for each type, and lets you manage authentication directly from the IDE. Groups with no configured integrations are hidden.
To open the view, click the Posit Workbench Extension tab in the Activity Bar.
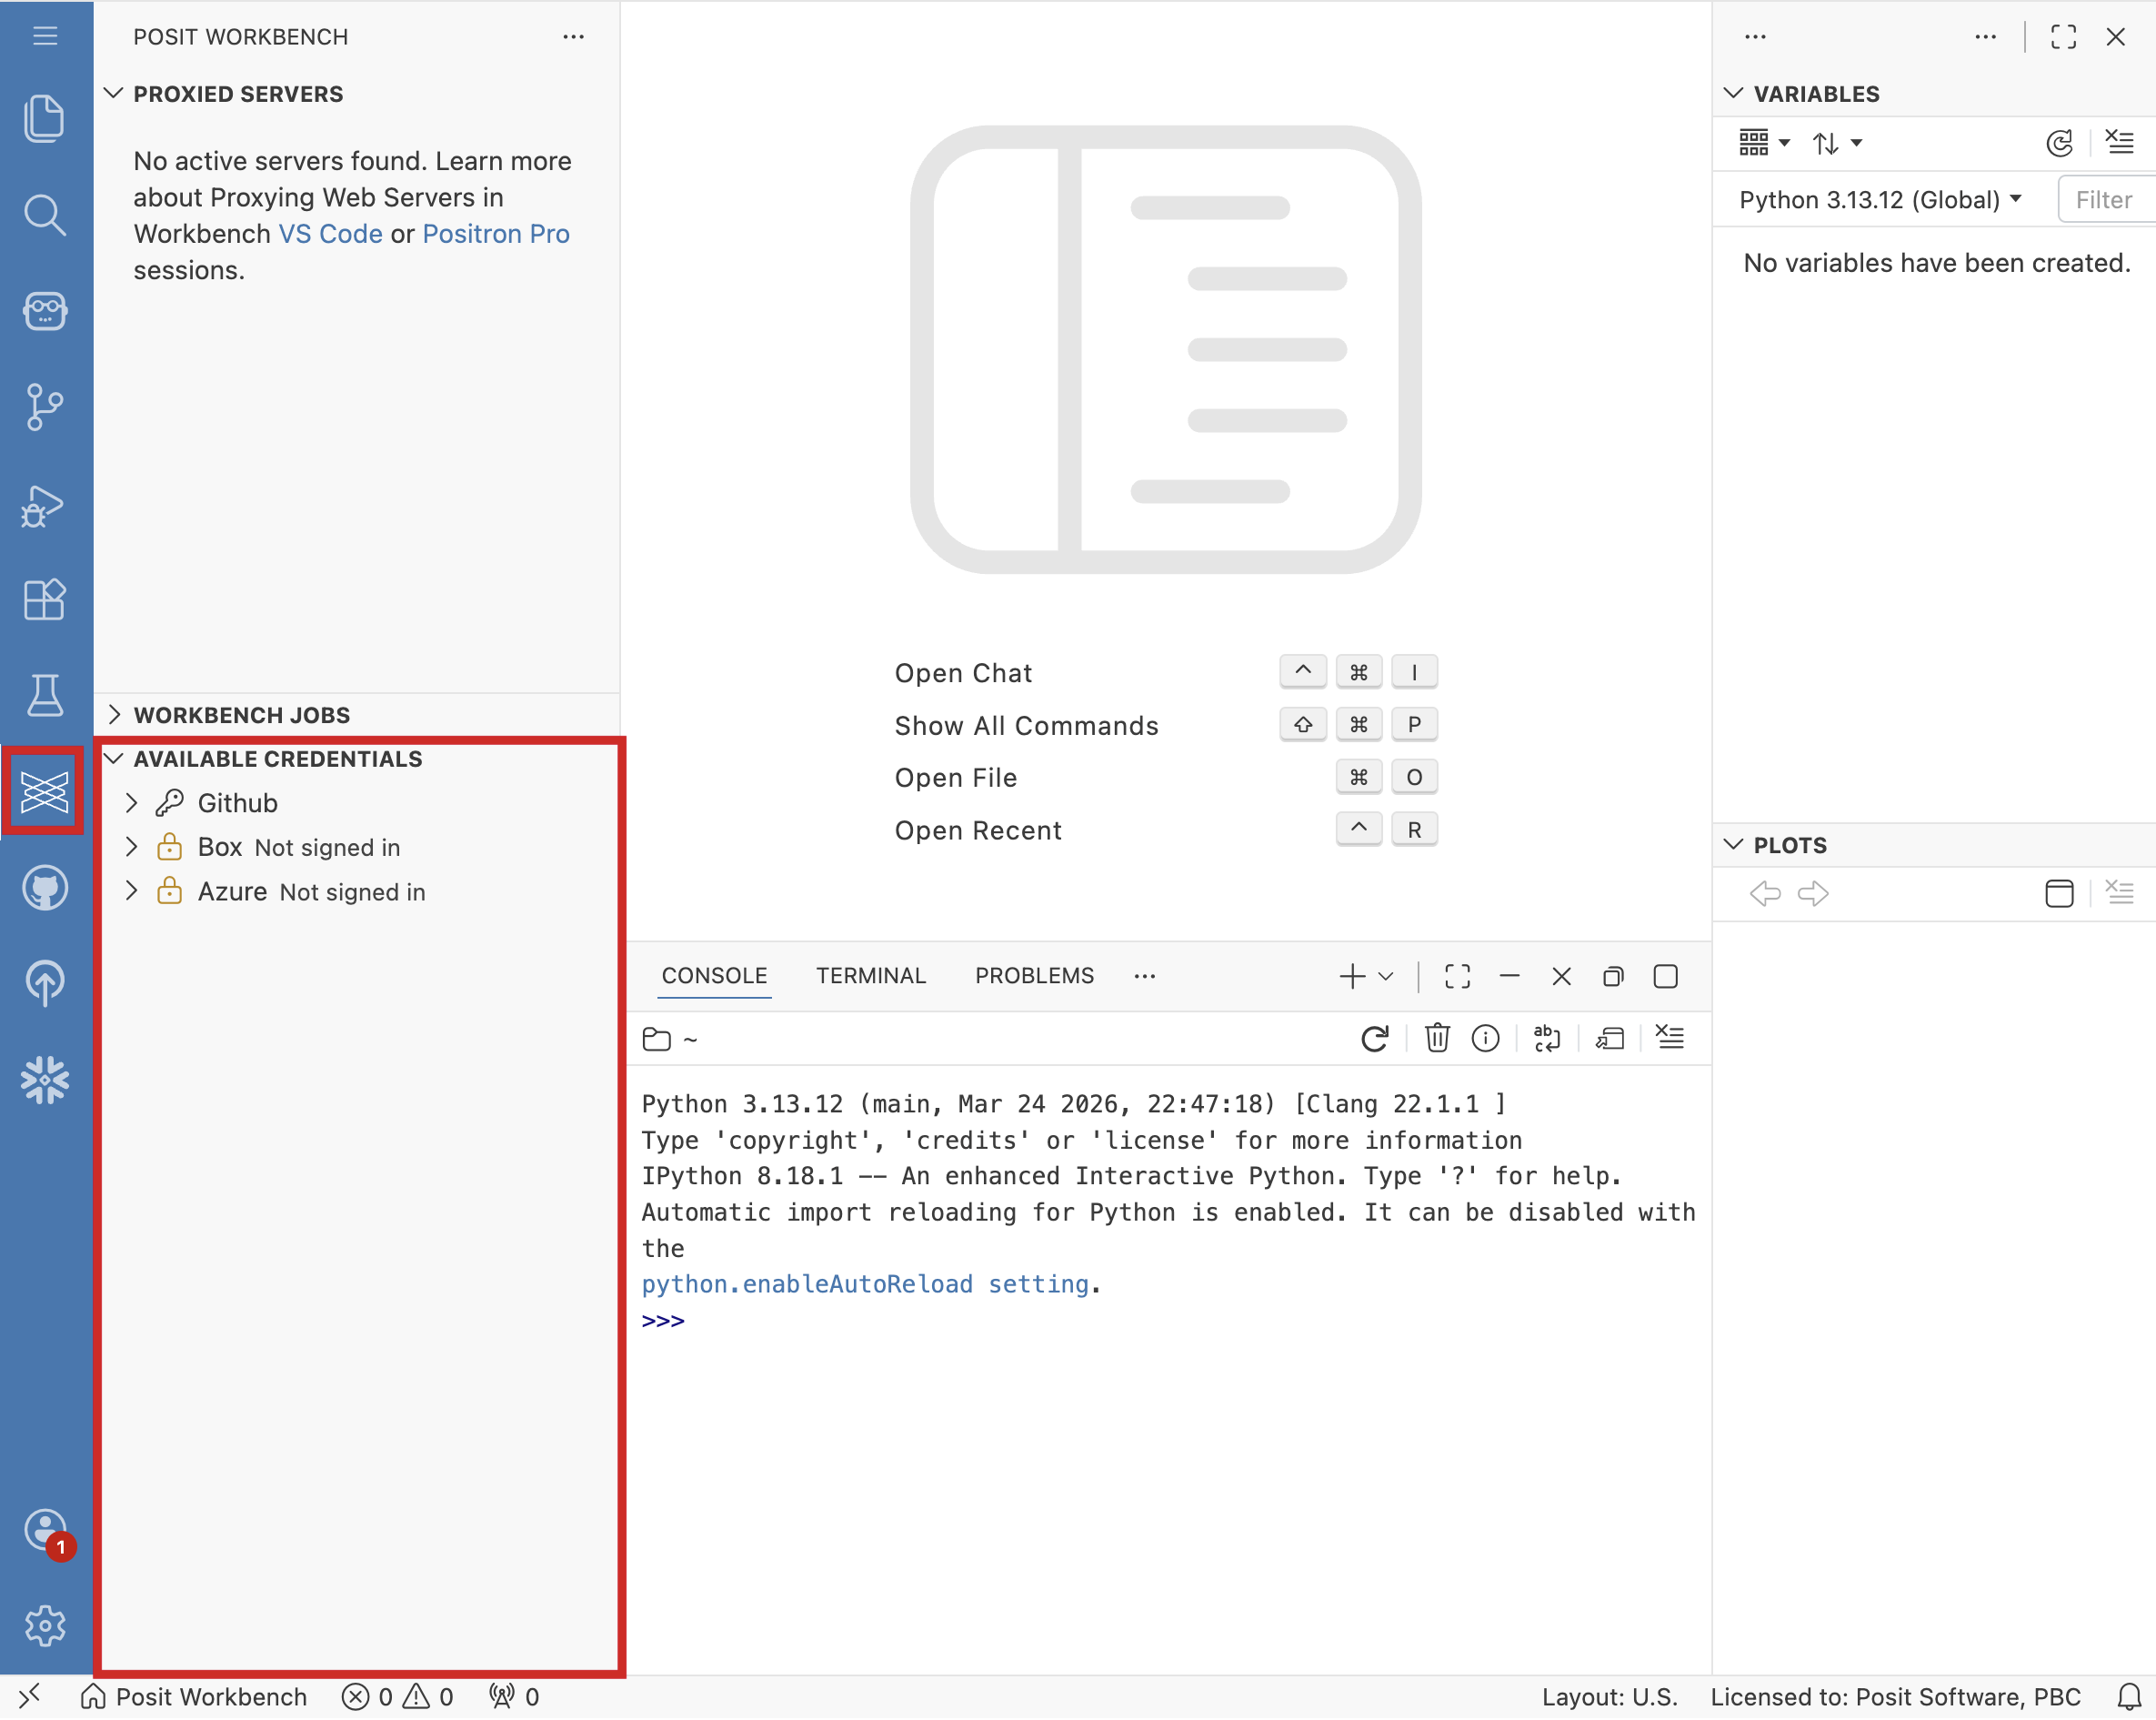
Each integration in the tree shows its current authentication status:
| Status | Icon | Description |
|---|---|---|
| Authenticated | Custom OAuth: you have signed in to this integration and it is ready to use. The description shows the Integration ID. Databricks and Snowflake: you have signed in, but must still activate the credential before your code can use it. | |
| Active | Databricks or Snowflake only: the credential is active in this session. Workbench has set its environment variables and written its configuration files. | |
| Not signed in | The integration requires authentication before use. | |
| Configuration error | The integration has a configuration problem. Point to the integration to see error details in the tooltip. |
The Available Credentials view automatically refreshes every 30 seconds when visible, and pauses when you hide the view to reduce resource usage. To manually refresh, click the Refresh button in the view toolbar.
Signing in
- In the Available Credentials view, locate the integration you want to authenticate with.
- Point to it and click the Sign In button that appears.
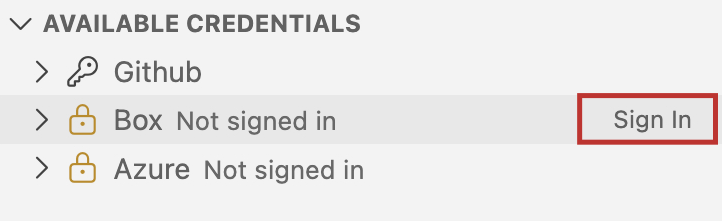
A browser window opens to complete the OAuth authorization flow with the provider. After successful authentication, the integration status updates to show the key icon.
Activating Databricks and Snowflake credentials
To make a Databricks or Snowflake credential available to your code, activate it in the current session.
- In the Available Credentials view, locate the Databricks workspace or Snowflake role you want to use.
- Point to it and click the Activate in Session button that appears. If you have not signed in yet, this starts the sign-in flow first, then activates the credential once authentication succeeds.
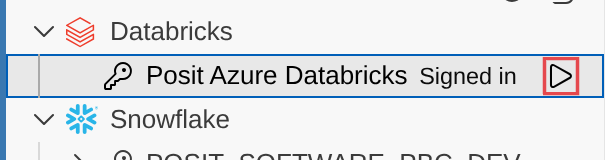
New terminals and interpreters started after activation automatically pick up the credential.
Reloading after activating or deactivating
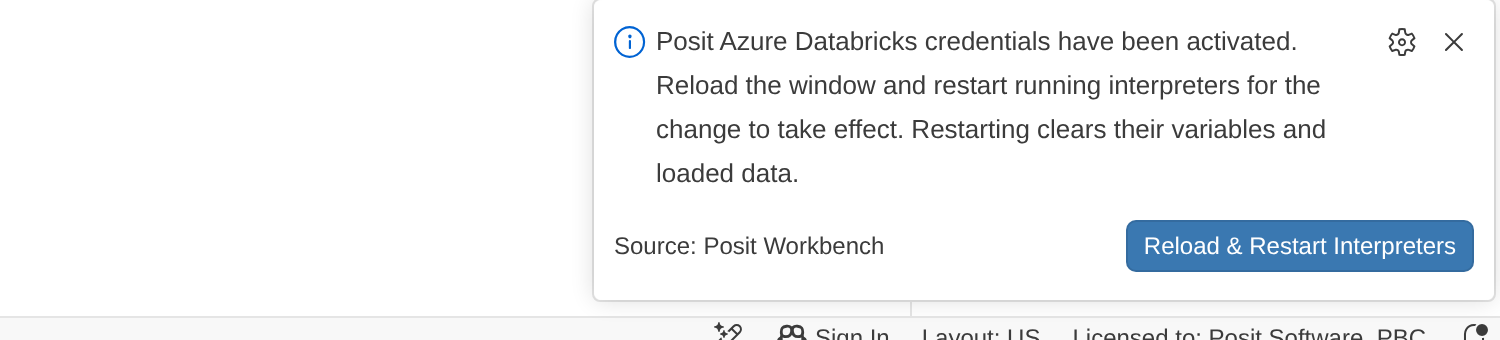
After you activate or deactivate a credential, Workbench prompts you to reload the window so other extensions see the change. If Positron interpreters are already running, it instead offers to reload and restart them. A reload alone reconnects to running interpreters without giving them the new credential, while restarting clears their variables and any loaded data. Terminals and interpreters started after the change do not need a reload.
Snowflake roles
Expand a Snowflake account to see its individual roles, each with its own authentication and activation status:
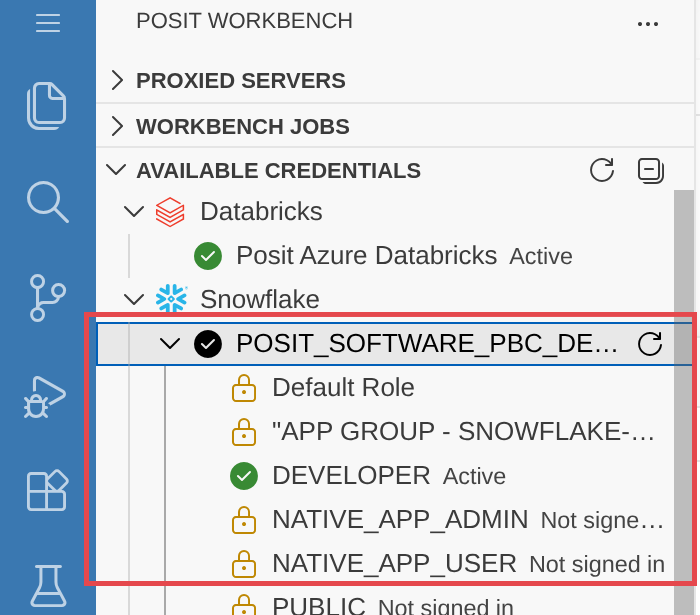
To switch roles, click Activate in Session on a different role under the same account. The previously active role is deactivated automatically. You can also right-click a signed-in role and select Switch to This Role to do the same thing.
You can also:
- Refresh Snowflake Roles: point to the account and click the refresh button that appears to request an updated role list, if your administrator has enabled this.
- Add Snowflake Role: click Add role… below an account’s roles to add one that was not discovered automatically.
If a Databricks workspace or Snowflake role was already selected for this session at launch in the New Session dialog, you can switch to a different workspace or role from this view, but you cannot deactivate it entirely. To turn it off, start a new session without selecting it. Point to the active credential to see this explained in its tooltip.
Deactivating a credential
- In the Available Credentials view, locate the active Databricks workspace or Snowflake role.
- Point to it and click the Deactivate button that appears.
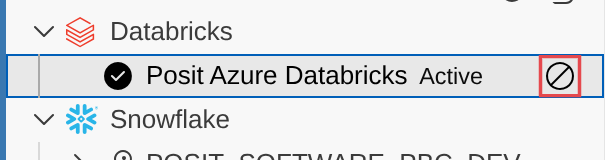
Deactivating clears the credential’s environment variables and configuration files for this session, but leaves you signed in.
Signing out
- Right-click an authenticated integration.
- Select Sign Out.
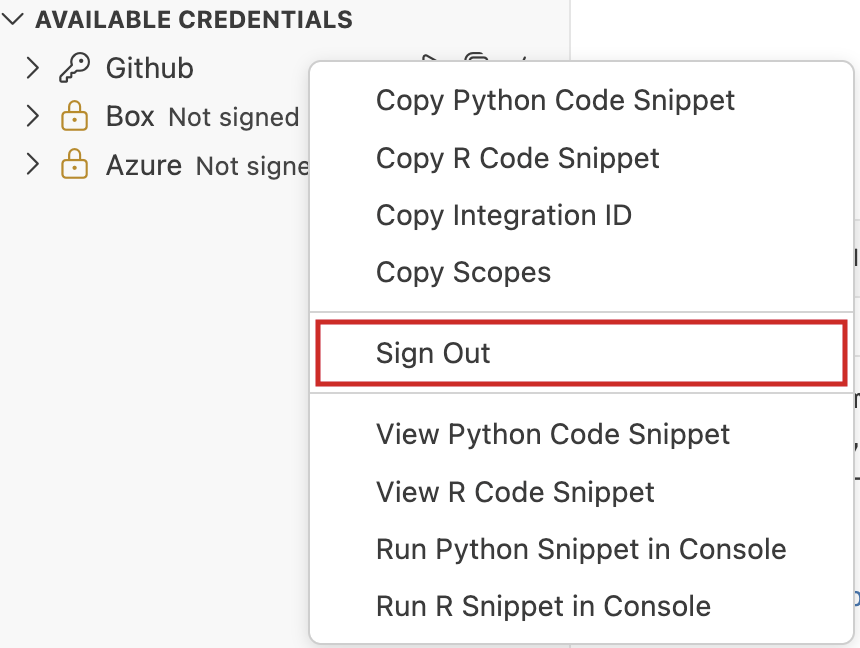
The integration status updates to show the lock icon, indicating you are no longer signed in. A Databricks or Snowflake credential that was selected at session launch cannot be signed out or deactivated in-session, since its environment variables come from the session process itself. Start a new session without selecting it to turn it off.
Viewing integration details
This section applies to custom OAuth integrations. Databricks and Snowflake credentials are used directly through environment variables, so they do not expand to show configuration details.
Expand any integration in the tree to view its configuration details:
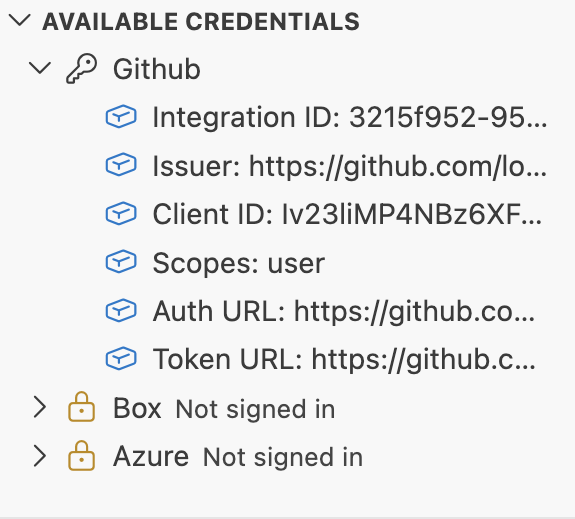
The view shows the following details:
- Integration ID (Globally Unique Identifier (GUID)): the unique identifier needed for programmatic access
- Issuer: the OAuth provider URL
- Client ID: the OAuth client identifier
- Scopes: the permissions granted to this integration
- Auth URL: the OAuth authorization endpoint
- Token URL: the OAuth token endpoint
To copy any detail value, point to it and click the Copy Value icon that appears on the right.
Generating code snippets
This section applies to custom OAuth integrations. Databricks and Snowflake credentials do not have code snippets to generate, since tools authenticate with them automatically once activated.
The Available Credentials view can generate ready-to-use Python or R code for retrieving OAuth credentials. This is a quick way to get started with the posit-sdk (Python) or rstudioapi (R) packages.
Copying a snippet
- Right-click an authenticated integration.
- Select Copy Python Snippet or Copy R Snippet.
The snippet is copied to your clipboard, ready to paste into your editor.
Viewing a snippet
- Right-click an authenticated integration.
- Select View Python Snippet or View R Snippet.
A read-only editor tab opens with the generated code, with syntax highlighting. From there you can review the code before copying it.
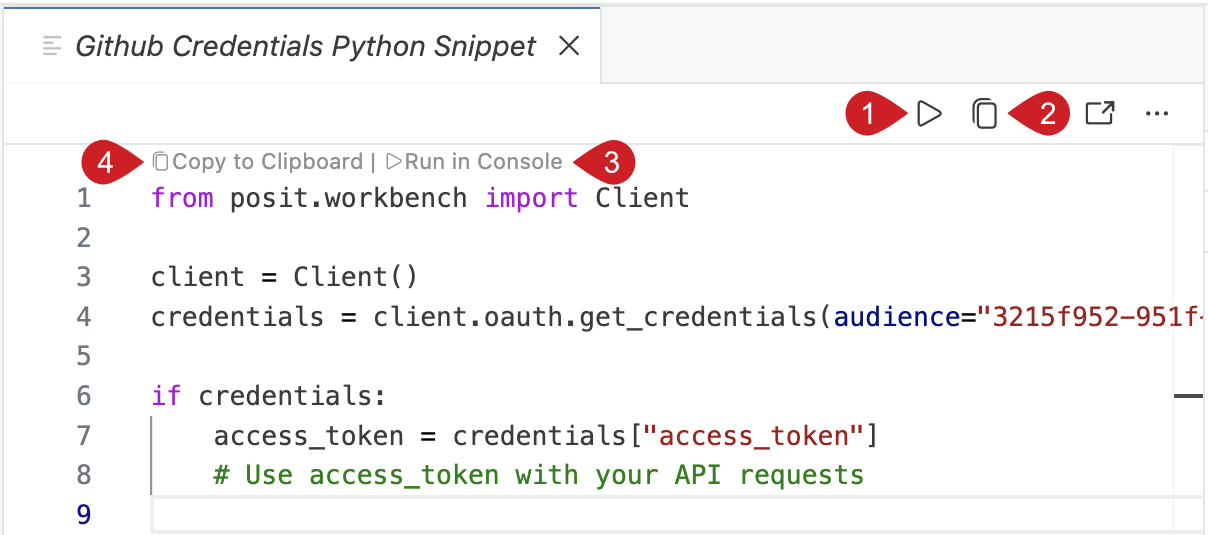
The callouts in the image above correspond to the following actions in the snippet view:
- Run the snippet in the active console by clicking the Run in Console icon in the editor toolbar.
- Copy the snippet code by clicking the Copy to Clipboard icon in the editor toolbar.
- Run the snippet in the active console by clicking the Run in Console code lens above the first line of code.
- Copy the snippet code by clicking the Copy to Clipboard code lens above the first line of code.
Running a snippet
- Right-click an authenticated integration.
- Select Run Python Snippet or Run R Snippet.
The snippet executes directly in the active console, so you can immediately inspect the returned credentials.
Generated snippet examples
The generated snippets use the integration’s GUID to retrieve credentials:
from posit.workbench import Client

client = Client()
credentials = client.oauth.get_credentials(audience="{integration_id}")

if credentials:
    access_token = credentials["access_token"]
    # Use access_token with your API requests
credentials <- rstudioapi::getOAuthCredentials(audience = "{integration_id}")
if (!is.null(credentials)) {
access_token <- credentials$access_token
# Use access_token with your API requests
}For more details on using these SDKs, including token refresh, error handling, and finding integrations programmatically, see Custom OAuth Integrations: Using credentials in sessions.
Command palette commands
The following commands are available from the command palette (Ctrl+Shift+P / Cmd+Shift+P) under the Posit Workbench category:
| Command | Description |
|---|---|
| Refresh Available Credentials | Manually refresh the credentials list. |
| View Credential Code Snippet | Open a read-only editor tab with the generated code snippet for the selected integration. |
| Copy Credential Code Snippet | Copy the generated code snippet for the selected integration to the clipboard. |
| Run Credential Code Snippet in Console | Run the generated code snippet for the selected integration in the active console. |