Management
Posit Team includes a Posit Connect management page for an administrator to perform post-installation operations.
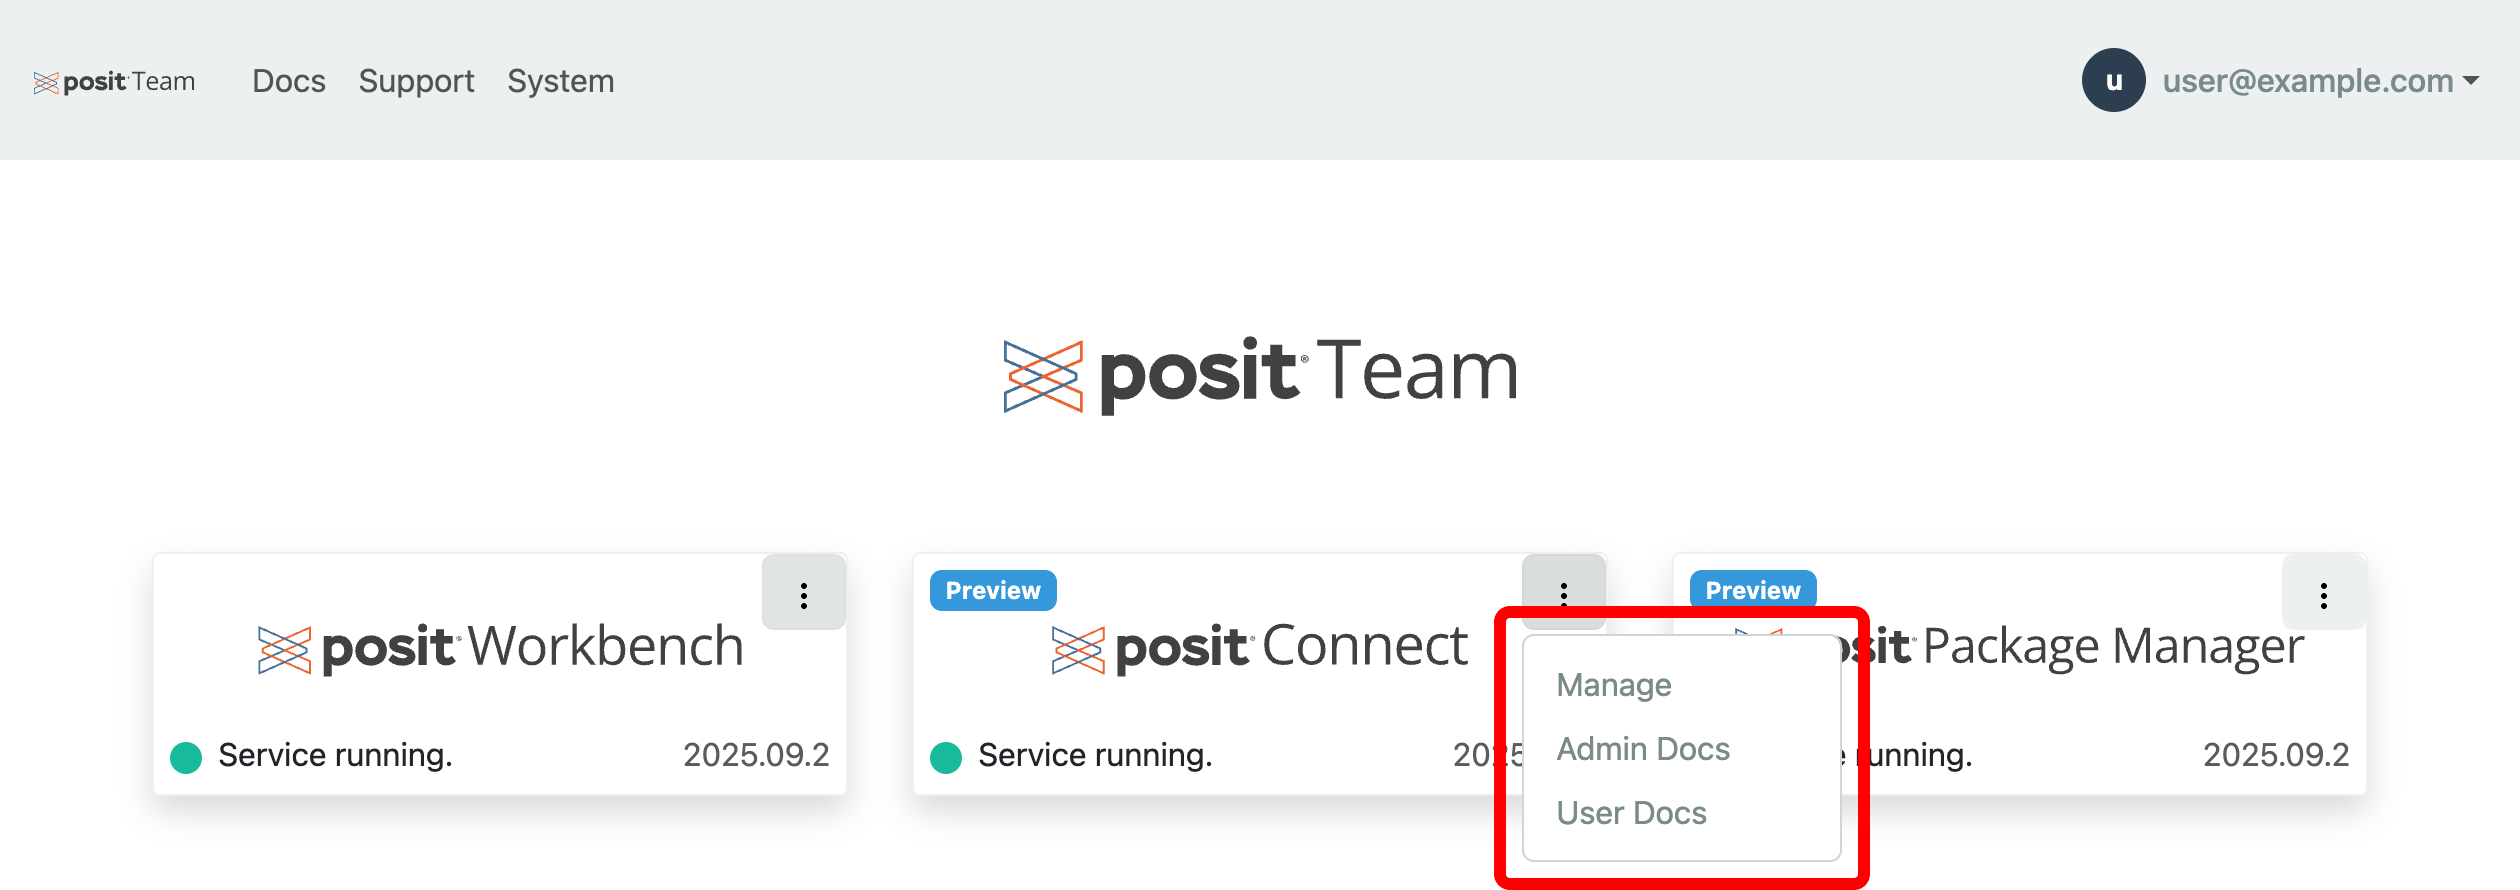
To manage Connect, click the menu icon (vertical dots) on the Connect card and click Manage.
Stop, start, restart
The Connect service can be managed in several ways:
- Manually triggered operations
- Programmatic operations
- Scheduled operations
If there are times when Connect is not used, such as on weekends and holidays, stopping (suspending) the service can help reduce your Snowflake compute costs. By default, a suspended service resumes when a user visits it.
Some features of Connect, such as scheduled jobs, do not run while the service is suspended.
Manual operations
You can manually stop, start, and restart the Connect service from the Manage page.

Programmatic operations
You can start, stop, and restart the Connect service using SQL commands.
Start service
Starts the named product service.
Syntax
START_SERVICE(product VARCHAR)Start Connect within the POSIT_TEAM Native App:
Snowsight UI
SELECT POSIT_TEAM.app.START_SERVICE('connect');Stop service
Stops the named product service.
Syntax
STOP_SERVICE(product VARCHAR, allow_resume BOOLEAN DEFAULT TRUE)The optional allow_resume argument indicates whether or not user activity is allowed to resume the service. With allow_resume = TRUE (the default), a user visiting the product resumes the service. With allow_resume = FALSE, the service does not resume on user activity. This setting persists until an administrator starts the service from the management page or a SQL call.
The Posit Team management page for Connect shows a badge indicating when auto-resume is disabled. Users visiting the product through Posit Team see that the service is stopped.
Stop Connect within the POSIT_TEAM Native App, allowing the service to resume on user activity:
Snowsight UI
SELECT POSIT_TEAM.app.STOP_SERVICE('connect');Stop Connect within the POSIT_TEAM Native App, preventing automatic resume on user activity:
Snowsight UI
SELECT POSIT_TEAM.app.STOP_SERVICE('connect', FALSE);Restart service
Restarts the named product service.
Syntax
RESTART_SERVICE(product VARCHAR)Restart Connect within the POSIT_TEAM Native App:
Snowsight UI
SELECT POSIT_TEAM.app.RESTART_SERVICE('connect');Scheduled operations
Schedule the start and stop of Connect with Snowflake tasks. This example stops Connect with allow_resume = FALSE so user activity does not resume the service.
Snowsight UI
-- Create a task to stop Connect at 6 PM daily.
CREATE OR REPLACE TASK task_connect_stop
    SCHEDULE = 'USING CRON 0 18 * * * America/New_York'
AS
    SELECT POSIT_TEAM.app.STOP_SERVICE('connect', FALSE);

-- Enable the stop task.
ALTER TASK task_connect_stop RESUME;

-- Create a task to start Connect at 8 AM daily
CREATE OR REPLACE TASK task_connect_start
    SCHEDULE = 'USING CRON 0 8 * * * America/New_York'
AS
    SELECT POSIT_TEAM.app.START_SERVICE('connect');

-- Enable the start task.
ALTER TASK task_connect_start RESUME;
Upgrade
Posit frequently upgrades the Posit Team Native App and its associated version of Connect. When the Posit Team Native App is updated, Posit Team automatically upgrades Connect.
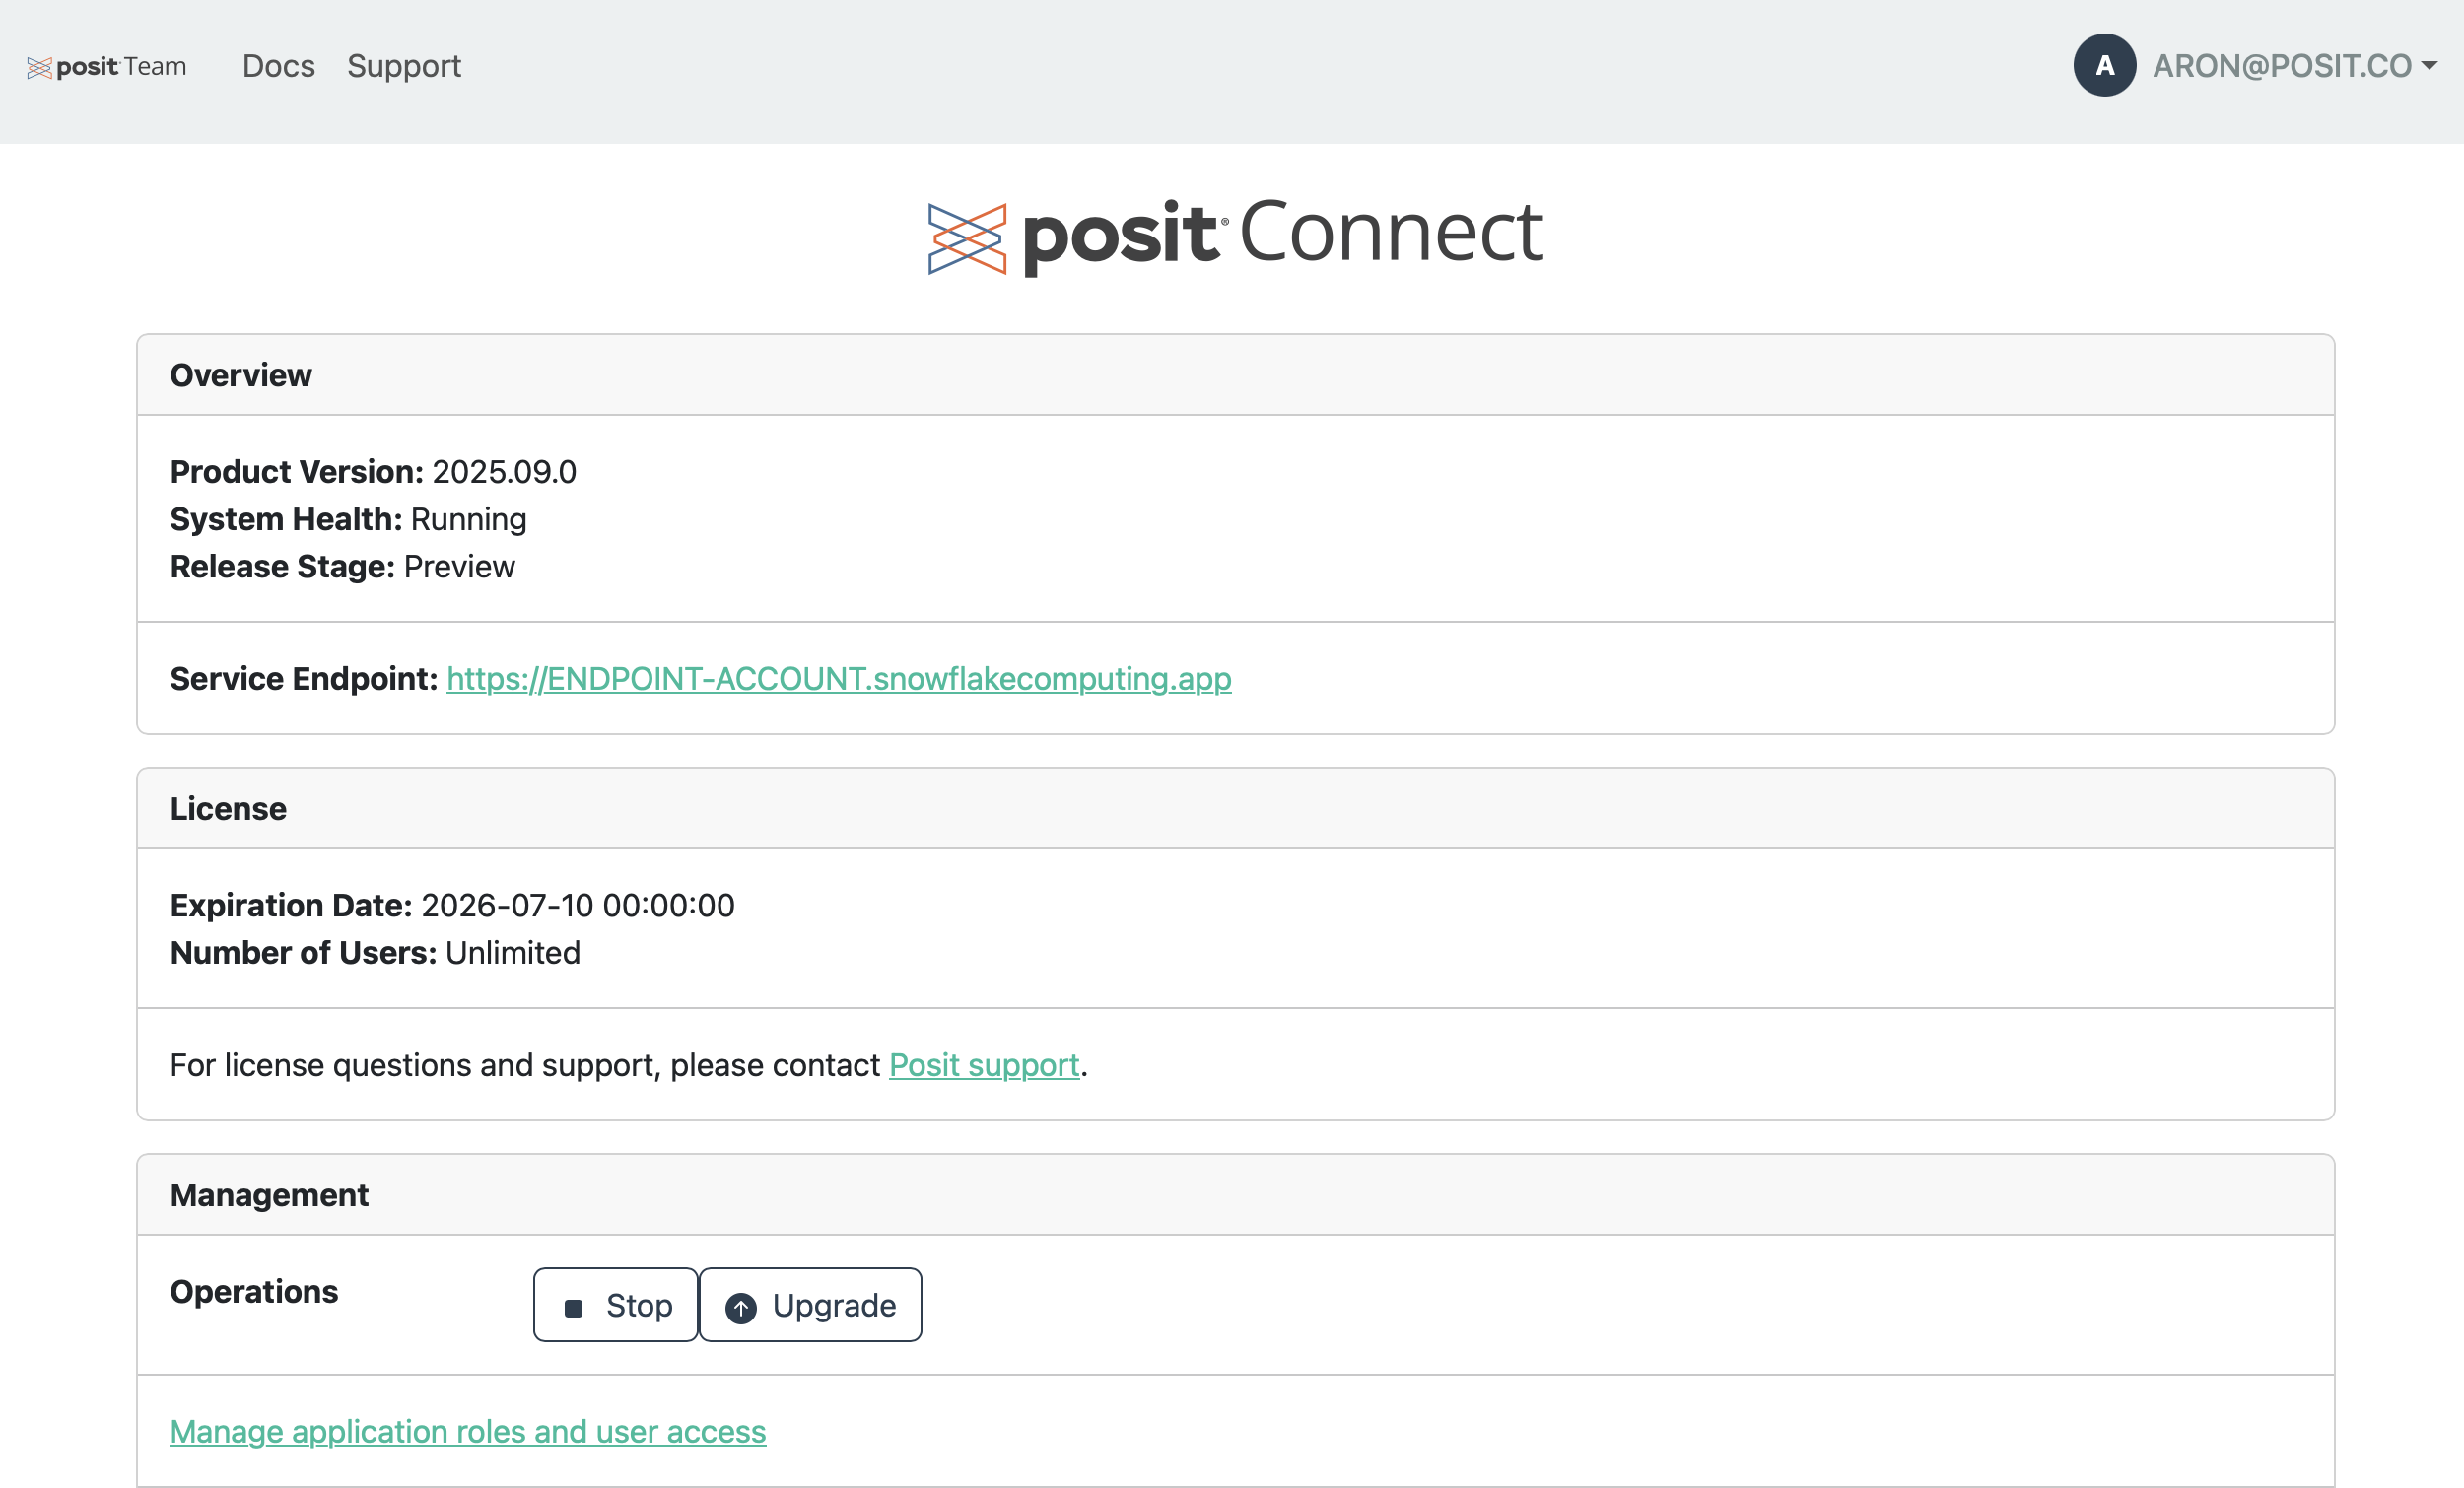
Some configuration changes require a service upgrade before they take effect. The management page indicates when configuration changes require an upgrade. Click Upgrade to upgrade Connect.

Change configuration
In the management page you can change the license, resize the compute pool, update user roles and access, update the OAuth integration, and configure email. Some changes require a service upgrade. Follow the upgrade section instructions.
Resize compute pool
The Manage page lets you change the compute pool used to run Connect. Choose a compute pool size appropriate to your workload requirements.

Click Upgrade to apply a compute pool change and restart Connect.
Update Snowflake OAuth credentials
You can modify the Connect Snowflake OAuth integration after its initial setup.
To update the integration:
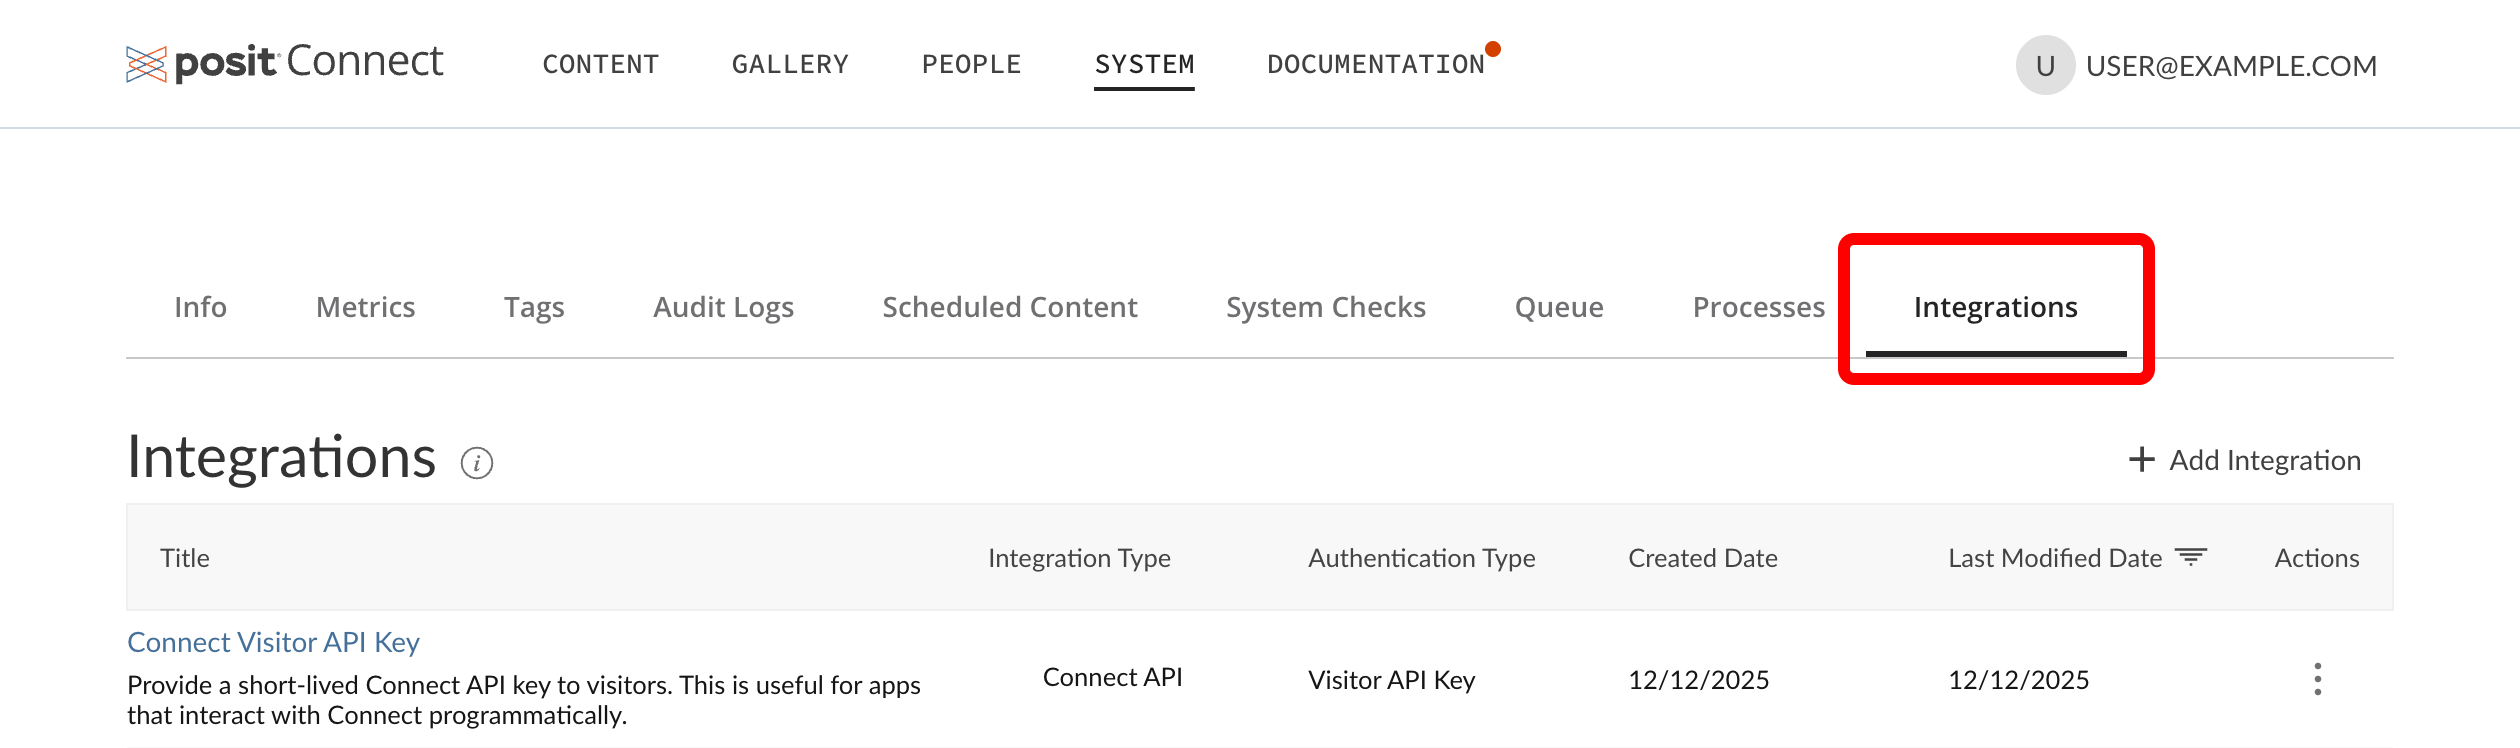
Open the Manage page and click OAuth Integrations.

Copy the generated SQL code and run it in a Snowflake Worksheet as an ACCOUNTADMIN to recreate the integration.

Save the client_id, client_secret, and account_url returned by the query.
Visit the System > Integrations page in Connect to update the integration or create a new one.
Use the values copied above to configure the Snowflake OAuth integration in Connect.
Backup and restore
Posit Team supports creating Connect backups. Specify a backup name or leave it blank for a randomly assigned name and click Save New Backup.

Next, wait several minutes for the backup to be created.

Restoring from a backup takes about 10 minutes. You can delete backups that are no longer needed.
Logs
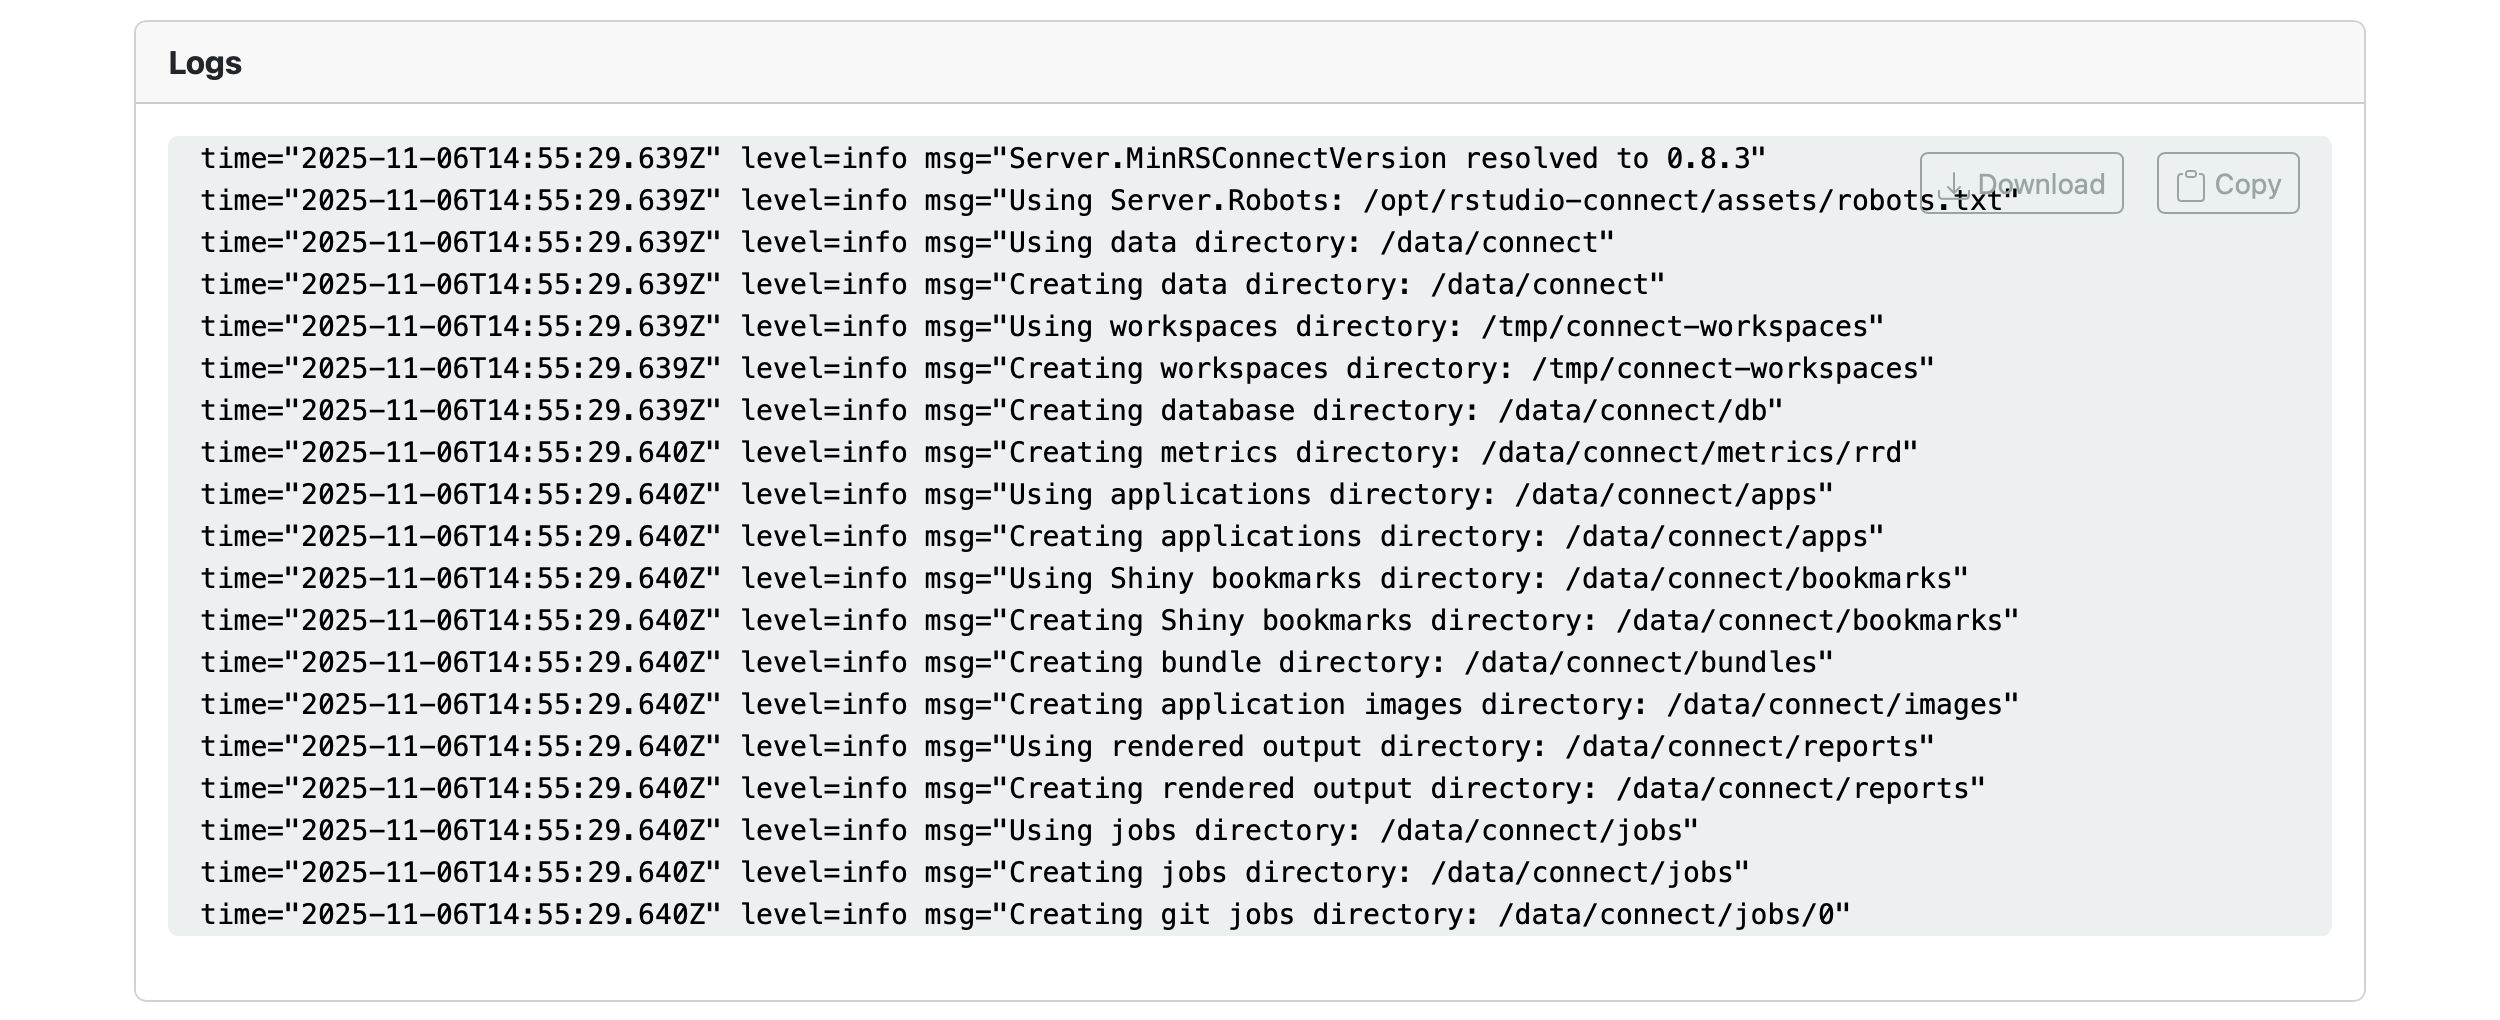
You can view logs of the Connect installation.
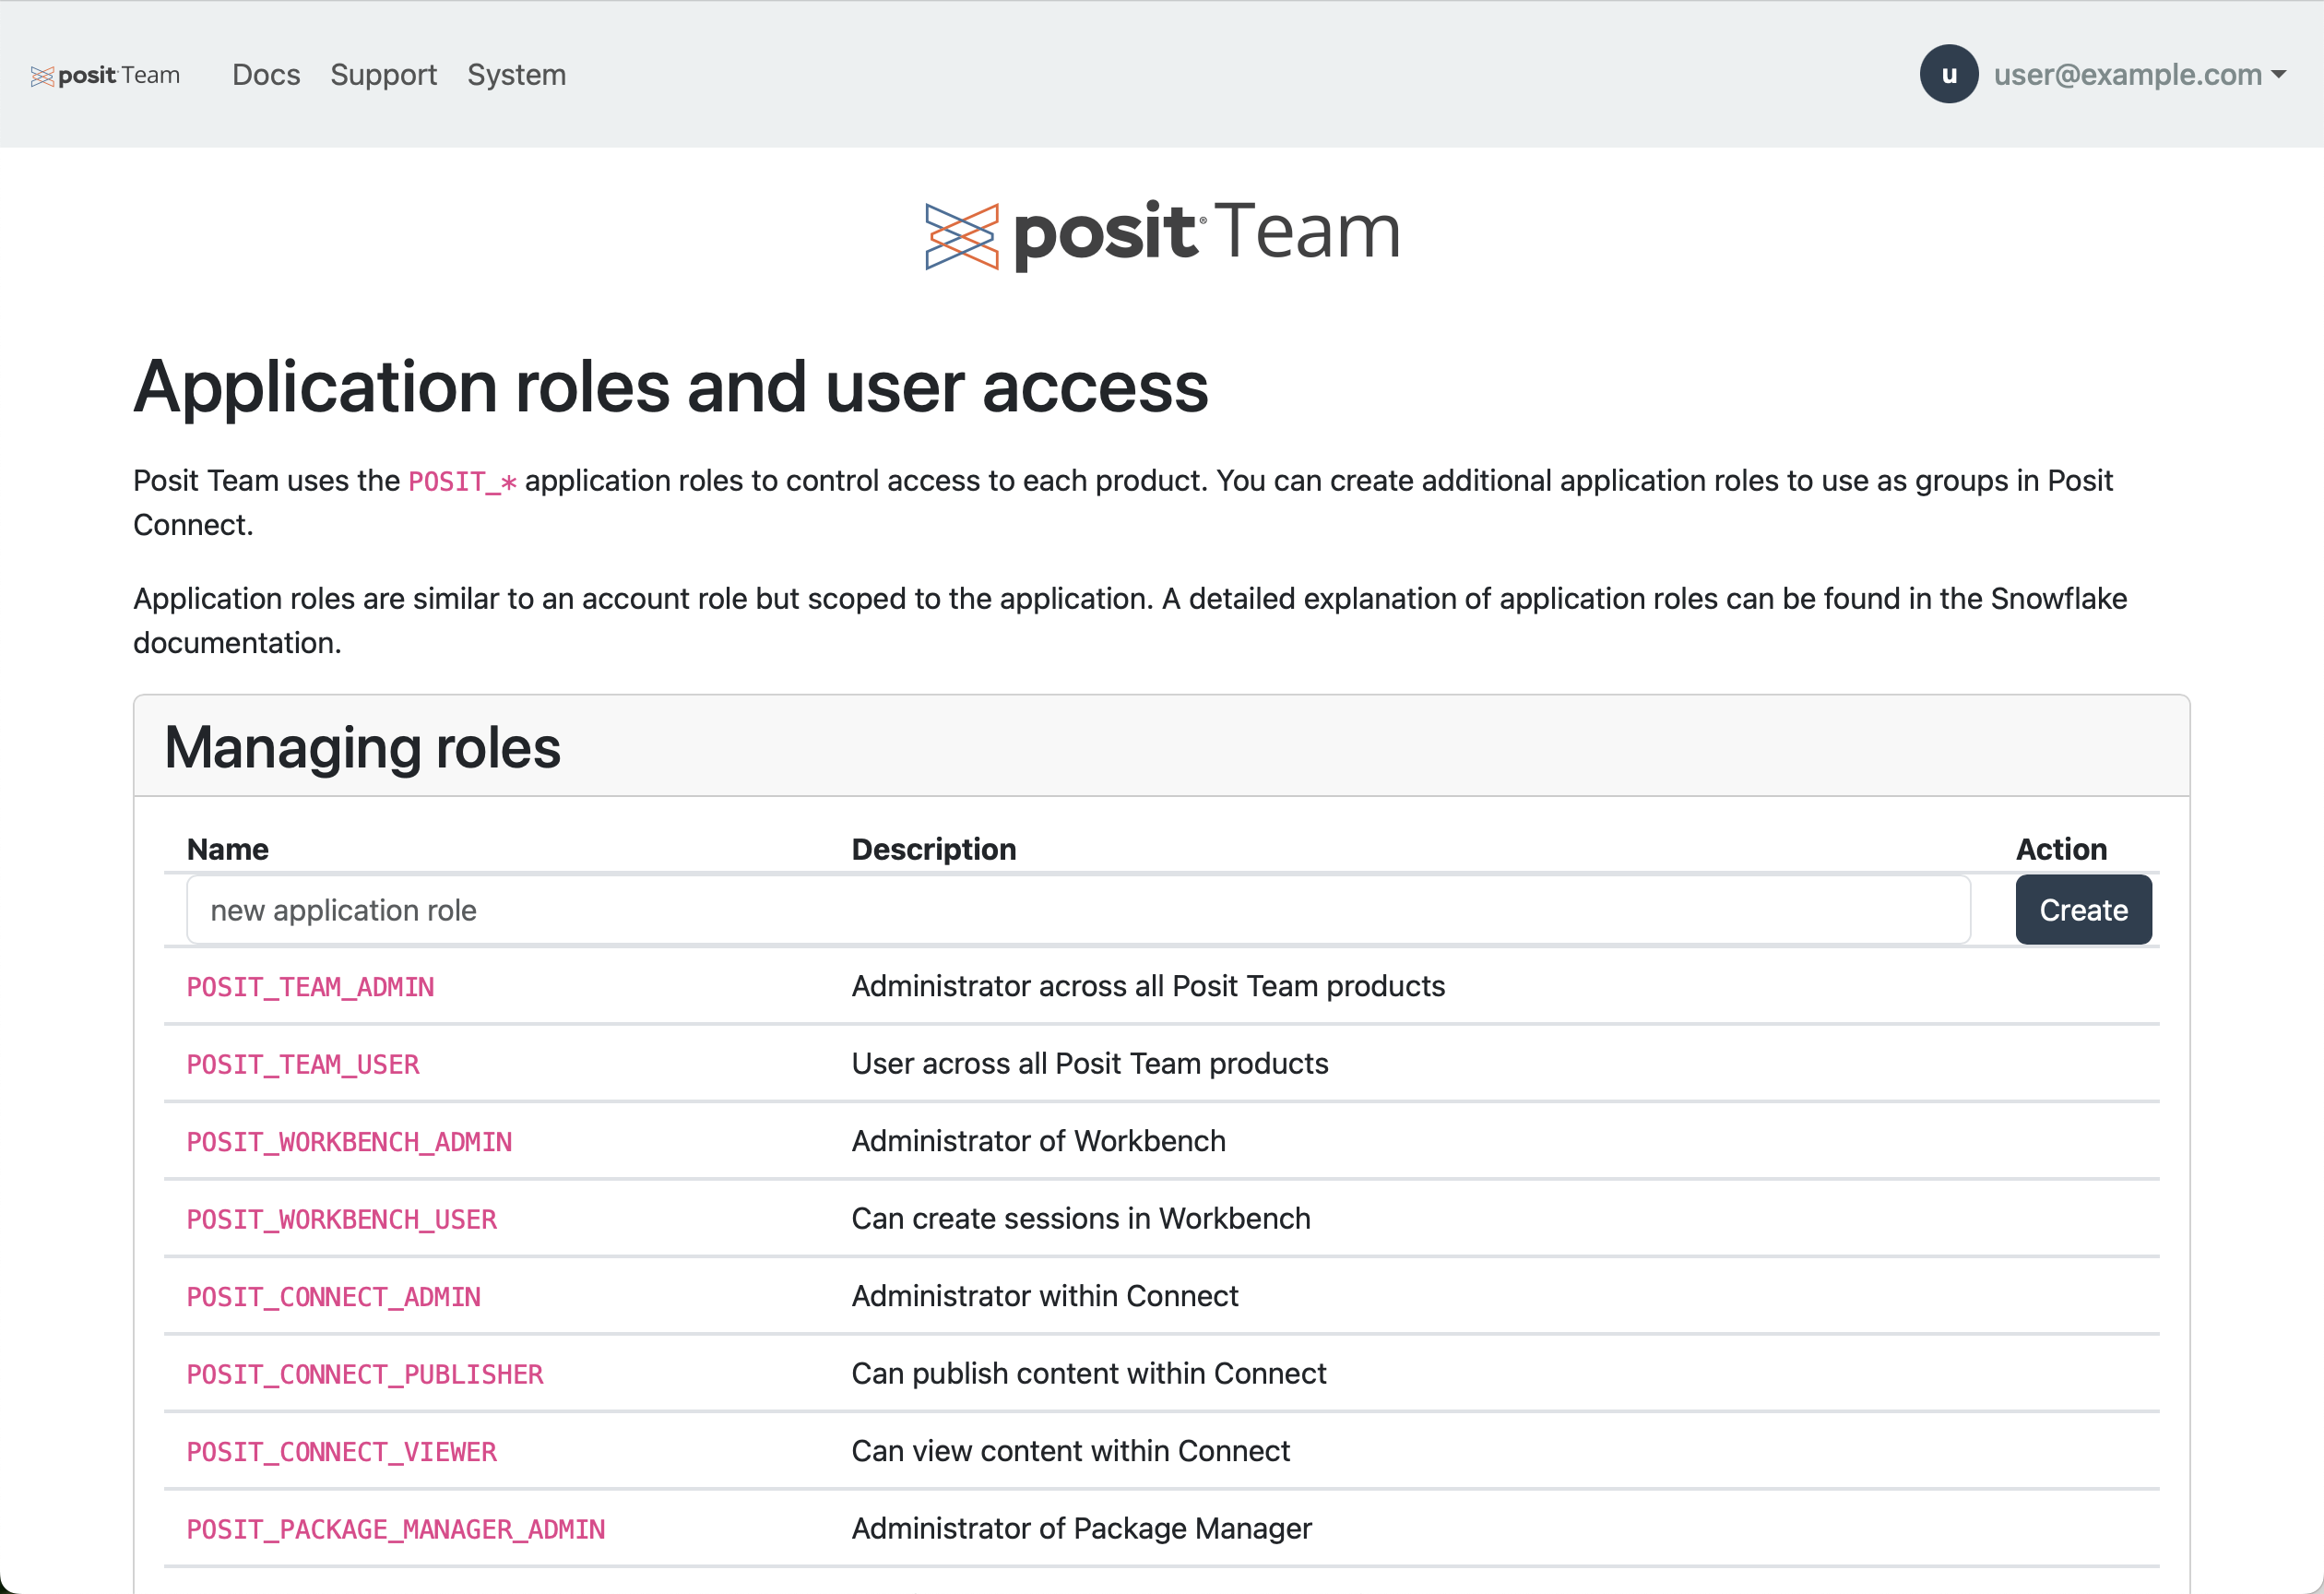
User access
Snowflake users can access Connect after you grant the appropriate application role to their user roles. We recommend you grant the application role POSIT_TEAM_USER to most users.
Snowsight UI
GRANT APPLICATION ROLE POSIT_TEAM.POSIT_TEAM_USER TO ROLE YOUR_USER_ROLE;To give users access to Connect but not the other products in the Posit Team Native App, grant the POSIT_CONNECT_PUBLISHER or POSIT_CONNECT_VIEWER application role. Grant POSIT_CONNECT_PUBLISHER to users who publish content and POSIT_CONNECT_VIEWER to users who only view content. See Managing Application Roles to learn more.
Snowsight UI
GRANT APPLICATION ROLE POSIT_TEAM.POSIT_CONNECT_PUBLISHER TO ROLE YOUR_PUBLISHER_ROLE;
GRANT APPLICATION ROLE POSIT_TEAM.POSIT_CONNECT_VIEWER TO ROLE YOUR_VIEWER_ROLE;
Connect groups
You can create additional application roles to use as groups in Connect. Publishers and Collaborators can use “groups” to associate multiple users to content as viewers or collaborators. This can often provide an easier alternative to maintaining a discrete list of users associated with each instance of published content.
To add a new application role, click User Roles and Access on the Connect management page.

The application roles page lets you manage custom application roles. Posit Team owns the POSIT_* roles. Custom application roles cannot use the POSIT_* prefix.
Change the egress
To ensure full product functionality, key endpoints must be accessible, such as those for Snowflake OAuth and the Online Certificate Status Protocol (OCSP). For more information, see the security egress traffic documentation.
Editing the default egress policy requires the ACCOUNTADMIN role. You can modify the default egress policy for Connect by:
- Using the Snowsight UI (recommended) or
- Writing your own SQL
To edit network rules via Snowsight UI:
Visit Governance & security > Network policies > Network Rules.

Edit the Connect egress network rule and remember to include the required endpoints detailed in the security egress documentation.
Snowflake generates the egress network rule and external access integration from the application egress references at install time. Each of these names begins with your application name, so substitute your application name for POSIT_TEAM below. For an application installed as POSIT_TEAM, the Connect network rule is POSIT_TEAM_APP_DATA.CONFIGURATION.POSIT_TEAM_CONNECT_EGRESS_NETWORK_RULE.
To edit network rules via SQL:
Find the network rule bound to the Connect external access integration, then modify it.
Snowsight UI
-- The ALLOWED_NETWORK_RULES property lists the fully qualified network rule
DESCRIBE EXTERNAL ACCESS INTEGRATION POSIT_TEAM_CONNECT_EGRESS_EXTERNAL_ACCESS;

-- Inspect the current network rule
DESCRIBE NETWORK RULE posit_team_app_data.configuration.posit_team_connect_egress_network_rule;

--- include custom <host>:<port>
--- host names are allowed
--- this example policy allows all ips on port 80 and 443
ALTER NETWORK RULE posit_team_app_data.configuration.posit_team_connect_egress_network_rule SET VALUE_LIST('0.0.0.0:80', '0.0.0.0:443');
Modify the egress rules only after a successful installation, and only change one rule at a time, allowing two to three minutes for each rule to take effect.
Troubleshooting and support
Visit the troubleshooting page for known issues and troubleshooting steps. If none of the troubleshooting steps help, please submit a request through the Posit support form or click Support in the navigation header.
