Pins
The pins packages for Python and R provide a way to publish data, models, and other Python or R objects, making it easy to share them across projects and with your colleagues. You can specify what file format to use for your pin, including options like CSV, JSON, Parquet, and Python or R binary file formats (like .rds or joblib). Pinned objects can be stored on a variety of boards, including local folders (to share on a networked drive or with Dropbox), Posit Connect, Amazon S3, and more.
Publishing data as pins is useful in many situations, for example:
Multiple pieces of content require the same input data. Rather than copying that data, each piece of content references a single source of truth hosted on Connect.
Content depends on data or model objects that need to be regularly updated. Rather than redeploying the content each time the data changes, use a pinned resource and update only the data. The data update can occur using a scheduled R Markdown document. Your content reads the newest data on each run.
You need to share resources that aren’t structured for traditional tools like databases. For example, models saved as R objects aren’t easy to store in a database. Rather than using email or file systems to share data files, use Connect to host these resources as pins.
Storing your data/object as a pin works well when you write from a single source or process, like an ETL script. It is not appropriate when multiple sources or processes need to write to the same pin, like a Shiny app with more than one user. Since the pins package reads and writes files, it cannot manage concurrent writes.
We recommend limiting pinned files to 500 MB. If you find yourself routinely pinning data larger than this, then you might need to reconsider your data engineering pipeline. Please see Reading and writing data to learn more.
Create a pin board
Connect is easy to use as a board for pinning Python or R objects. Create a board with board_connect().
The board_connect() function takes server_url and api_key arguments which inform how you authenticate to Connect. If not specified, pins attempt to read an api_key from the CONNECT_API_KEY environment variable.
To read pickle files from a pin board, you must set the allow_pickle_read=True argument in board_connect(). The pickle module is not secure, so only read files you trust. For more information, refer to the Python documentation.
import os
from pins import board_connect
from dotenv import load_dotenv

load_dotenv()
API_KEY = os.getenv('CONNECT_API_KEY')
SERVER = os.getenv('CONNECT_SERVER')

board = board_connect(server_url=SERVER, api_key=API_KEY)
The pins::board_connect() function takes an auth argument which informs how you authenticate to Connect. Use auth = "envvar" if you have already defined CONNECT_SERVER and CONNECT_API_KEY as environment variables in your R session.
library(pins)
board <- board_connect(auth = "envvar")
Connect automatically applies values for these environment variables for deployed content at run time, so there is no need to include them in your code (never a best practice) or specify them in the Vars Pane unless your server administrator has disabled that function.
The automatic generation of these environment variables can be disabled for security reasons. Reach out to your Posit Connect server administrator or review the Admin Guide for additional details.
Read and write pins
Once you have a pin board, you can write data to it with pin_write():
from pins.data import mtcars
board.pin_write(mtcars.head(), "my.username/mtcars", type="csv")
board %>% pin_write(head(mtcars), "mtcars")The first argument is the object to save (oftentimes a data frame), and the second argument specifies the name of the pin. On Connect, this name is used along with your username to retrieve or read data from the pin. Running the code above should yield a success message that looks something like this: Writing to pin 'my.username/mtcars'.
After you’ve pinned an object, you can read it back with pin_read():
board.pin_read("my.username/mtcars")board %>% pin_read("my.username/mtcars")Pin metadata
Every pin is accompanied by some metadata, which you can access with pin_meta(). This returns the metadata generated by default. Pins from Connect have a url and content_id.
When creating the pin, you can override the default description or provide additional metadata that is stored with the data:
board.pin_write(
    mtcars,
    name="mtcars2",
    type="csv",
    description = "Data extracted from the 1974 Motor Trend US magazine, and comprises fuel consumption and 10 aspects of automobile design and performance for 32 automobiles (1973–74 models).",
    metadata = {
        "source": "Henderson and Velleman (1981), Building multiple regression models interactively. Biometrics, 37, 391–411."
    }
)
board %>% pin_write(mtcars,
description = "Data extracted from the 1974 Motor Trend US magazine, and comprises fuel consumption and 10 aspects of automobile design and performance for 32 automobiles (1973–74 models).",
metadata = list(
source = "Henderson and Velleman (1981), Building multiple regression models interactively. Biometrics, 37, 391–411."
)
)Using a pin
Once a pin has been deployed, it’s easy to share the pin with colleagues. You can either share the link to the pin in Connect, or colleagues can search for resources using the pin package within RStudio.
For an example in R, see Sharing tidied data.
You can manage content settings for deployed pins just like you would for other content types. For example, you can manage access controls to pins to determine who should be able to view and utilize the resource.
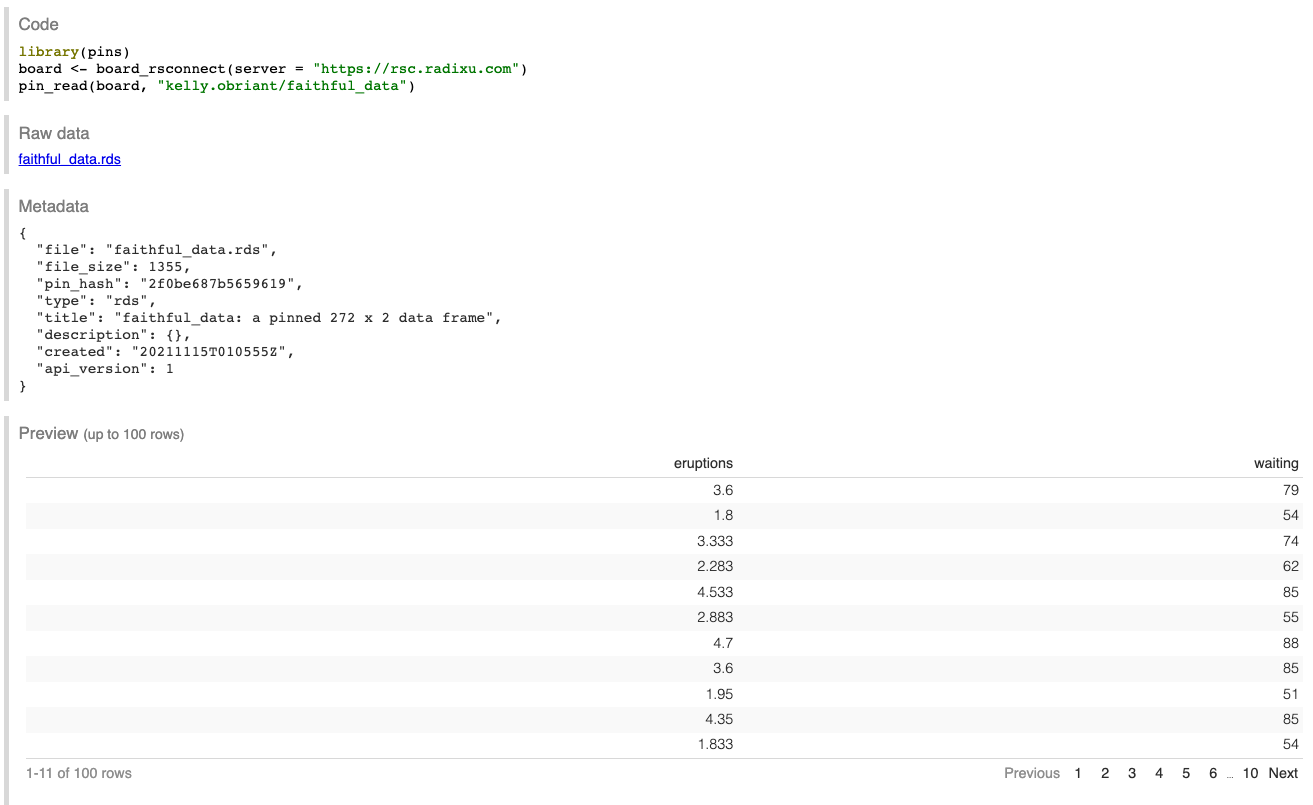
Connect provides a preview of pinned data objects, their metadata, and a direct download link which can be accessed at the content url:
Updating a pin
Pins are objects. They are not backed by source code and so they cannot be directly scheduled. A common pattern for updating pinned data on a schedule is to use pin_write() from a scheduled R Markdown document, Quarto document, or Jupyter Notebook. Writing to the same pin multiple times creates a version history which can be accessed under the More button drop-down menu.
