Git-Backed Content
Content may be deployed to Posit Connect directly from a remote Git repository. Content will automatically fetch from the associated remote Git repository and deploy the updates. This allows for integration with Git-centric workflows and continuous deployment automation.
Support for Git-backed content is dependent on an acceptable version of Git being present in the Connect deployment environment, as described in the Git-Backed section of the Admin Guide.
Git-backed content can be distinguished from other content by the presence of the text “from Git” in the content description as well as a Git Details section in the content Settings > Current Bundle panel.
Publishing for the first time
In order to deploy Git-backed content to Connect, follow this two step process:
- Create and commit a manifest file
- Link Connect to the Git repository
The first step is completed in the development environment, and the second step is accomplished from within Connect.
Creating a manifest file from R
The first step is to create a manifest.json file associated with the content you want Connect to track and deploy. The manifest file tells Connect how to deploy and host your content. This manifest includes information like the content’s environment dependencies. The manifest can be created by calling the R function rsconnect::writeManifest() from within your project directory.
For example, if your project has a single app.R file, the sequence would look like:
app.R
list.files()
# [1] "app.R"

# Create the manifest
rsconnect::writeManifest()

# Confirm manifest.json output
list.files()
# [1] "app.R" "manifest.json"
Calling rsconnect::writeManifest repeatedly updates the manifest.json file.
If your Git repository includes multiple directories, call the function from within the directory containing the content you wish to deploy. For example, if the project looks like:
Project Git Repository :
- README.md
- analysis (directory)
  - prep.R
  - experiments.Rmd
- results (directory)
  - app.R
  - supporting (directory)
If you want to deploy the Shiny app in the results directory, first make the results directory your working directory. Then call writeManifest.
Project Git Repository:
- README.md
- analysis (directory)
  - prep.R
  - experiments.Rmd
- results (directory)
  - app.R
  - manifest.json
  - supporting (directory)
In this case, do not call writeManifest from the project’s root directory. Connect includes everything in the results directory and supporting directory in the deployment.
The writeManifest function does its best to infer the correct information about your content. In some cases you might want to be more explicit and can include the following arguments:
appPrimaryDoc: The primary file in cases where there are more then onecontentCategory: The type of content in cases where it is unclearimage: The image you want to target when building or running content with off-host execution enabled in a Kubernetes environment
Below are some examples to show when you would need to use these explicit options:
A directory containing multiple R Markdown documents
Your project directory may contain multiple R Markdown documents:
report.Rmd
email.Rmd
Use
appPrimaryDocto specify which R Markdown is the entry point for Connect:rsconnect::writeManifest(appPrimaryDoc = "report.Rmd")A directory containing HTML
Use
contentCategoryto distinguish between a website and a plot. For instance, if the directory contains multiple HTML files for a website, use:rsconnect::writeManifest( appPrimaryDoc = "index.html", contentCategory = "site" )An R Markdown site (e.g., Bookdown)
R Markdown sites (including Bookdown) must use the “site” content category.
rsconnect::writeManifest(contentCategory = "site")Target a specific image for off-host execution in Kubernetes
Use
imageto specify an image rather than having Connect automatically select one (this image must be preconfigured by your Connect administrator):rsconnect::writeManifest(..., image = "ghcr.io/posit-dev/connect-content:R4.6.0-python3.14.5-ubuntu-24.04-base")Additional information can be found in the Publishing section of this guide.
Creating the manifest file from Python
Support for creating manifests for Python content is provided by the rsconnect-python package.
Using the Python CLI
Install the latest version of the rsconnect-python package from pip:
Terminal
pip install rsconnect-pythonUse the rsconnect write-manifest command to create a manifest for your specific Python content type. Your current environment is frozen to a file that can be used to reproduce your package set on the Connect server. For example:
Terminal
rsconnect write-manifest notebook MyJupyterNotebook.ipynb
# Checking arguments...                            [OK]
# Inspecting python environment...                 [OK]
# Creating manifest.json...                        [OK]
# Creating requirements.txt...                     [OK]
The tool looks for a requirements.txt file in the source directory. Providing one makes deployments faster by installing only the packages you specify and allowing environments to be reused across deployments that have the same requirements.
If a requirements.txt file is not found, rsconnect-python inspects the current Python environment and creates the file for you. Be sure to activate your virtual environment before deploying so the correct packages are listed.
Use the --image option with rsconnect write-manifest to specify a target image for building or running content with off-host execution enabled in a Kubernetes environment.
Tracking the manifest file
After the manifest.json is generated, add and commit it to your local Git working copy. Be sure to push to the remote Git repository so that Connect can see the manifest.json after fetching. This is roughly the equivalent done in a terminal:
Terminal
git add manifest.json
git commit -m 'Adding manifest.json for Posit Connect deployment'
git push
Linking Git to Posit Connect
Connect users must have at least a publisher role in order to create new content from a Git repository.
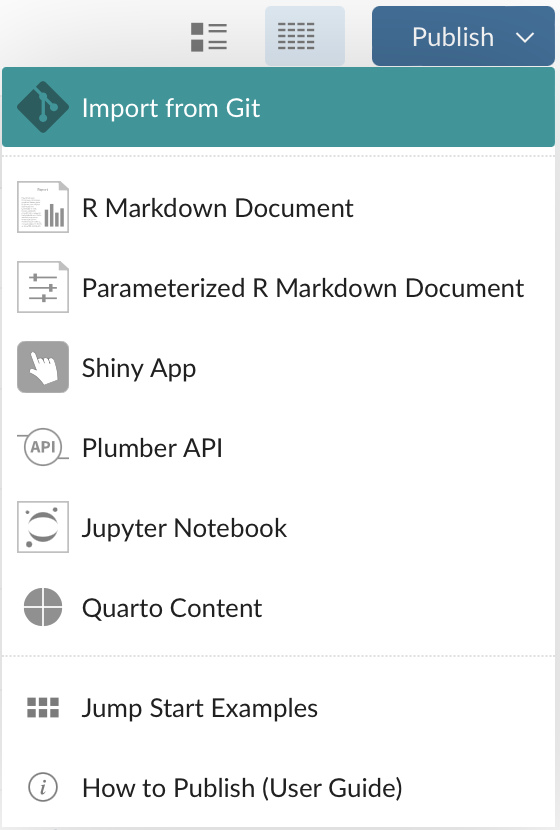
From the Content page, click Publish then click Import from Git to launch a new content wizard.
The new content wizard prompts for a Git repo URL, which can use https:// (recommended) or http:// remotes.
Repository URLs must not contain authorization. Private repository access requires configuration of GitCredential.Host, GitCredential.Username, and either GitCredential.Password or GitCredential.OAuthIntegration, as described in the Admin Guide.
Once the repository URL has been entered, specify a branch name. A selection of candidate branch names collected from the remote repository are listed. The branch dropdown is sorted with the repository’s default branch first, followed by common convention names (main, master, release/*, develop, dev), then alphabetically.
Once the branch name has been entered, specify a target directory. The directory names listed are determined by searching for directories containing a manifest.json file.
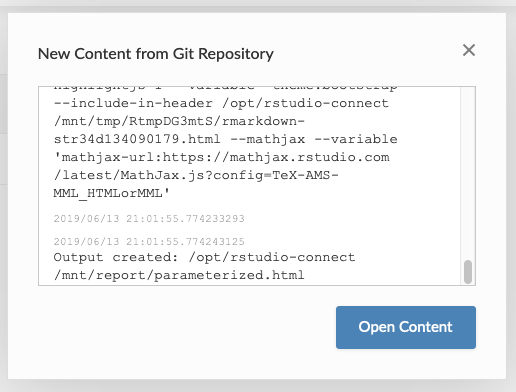
Entering the target directory triggers an initial deployment.
Deploying different content from a single repository
It’s common to have different but related content (applications, reports, etc.) in a single Git repository. Connect supports deploying these from the same repository as separate content items.
Repository structure
To deploy multiple applications, reports, etc. from a single repository, each should:
- Be in a separate directory in the repository
- Have its own
manifest.jsonfile in that directory
For example, a repository might be structured like this:
Project Git Repository:
- README.md
- shiny-dashboard/
  - app.R
  - manifest.json
  - data/
    - sales.csv
- weekly-report/
  - report.Rmd
  - manifest.json
  - plots/
    - plot1.R
- interactive-map/
  - app.py
  - manifest.json
  - requirements.txt
Creating manifest files
Create a manifest for each item you want to deploy. Each target directory should contain a manifest.json. These use the same examples as above. For R content:
# For the shiny-dashboard directory
rsconnect::writeManifest("shiny-dashboard")

# For the weekly-report directory
rsconnect::writeManifest("weekly-report")
For Python content:
Terminal
# Navigate to the interactive-map directory
cd interactive-map

# Create the manifest
rsconnect write-manifest api app.py
Deploying
When you link the Git repository on Connect:
- Go to the Content page in Connect.
- Click Publish > Import from Git.
- Enter the repository URL and branch name. Connect will automatically detect all directories containing manifest files.
- Choose the directory corresponding to the application, report, etc. you want to deploy.
- Enter a title for the content and click Deploy Content.
To deploy an additional application, report, etc. repeat steps 1-5 above, selecting the content’s corresponding directory.
Updating multiple items
Each item deployed from the same repository is treated as a separate item in Connect. All of the standard Git updating features apply:
- Connect checks for changes according to the configured polling interval.
- Only content that has changes in its directory will be redeployed.
- You can manually trigger updates for each item separately.
This approach lets you maintain related content in a single repository while giving Connect fine-grained control over deploying and managing each item individually.
Changing the branch
You can change the branch for Git-backed content from the Settings > Current Bundle panel without creating a new content item. In the Git Details section, click the edit icon next to the branch name to open the branch selector. Select a new branch and click Save. After changing the branch, click Update Now to deploy from the new branch.
If Connect cannot fetch the list of branches from the remote repository, you can type a branch name directly into the input field.
Updating content
To update Git-backed content, make any necessary code changes and then call rsconnect::writeManifest(). Commit both the updated code and the updated manifest.json file. Once the commit is made, you can either wait for Connect to automatically deploy the changes or, from within the Connect dashboard, manually tell Connect to Update Now from the Settings > Current Bundle panel.
Option 1: Connect automatic update
Connect periodically checks all Git-backed content for updates. By default, this check occurs every 15 minutes. Administrators can configure a different interval. If the updated repository is found to contain changes to the relevant branch and path specified, a new deployment is automatically triggered. Such an update might be from new commits pushed to the remote Git repository, or from another branch being merged into the target branch such as when merging a pull request.
Automatic updates can be disabled or enabled in the Git Details section of the Settings > Current Bundle panel.
Option 2: Connect manual update
To immediately check Git-backed content for updates and potentially redeploy (if needed), click the Update Now button in the Settings > Current Bundle panel.
Limitations
Git-backed content has a number of restrictions that affect deployment and usage:
Authentication and hosting constraints
Repository access protocols: When linking Git to Posit Connect, the content wizard prompts for a Git repository URL that uses
https://(recommended) orhttp://remotes. Connect does not support SSH authentication to Git repositories.Private repositories: Repository URLs must not contain authorization information. Access to private repositories requires configuration of
GitCredential.Host,GitCredential.Username, and eitherGitCredential.PasswordorGitCredential.OAuthIntegrationas described in the Admin guide.Credential limits: Connect supports one set of credentials per host. Configuring multiple hosts with different sets of credentials is supported. See the Git-backed Private Repositories section of the Admin guide for details.
Deployment restrictions
Alternative deployment methods: Git-backed content cannot be deployed or updated via other means, such as by publishing from Posit Publisher, or
rsconnect::deployApp().Manifest requirement: Successful deployment requires linking Connect to a target directory that contains a
manifest.jsonfile.Bundle contents: Connect does not rely on the file list in
manifest.jsonwhen extracting content from a Git repository. Connect usesgit archiveto include all files in the target directory.Large File Storage (LFS): Connect Git-backed publishing does not support Git Large File Storage.
External content linking: Connect Git-backed publishing does not support the use of Git submodules or symbolic links.