Code Projects
This guide will not teach you how to write code - but it does cover all you need to know to write code in Posit Cloud projects.
That said, here are a few resources for learning to code for data science we can recommend:
- R for Data Science, by Hadley Wickham & Garret Grolemund
- Posit Cloud Recipes, which are a collection of instructional guides on Posit Cloud with code snippets that cover everything from coding basics to data modeling
- Posit Community, for questions and discussion
Projects
To write code on Posit Cloud, create a project. A project encapsulates your code, packages and data files and provides isolation from other analyses.
Each project on Posit Cloud runs in its own container, independent of all other projects, with its own allocation of RAM and CPUs.
Projects can be shared - you can allow others to see and make copies of your projects, or you can work with a group to collaboratively edit your project.
Create a Project from a Template
Beginning a project from a template is a great way to see examples of what can be done in Posit Cloud, as well as a way to speed up your workflows by customizing the packages and files you start a project with.
Posit Cloud includes a number of templates that we have created at Posit.
You can also create your own templates, tailored to your, or your team’s, particular needs. See the Project Templates section below for details.
To create a project from a template, press the New Project button and choose “New Project from Template” from the menu.
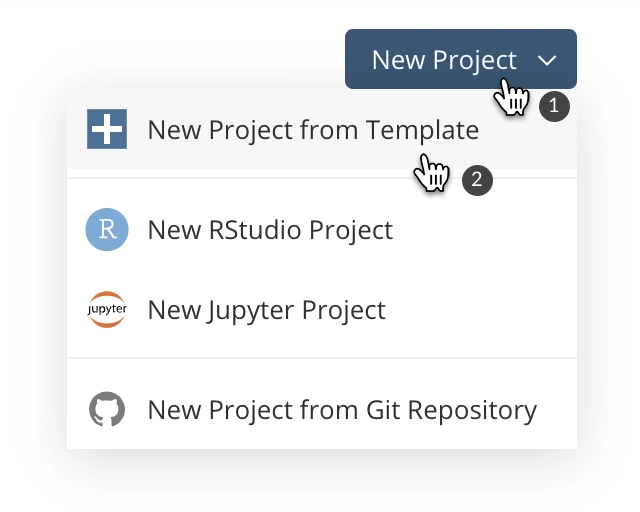
A dialog will appear, listing templates from Posit, and if you are in a shared space, any templates that have been created in that space. Select a template and press the OK button to create your project - it will start with the template’s packages and files pre-loaded.
RStudio Projects
If you are familiar with projects in the desktop RStudio IDE or Posit Workbench, a Cloud RStudio project is the same thing, plus some additional metadata for access and sharing.
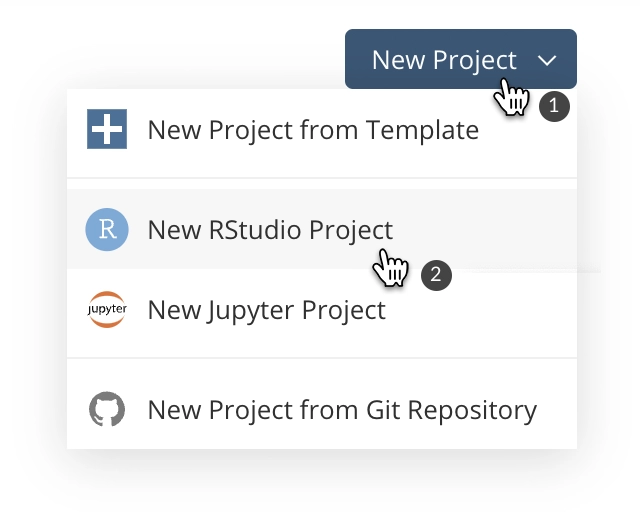
To create a new RStudio project from scratch, press the New Project button and choose “New RStudio Project” from the menu that appears. Your new project will open in the RStudio IDE.
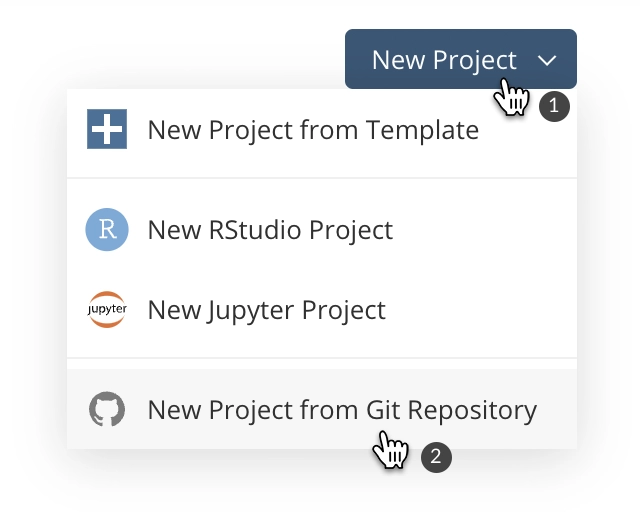
To create a new project from an existing git repository, press the New Project button, and choose “New Project from Git Repo” from the menu that appears. Note that your git credentials need to be entered each time you create a new project and are only cached for 15 minutes by default. See Working with GitHub in the Advanced Topics section for more info.
Jupyter Projects
Create a Jupyter Project
Press the New Project button, and choose “New Jupyter Project” from the menu that appears.
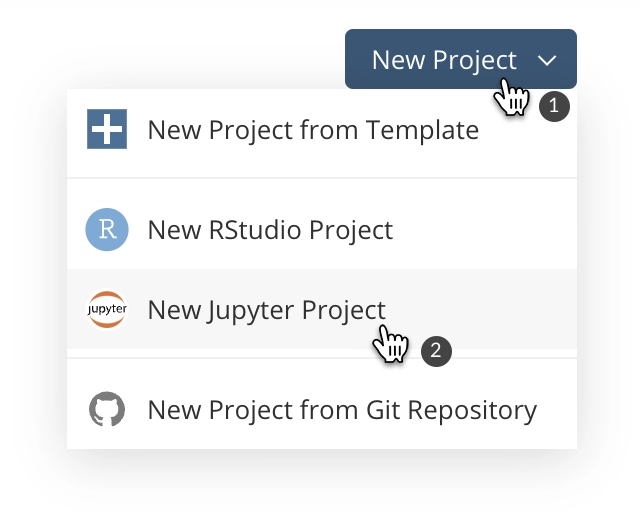
A new Jupyter project will be created and deployed. Once deployed, you will see the Jupyter hub tree view with a welcome.ipynb notebook that contains information about getting started with Jupyter.
Create a Jupyter Notebook
Within a Jupyter project, you can create any number of Jupyter Notebooks.
How To
Press the New dropdown menu in your Jupyter project, and select a Python kernel.
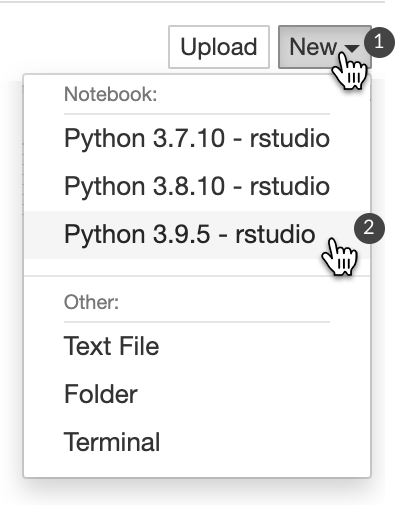
You can also create text files, folders and terminals from the same menu.
Install Python Packages
The welcome.ipynb notebook contains useful information about installing packages in your notebooks and managing different Python environments.
Jupyter Compute Hours
During the beta period, any time spent editing and running Jupyter projects will not accrue to your compute hours. If you are on a plan that has usage limits or charges, you will not see any usage charges related to Jupyter projects.
Known Jupyter Limitations
Following are the known limitations of Jupyter projects:
Project Export is not available for Jupyter projects.
Jupyter projects cannot be created directly from git repositories, but you can clone a git repo into a Jupyter project.
How To
- Create a Jupyter project from the New Project menu.
- In the project, open a new terminal and type
git clone <your git repo url>.
You cannot customize the background execution time of a Jupyter project.
The memory gauge does not work for Jupyter projects.
Project Settings
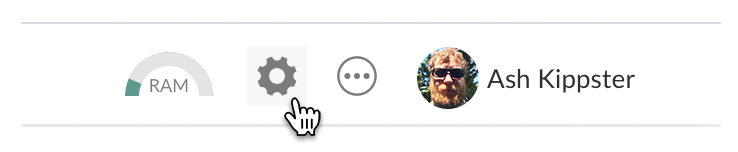
You change the attributes of a project, the resources available to it, and who can access it, by using the Settings panels. You can open Settings in either of two ways.
How To
- In a content listing, press the menu button
 and choose Settings from the menu.
- For an open project, click on the gear icon in the header.
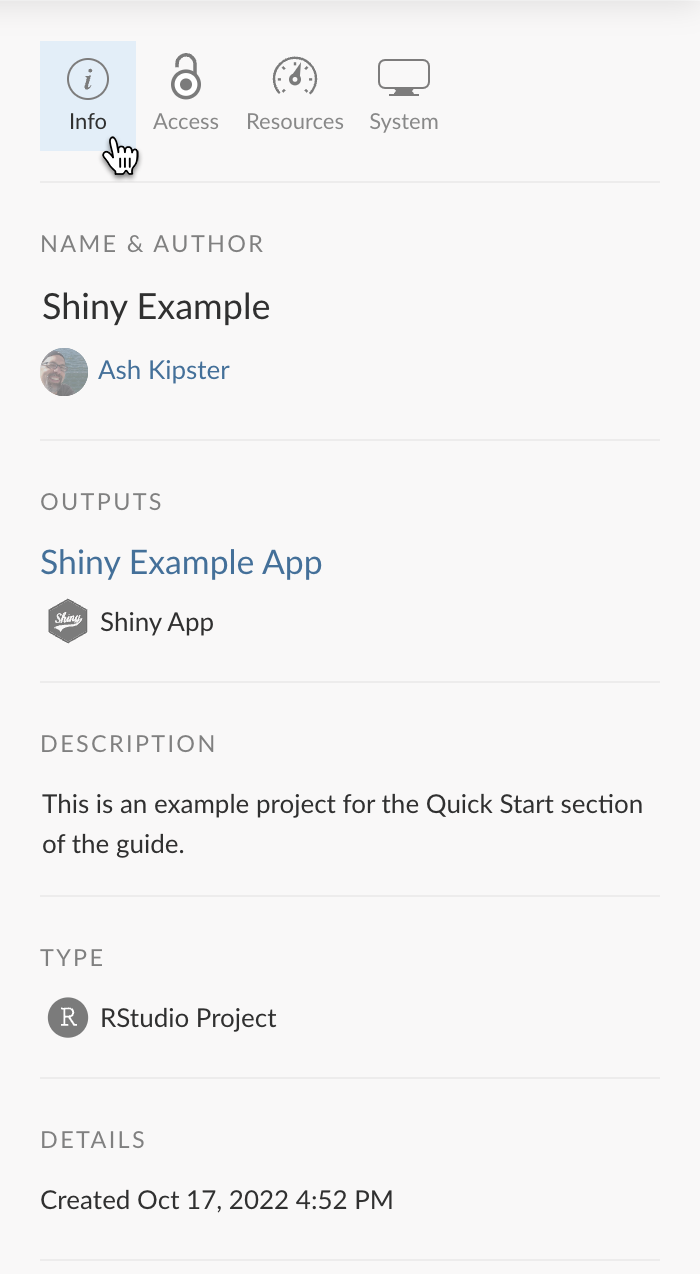
Info Settings
The Info panel shows you basic info about the project and links to any outputs that have been published from the project. You can also edit the project’s name and description.
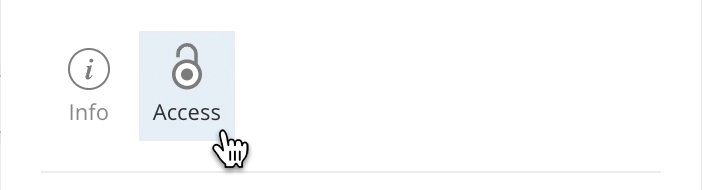
Access Settings
The Access panel shows you who has access to the project, and allows you to change who can access the project.
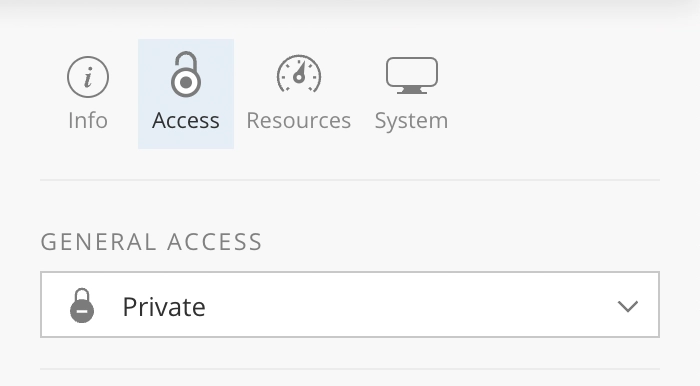
Access options vary depending on whether the project is in Your Workspace, or in a shared space. See Content Access in the Share & Collaborate in Spaces section for details.
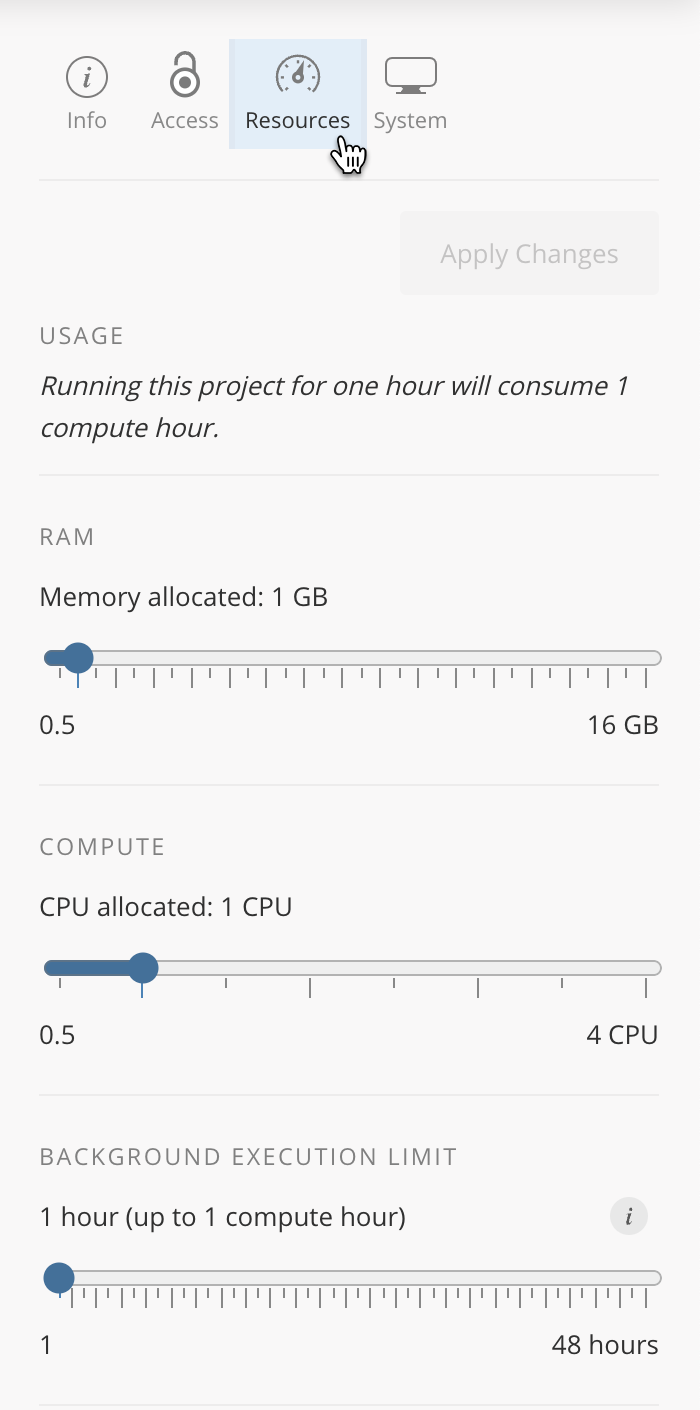
Resources Settings
For open projects
To ensure that each project executes securely and independently from all other projects, Posit Cloud deploys each project in its own container. This also enables each project to specify the resources that are allocated to it.
By default, each project is allocated 1 GB of RAM and 1 CPU, and given a background execution limit of 1 hour.
If you close or stop interacting with a project, the background execution limit determines the maximum amount of time a project can execute code until it gets automatically shut down. Projects have a maximum runtime of 24 consecutive hours beyond the configured background execution limit, even if you interact with them.
If your plan allows it, you can increase the memory, CPU or background execution time allocated to a project. To do so, use the Resources panel to adjust the allocation.
Configurable background execution limit is not currently supported for Jupyter Projects
Note that copies of a project will inherit its resource settings. However, the effective allocation for the copy will be limited by the maxiumum allowed by the account that “owns” the new copy.
The usage hours consumed by a project in a given amount of time depend on the resources allocated to the project, according to the following formula: (RAM + CPUs allocated) / 2 x hours.
A project’s session will go idle 15 minutes after the last interaction, if it is not actively executing code. We do not charge for usage while a session is idle, even though its container remains deployed for additional time.
On disk, each project is allocated up to 20GB for its files, data, and packages.
The maximum size of an individual file that can be uploaded to a project is 500MB.
System Settings
For open projects
Posit Cloud deploys each project in its own container. The System settings panel specifies the operating system used in that container.
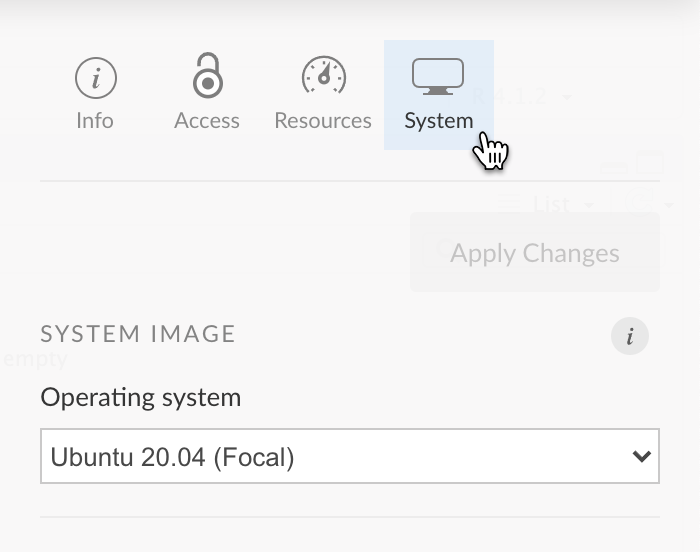
Note that when a version of the OS is no longer supported it becomes a security risk for Posit Cloud to continue to run projects using that version. When this happens, as it did with Ubuntu 16.04, we will automatically migrate any projects using that OS to a more recent version of the operating system.
Project Actions
Export
You can download the contents of a project to your computer as a .zip file.
How To
Press the Export action for the project that you want to download. ![]()
A dialog box will appear showing the progress of your export. The process can take anywhere from a few seconds to a couple of minutes, depending on the size of the project, and how recently it was opened.
Once the export is complete, press the Download button in the dialog box to download the project .zip file to your computer.
Move
Projects can be moved from one space to another. You can move any project that you have created, or if you are an admin or moderator of a space, you can move any project in the space.
To move a project from a space in one account to a space in a different account, you must have permission to transfer content out of the current account. If you do not have permission, you will not be able to move a project to a space owned by another account. See the Control Account Content section for details on setting the permission.
When a project is moved to a space owned by a different account, it becomes subject to the project resource limits of the new space’s account - and any subsequent compute hours are charged to the new space’s account.
How To
Press the Move action for the project you would like to move. ![]()
In the dialog box that appears, select the space that you would like to move it to, and press OK.
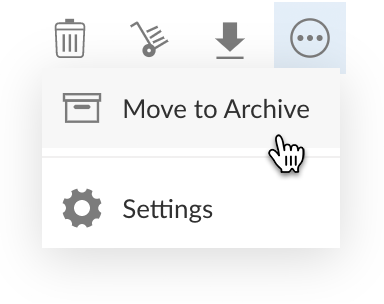
Move to Archive
If you are no longer working with a project, but want to retain it for possible future use, you can move it to the archive. Projects in the archive are retained indefinitely and do not count against any space or account limits. While in the archive, a project cannot be opened or edited.
How To
To move a project to the archive, press the menu button ![]() and choose Move to Archive from the menu.
and choose Move to Archive from the menu.
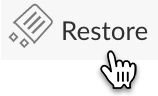
Restore from Archive
When a project is in the archive you can restore it. It will be removed from the archive, appear in the space’s content listings, and can be opened and edited.
How To
Select the Archive list to view the archive for the current space.
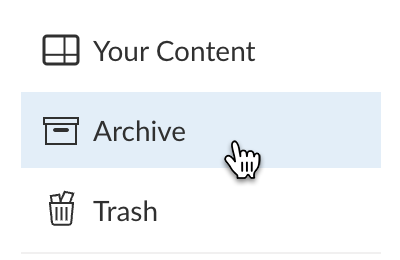
Press the Restore action for the project you would like to restore.
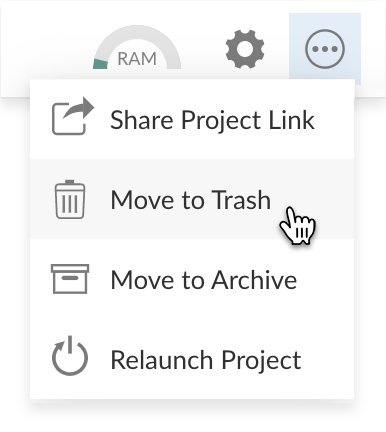
Move to Trash
If you no longer need a project you can move it to the trash. Projects in the trash are retained for 30 days, or until the trash is explicitly emptied - they are then permanently deleted. While in the trash, a project cannot be opened or edited.
How To
To move a project in any content listing to the trash, press the Move to Trash action for the project. ![]()
To move an open project to the trash, press the menu button ![]() and choose Move to Trash from the menu.
and choose Move to Trash from the menu.
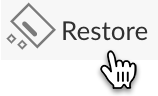
Restore from Trash
When a project is in the trash, you can restore it. It will be removed from the trash, appear in the space’s content listings, and can be opened and edited.
How To
Select the Trash list to view the trash for the current space.

Press the Restore action for the project you would like to restore.
Add / Remove from List
In shared spaces, projects can be added and removed from Lists. See Organize Content with Lists in the Share & Collaborate in Spaces section for details.
Project Templates
Project templates serve as convenient starting points for any project. When you create a project from a template, the packages and files from the template are pre-loaded into your new project.
Posit provides a number of templates, but more importantly, you can also create your own custom templates for you and your colleagues to use. By creating and using templates, you can speed up your workflows, and define common sets of packages to begin your analyses from.
Create a Template
A project template is simply an RStudio or Jupyter project that has been designated for use as a template. When you designate a project as a template, nothing about the project changes - it just changes how Posit Cloud presents the project, and how you and members of your space interact with it.
Space admins and moderators define templates for use within a space as follows.
How To
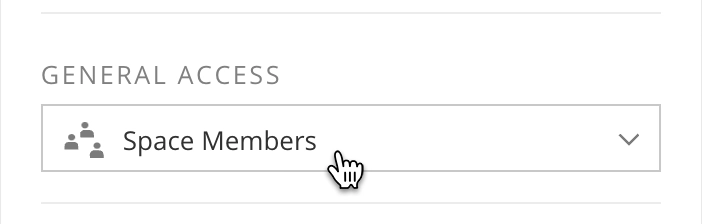
Open the Project Settings: Access panel
Typically, you will want to set General Access to Space Members so that everyone in the space can use the template
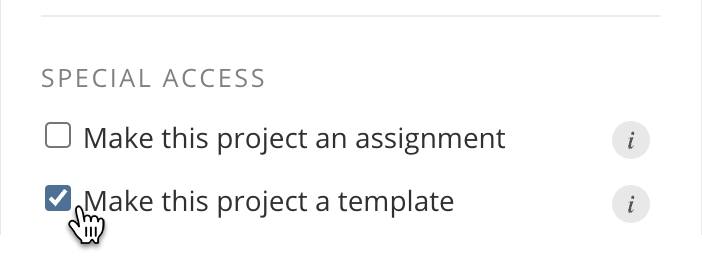
Check the “Make this project a template” box in the Special Access section
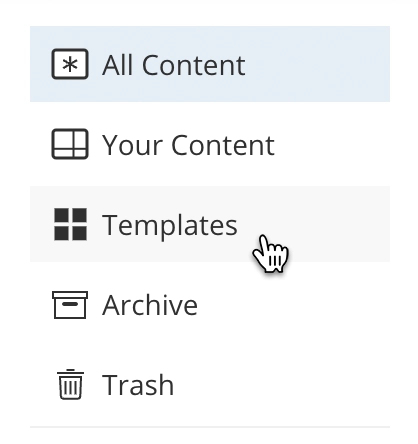
When a project has been designated as a template, it will appear in the New Project from Template dialog. It will no longer appear in the All Content list, but will be shown in the special Templates list and tagged as a template. ![]()
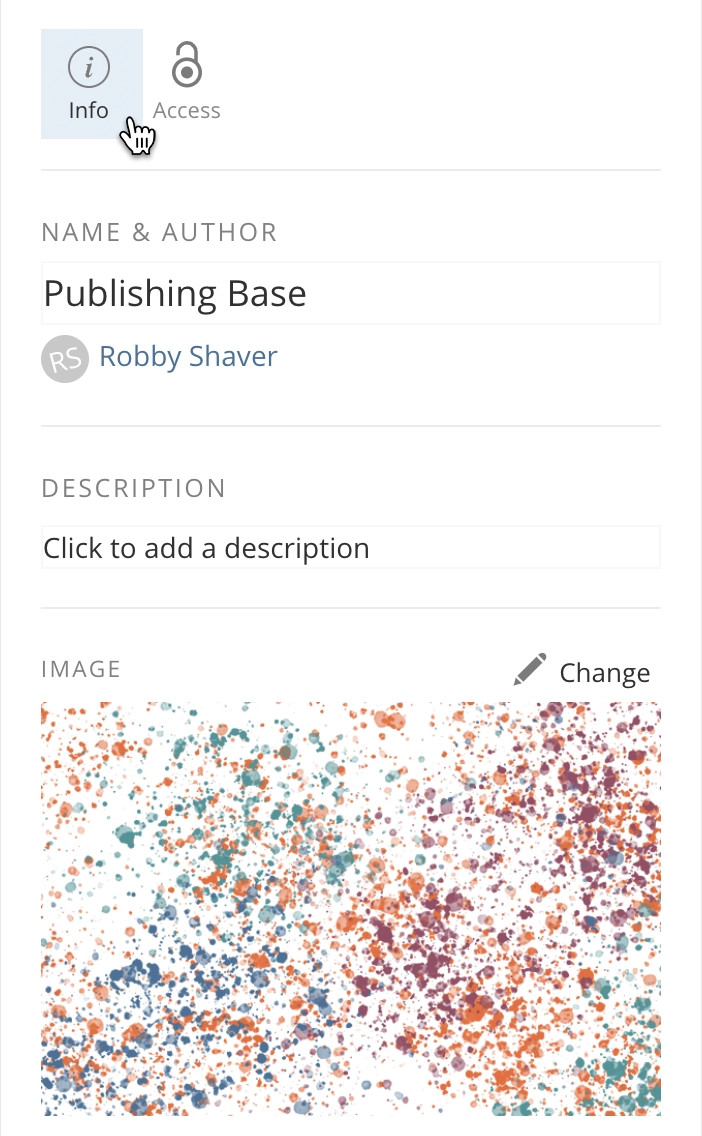
You can update a template’s name, description and image in the Project Settings: Info panel.
Default Template
You can also designate an RStudio or Jupyter project as the default template for projects of its type. A default template serves as the starting point whenever a project of its type is created in the space from the New Project menu.
How To
- Designate the project to be a template, as described above
- Set General Access to Space Members - the template must be accessible to all space members to serve as a default template
- Check the “Make it the RStudio / Jupyter default” box in the Special Access section
Default templates are tagged and shown in the Templates listing for the space. ![]()
Update a Template
You, as a space admin or moderator, can update any template - simply go to the Templates list and open the template, then make and save your changes.
Note that changes are not retroactive and will not be applied to projects previously created from the template. They will only apply to new projects created after you have made your changes.