Manage Accounts
To find a list of information about accounts that you own or are a member of, including account IDs, visit https://posit.cloud/whoami.
There are two kinds of accounts on Posit Cloud - personal accounts and organization accounts.
Every user of Cloud has a personal account.
Every user can also own, or be a member of, any number of organization accounts. An organization account provides access to advanced features for multiple members of a team or organization.
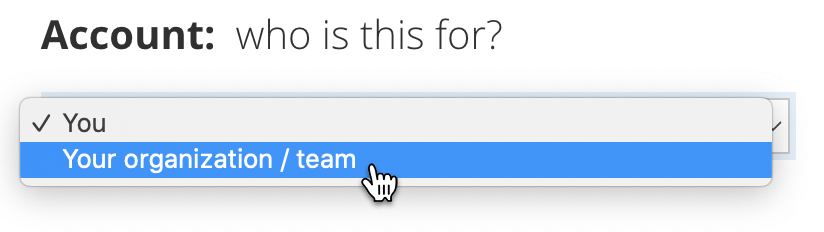
If you are interested in creating an account for your organization or team, select the “Your organization / team” option on the Basic, Standard, or Instructor plan pages.
Organization accounts on Standard or Instructor plans also allow for single sign on (SSO) via a SAML integration, so that users can log in to Cloud using their organization’s authentication method.
Personal Account
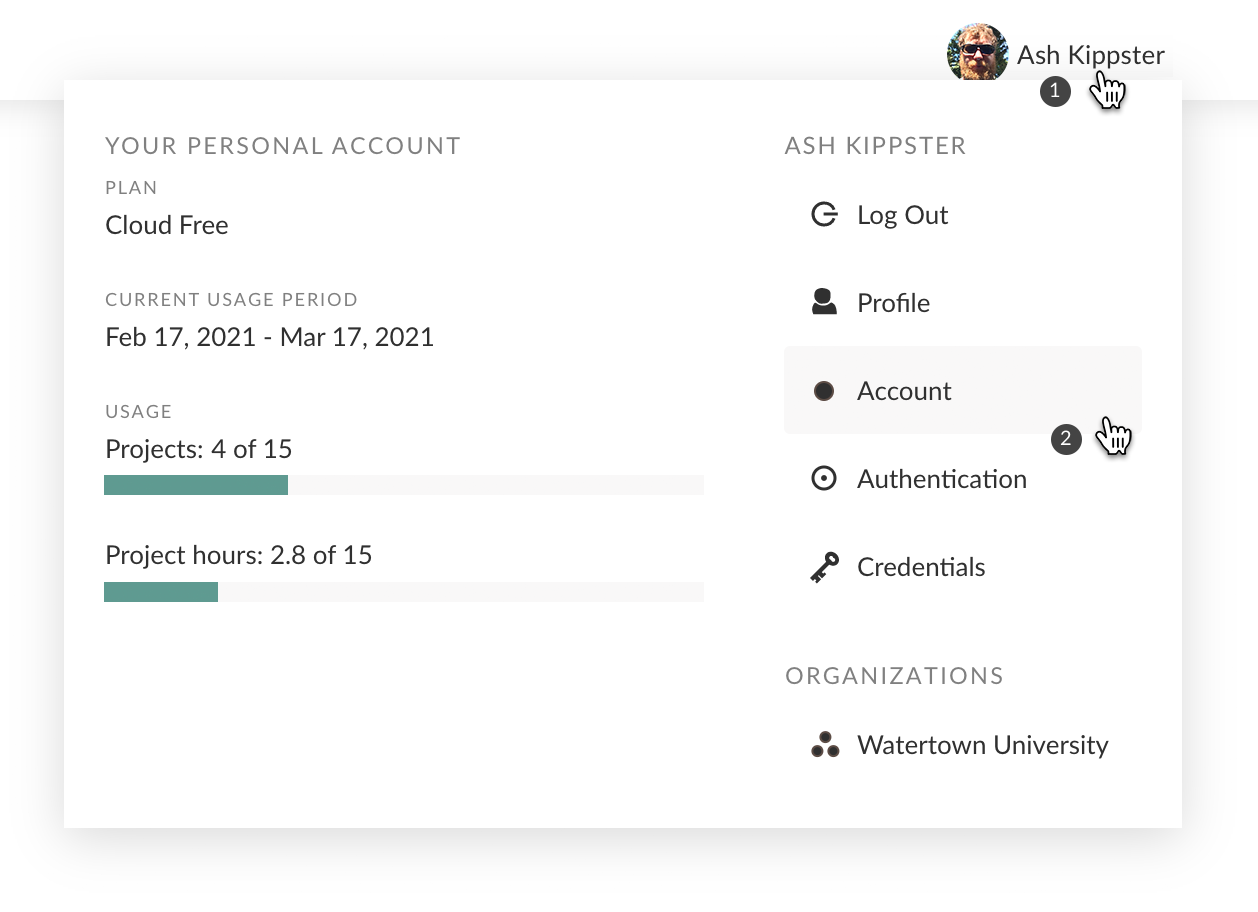
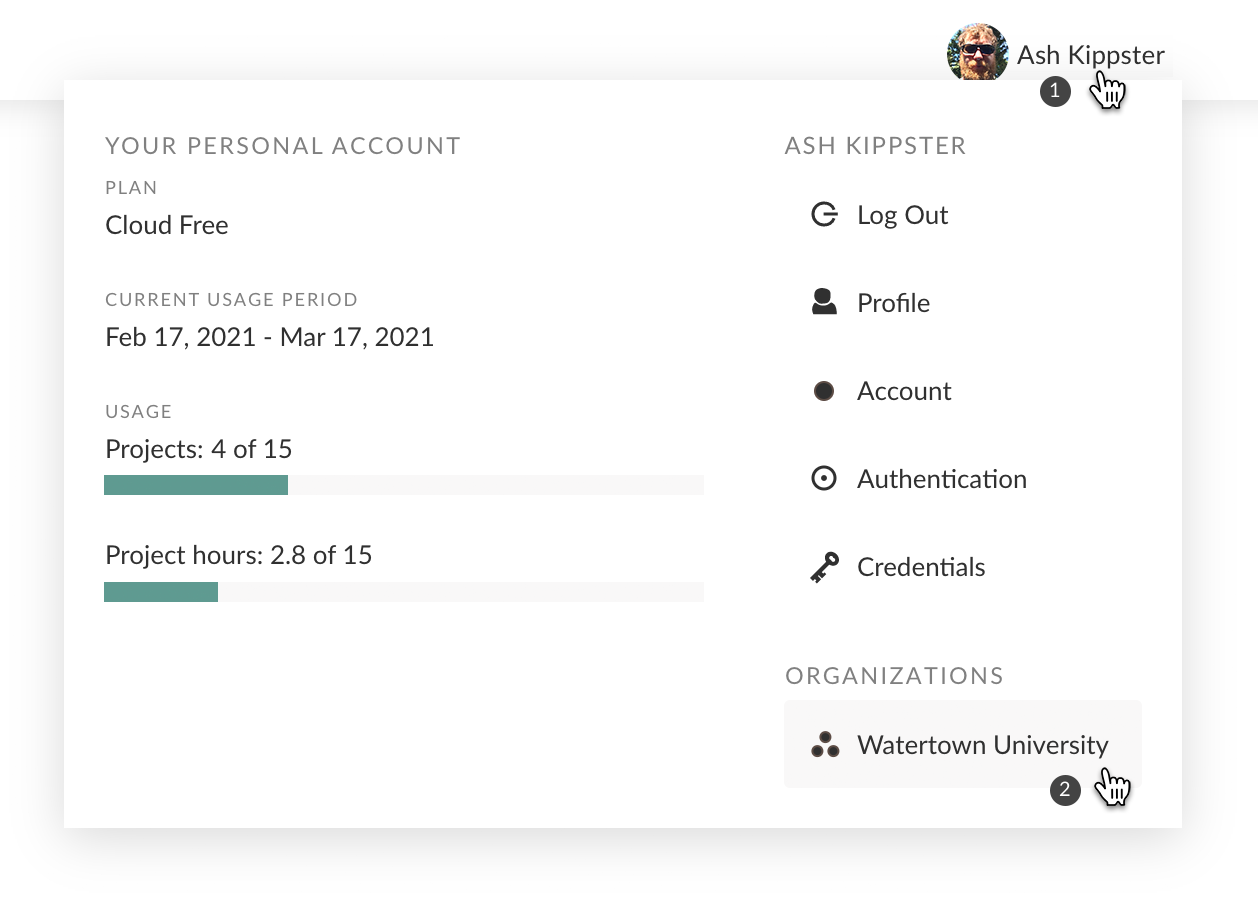
To see your personal account status, click on your icon/name in the header to open the User panel. To see additional account details and to manage your account, click on the Account menu item.
Organization Accounts
To view or manage an organization account, click on your icon/name in the header to reveal the User panel, then click on the organization name.
Account Plan
The account plan provides a license which specifies the capabilities and limits of what can be done in the account. The account owner can view an account’s current plan and license capabilities on the Account Overview page.
To see our available plans, visit the Plans & Pricing page.
To modify a plan purchased via our Sales team, reach out to your sales representative.
For plans purchased via a subscription, the account owner can perform the following actions on the Account Overview page.
Change Number of Licensed Seats
If you own an Organization account, or have an Instructor: Fee per Student plan, you can adjust your account’s licensed seats at any time. The number of licensed seats sets the maximum number of members, instructors and/or students you can have in your account, and affects your monthly invoice. Any changes you make will be prorated for the remainder of the current month, and then apply in full to future monthly invoices.
How To
- Go to Account Overview
- Press the change link
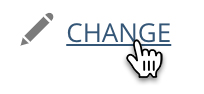 next to the type of license seat you want to adjust
 - Make your changes and press the Update Subscription button
Change Your Plan
How To
- Go to Account Overview
- Press the Upgrade or Change Plan button - this will take you to Plans & Pricing
- Select the plan you would like to subscribe to
Change Your Payment Method
How To
- Go to Account Overview
- Press the Update button in the Payment section
- Enter your new payment information in the form that appears
- Press the Save Changes button
Cancel Your Subscription
How To
- Go to Account Overview
- Press the Cancel Plan link
- Confirm that you want to cancel your subscription
Note that cancellation takes effect at the end of your current period and the account will be switched to the Cloud Free plan. None of your spaces or content will be deleted, but you will be subject to the Free plan limits for creating and working with spaces and projects. You can resubscribe at any time.
Delete your account
If you want to delete your account for Cloud, you must submit a support ticket by completing this Posit support form. Please include your account ID and, if possible, send the request from the email address used to create your account.
Deleting your account removes it from both posit.cloud and shinyapps.io, because the same account is shared across both platforms. We can’t delete only a shinyapps.io or posit.cloud account while leaving the other one active.
Where You Work Matters
One important note: your account’s plan determines the capabilities and limits within spaces created with your account. When you work in spaces owned by another account, the limits and capabilities of that account apply. For example, if you are a student with a Cloud Free plan who is taking a course, and your school provides you access to a course space, the school’s account will determine your capabilities and limits in the course space. Any usage will be attributed to the school’s account for work you do in the course space as well. Your account limits and capabilities and usage attributions will apply only when you work within Your Workspace or other spaces created with your personal account.
Manage Account Members
The account owner and account admins can manage the members of an account.
Every member of an account is assigned a role. The role determines what a member is able to do within the account.
Account Roles
- Owner: can manage the account plan, account members, spaces and content, and view account usage data.
- Admin: can manage account members, spaces and content, and view account usage data.
- Moderator: can manage spaces and content, and view account usage data.
- Contributor: can create and manage their own spaces.
- Participant: anyone who is added to a space owned by the account is automatically added to the account and given this role. The role does not grant them any additional capabilities in the account. When they leave or are removed from the space, they are also automatically removed from the account.
Note that users who join spaces owned by the account are automatically added to the account as Participants - they do not have to be explicitly invited to join the account. They are also automatically removed from the account when they leave or are removed from their “last” space - so there is nothing that needs to be done to manage them at the account level.
For a personal account, the only possible roles are Owner and Participant, and these are automatically assigned by Posit Cloud.
Add Member
Organization Account Only
Use Add Member to explicitly invite users to become members of your account.
How To
- Go to Account Members
- Press the Add Member button
- Complete and submit the dialog that appears
The invitee will be sent an email with a link that allows them to join the account. For security reasons, the invitation is good for 7 days from the time that it is sent.
You can view the list of outstanding invitations by pressing the Invitations option. You can then copy, resend or revoke any outstanding invitation by selecting the corresponding action for that invitation.

Remove Member
Use Remove Member to remove a member from the account. They will also be removed from any spaces owned by the account.
How To
- Go to Account Members (or Account Participants for a personal account)
- For the member you would like to remove, press the trash button
- Complete and submit the dialog that appears
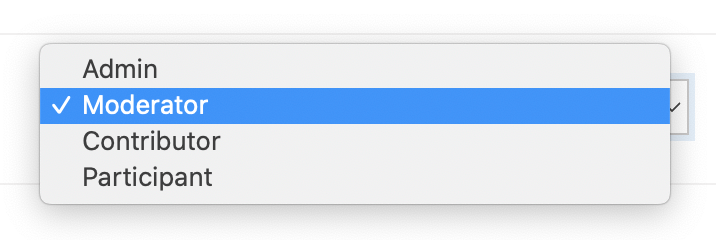
Change Member Role
Organization Account Only
As described in the Account Roles section, the member’s role determines what they are able to do in the account.
How To
- Go to Account Members
- For any member in the list, select their new role
Organization Accounts and Spaces
The following is a diagram of the relationship between an organization account and its spaces, tagged at each level with typical role assignments for an educational institution.

A key takeaway is that Cloud supports distributed member management for organization accounts. At the account level, you only need to be concerned with members you want to manage the account or create spaces. Space members’ account membership is managed automatically as they are added to or removed from spaces.
Control Account Content
By default, account members can transfer content out of the account. However, there are cases where it is important that the account retain control over all content in the account. For example, you might want to prevent employees from taking their work with them if they leave your organization.
You can remove the ability of members to transfer content out of the account.
How To
- Go to Account Members
- In the Options panel, toggle the transfer content permission for any account role
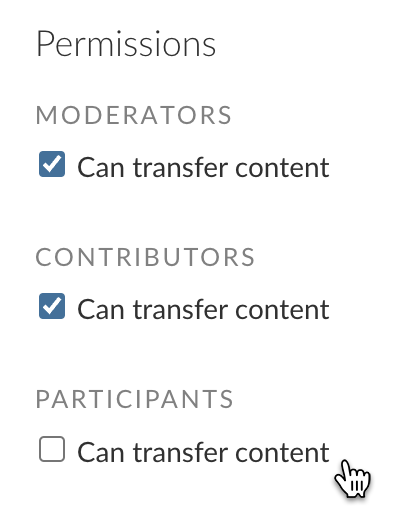
If the permission is unchecked, members of the account with that role will not be able to move content, or copy spaces, to other accounts.
The account owner and account admins can transfer content, regardless of these settings.
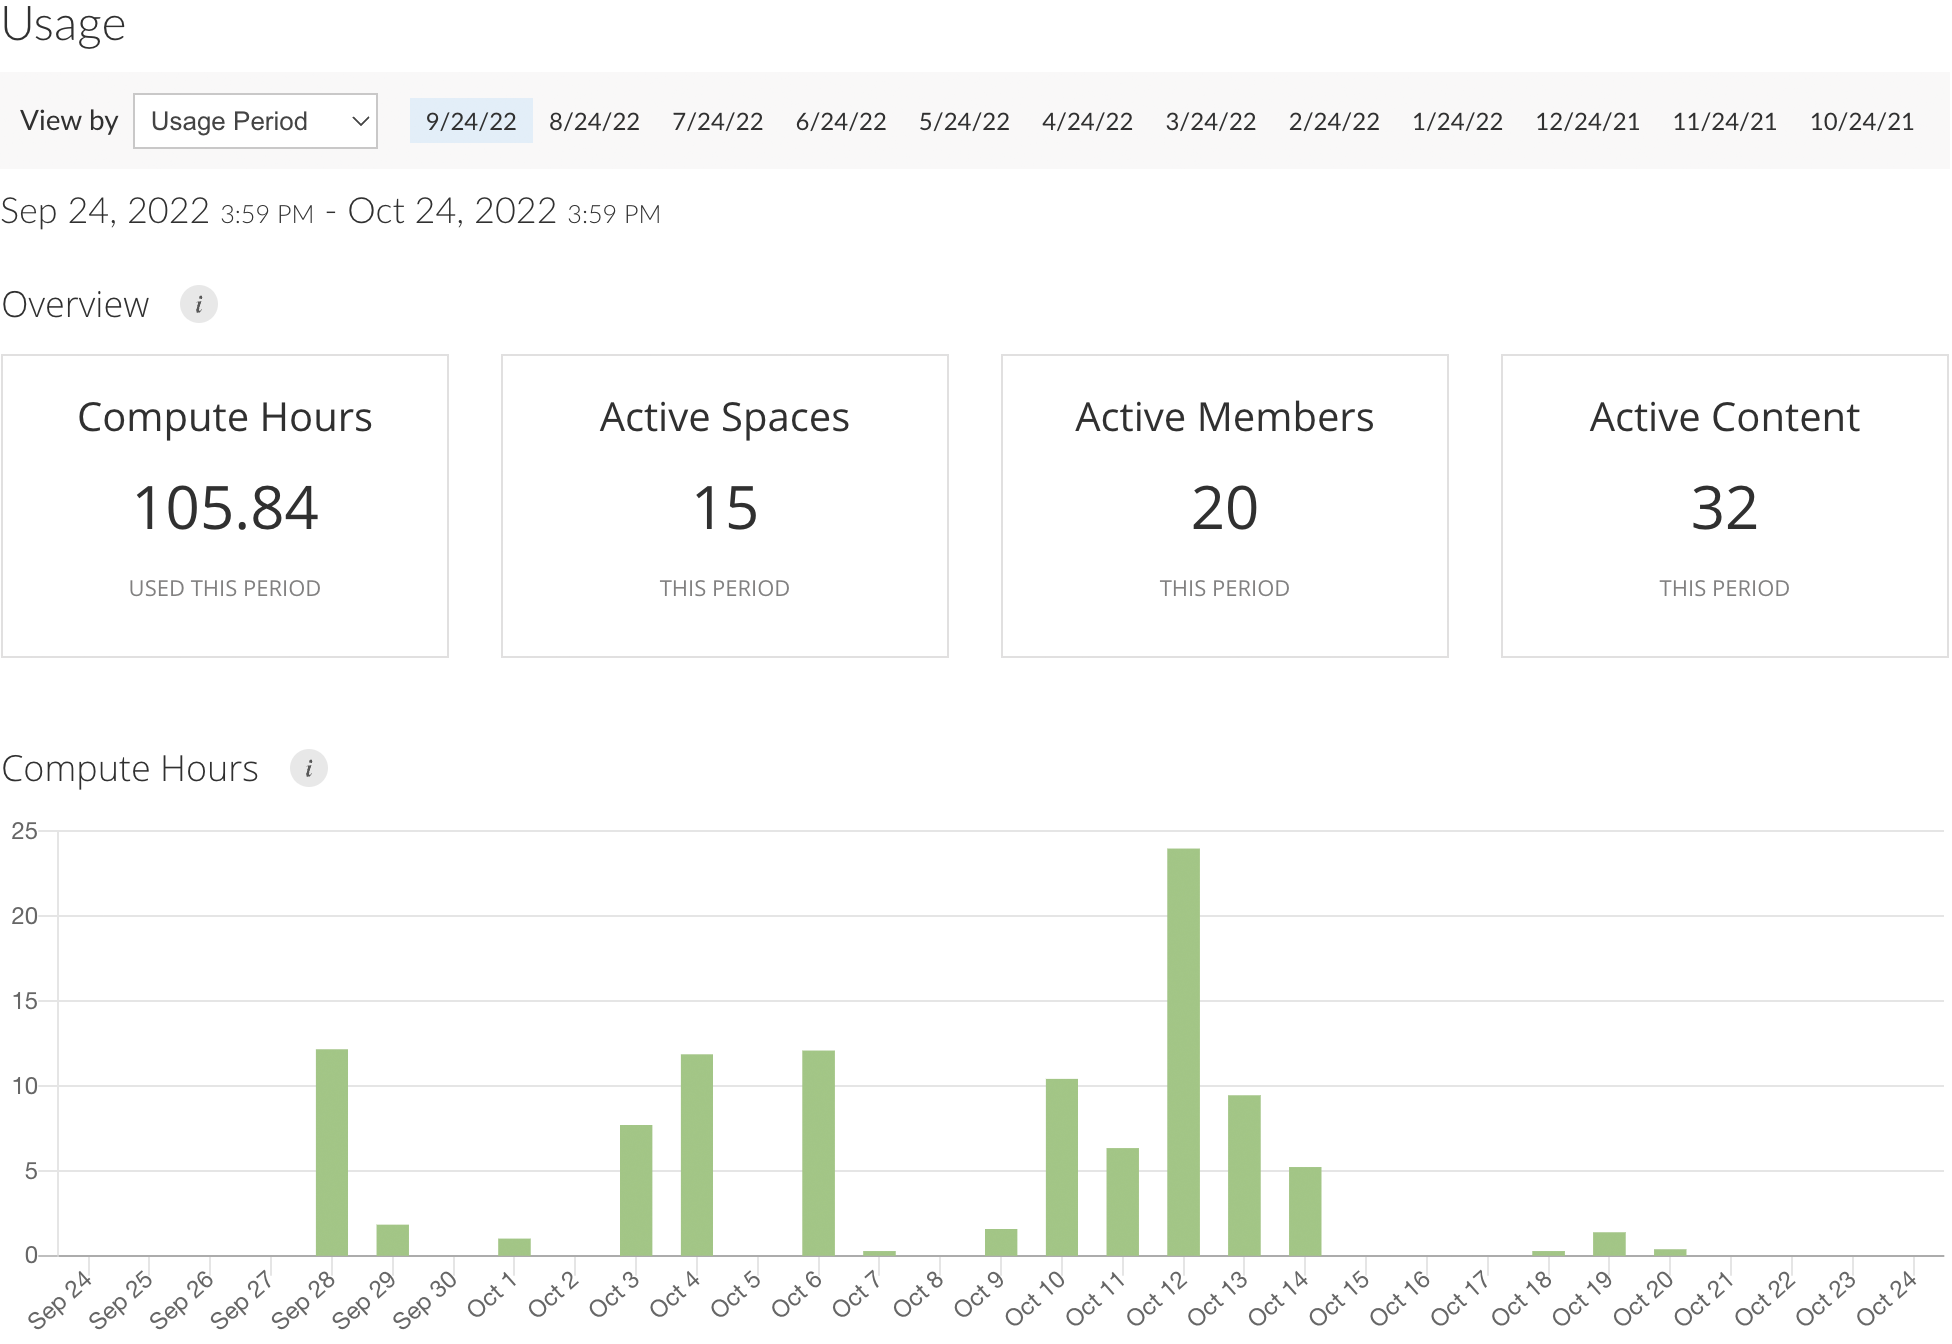
Account Usage
When a project is opened or code in it is executed, when an application is run, when an API is accessed, or when content is generated, Posit Cloud records that usage activity. Usage activity is associated with the space and the account in which it occurs, and is measured in compute hours. See the Compute Hours section for more detail on how compute hours are calculated.
To view usage statistics for an account, go to Account Usage. You can view summary usage information for the account over a given period, and view the data for individual spaces, members and projects within the account.
Account Spaces
To view and manage the spaces in your account, go to Account Spaces. You can see the list of both active and archived spaces, with summary information about each space. Select any space in the list to see additional info and perform any of the following actions.
- Navigate to the space.
- Copy the Space.
- Delete the Space.
- Archive the Space.
- Restore the Space (from the archive).
Account Invoices
If your account is paid for via a subscription, go to Account Invoices to view the invoices associated with your subscription.
Account Tokens
Tokens are used to enable publishing outputs to Posit Cloud from external environments.
How To
- Go to Account Tokens for your personal account
- Press the New Token action - this will create a new token and display it in your list of tokens
- Press the Copy action on the new token
- In the dialog that appears, follow the instructions to use your token to publish from R or python
See the Publish Outputs section for more details on publishing.
Account Settings
View basic account information. For organization accounts, you can also change the account’s display name and owner.
Change Account Display Name
Organization Account Only
How To
- Go to Account Settings for your organization account
- Press the change link next to the account display name
- Enter and submit a new display name in the dialog that appears
Change Account Owner
Organization Account Only
How To
- Go to Account Settings for your organization account
- Press the change link next to the account owner
- Enter and submit the email of the new account owner in the dialog that appears
Note that the new owner must have a Posit Cloud account with the email that you enter.
Also note that if you are the current owner of the account, you will be removed from the account - if you want to retain access to the account, the new owner must add you to the account.
Beta Features
Beta features are features that are still under development and may change in the future. These features often have known limitations that prevent them from being made available widely, but may be enabled on your account for experimentation. Your feedback on these features helps shape future work.
Account owners with a Basic, Standard, or Instructor plan can enable access to beta features for their account.
How To
- Go to the Account Overview page.
- Click on the configure link to go to the Configure Beta Features page.

- Click on the toggle switch to enable any listed feature.
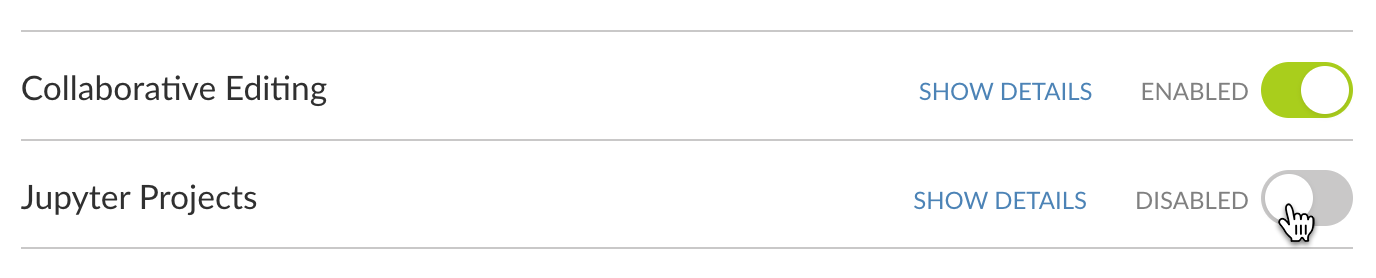
We recommend you review the details of a beta feature, including the known limitations of the current implementation, before use. Please see the following for more details about our current beta features:
Login
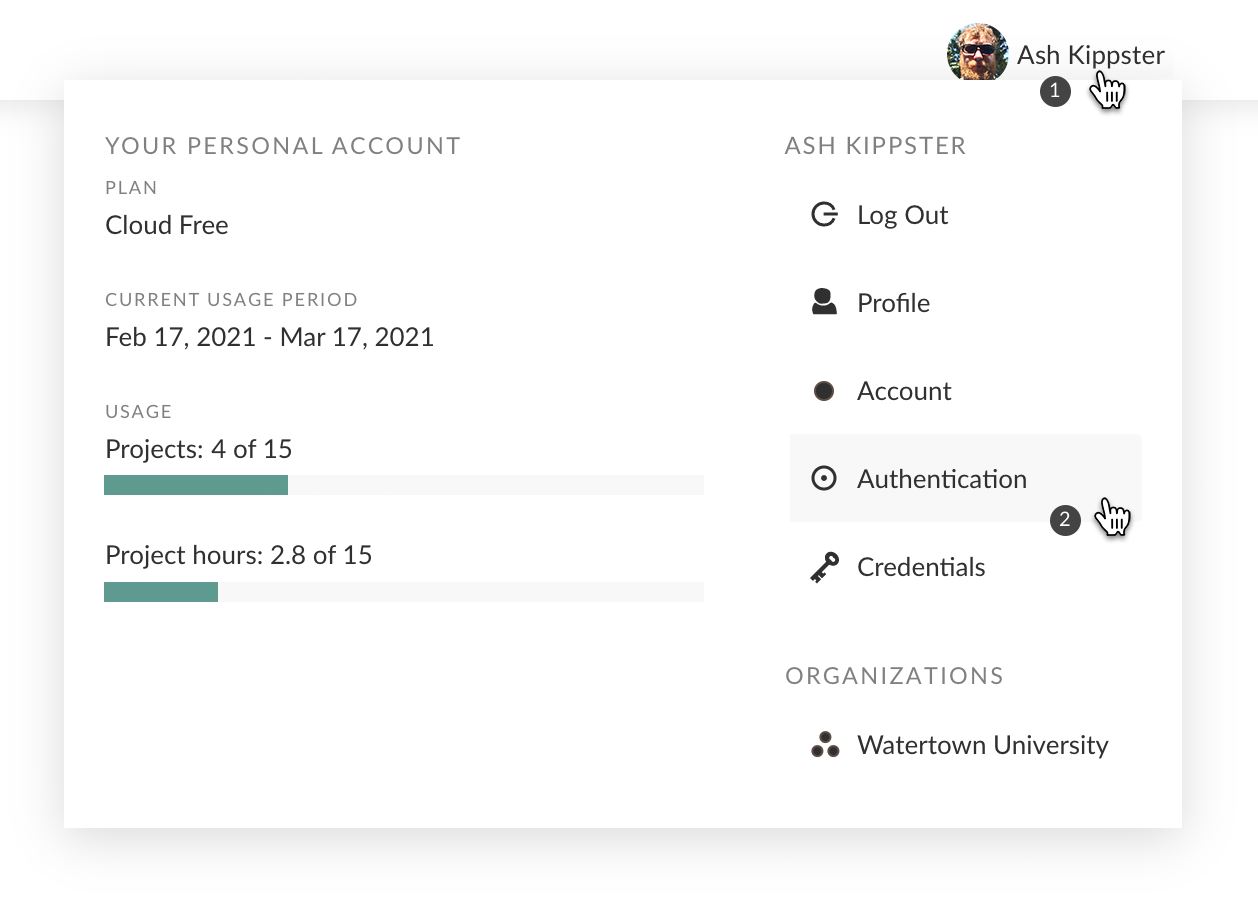
You can log in to Cloud via your email address and a password, or by using an existing Google or GitHub account. To change your email address, password, or how you log in, go to the Authentication page of Posit User Settings. To get there, click on your icon/name in the header to reveal the User panel, then click on Authentication.
SSO Configuration
For Organization accounts on Standard or Instructor plans, Posit Cloud supports SAML 2.0 for SSO integration. We’ve successfully integrated with Shibboleth, Azure/ADFS, Okta, and other identity providers.
Important things to know before configuring SSO:
- Users may only belong to one SSO enabled account.
- Once a user is a member of your SSO enabled account, they will be forced to log in via your IdP anytime they access Cloud.
- All invitations sent by Cloud for your account, or spaces in the account, will direct users to your IdP.
- If users on your Cloud account also use shinyapps.io, they will no longer be able to log in to shinyapps.io. This is because users and accounts in Cloud and shinyapps.io are shared, but SSO is not available on shinyapps.io. If this is the case, then there are two options your users may take before you enable SSO:
- Create a new shinyapps.io user
- Create a new user on shinyapps.io.
- Log in to shinyapps.io with the old user that is going to be tied to SSO.
- Download content bundles.
- Transfer ownership of their shinyapps.io account to their newly created user.
- Log in to shinyapps.io with the new user.
- Upload the content bundles that were previously downloaded.
- Migrate content on shinyapps.io to Connect Cloud
- Sign up for Connect Cloud using the same user that is used for Cloud and shinyapps.io.
- Deploy content that was previously deployed to shinyapps.io.
- Optional: Sign up for an org plan on Connect Cloud which will let you use the same SSO for Cloud and Connect Cloud.
- Create a new shinyapps.io user
Currently, SSO configuration is a manual process - please contact your sales representative to begin the process. The following are the questions that we will ask in order to configure Posit Cloud to work with your system as an identity provider.
- What IdP software are you using?
- Where can we find your IdP metadata XML? Please provide it as an attachment or a link to where we can fetch it.
- What are the attribute names that will be released to us? We request the following data:
- Stable and Unique Identifier (typically
eduPersonTargetedIdoreduPersonPrincipalName). - First Name (typically
givenName) - Last Name (typically
sn)
- Stable and Unique Identifier (typically
- What
organization-namewould you like to use in your dedicated login URL, which will be of the form:https://sso.posit.cloud/organization-name. - If you would like to restrict access to a specific subset of users based on a supplied attribute, which attribute(s) should be inspected, and what is the expected value? Typically this is
eduPersonEntitlement.
Things to know about our Service Provider implementation:
- Our metadata can be found at https://login.posit.cloud/saml/sp.xml
- We require signed responses, so this may need to be configured in your IdP.
- We do not support IdP initiated log in. After we have set up your IdP we will provide you with a link that you can add as a bookmark in your IdP that will automatically kick off the login workflow and ultimately take your users to your Connect Cloud account home page.
Once configured, your users will access Cloud via your dedicated login page that will link to your authentication system. All invitations sent by Cloud to your account or spaces will also direct users to your dedicated login page.