Share & Collaborate in Spaces
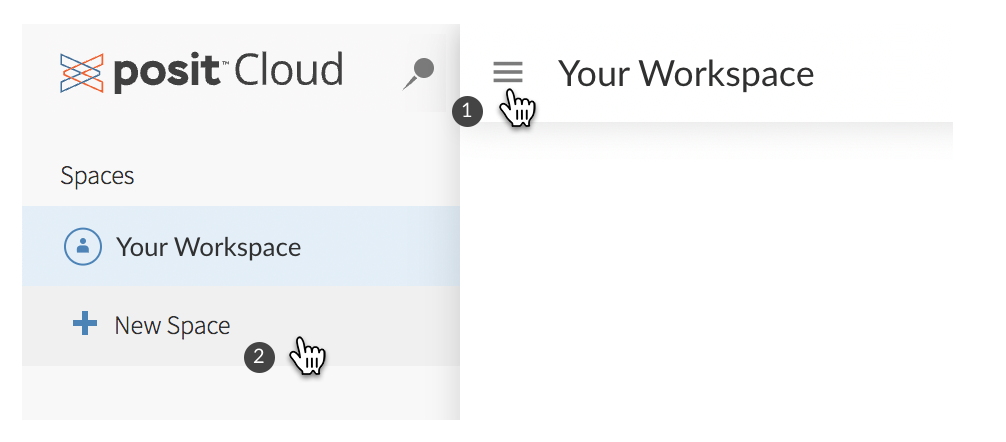
All work in Posit Cloud takes place within a space. You may create spaces and invite others to join you there - or you may be invited to join spaces created by others.
Here are some examples of spaces in Posit Cloud.
- A course space for instructors and students to share and work on class assignments
- A collaboration space for a group of researchers working together on a common project
- Client spaces for a consulting company to securely share work with each client
Following are details for how to create and work in spaces.
Your Workspace
Every Posit Cloud user gets a personal workspace, named Your Workspace, in which to create projects and outputs.
Only you can work on projects and outputs in your workspace, and by default, the projects and outputs you create there can only be accessed by you. However, you can choose to let your projects and outputs be accessed by other Posit Cloud users. For details on how to share projects and outputs with others, see Content Access.
Note that any work you do in Your Workspace is subject to the limits of, and if applicable, charged to, your personal account, even if you are also a member of an organization account at your school or workplace.
Switching Spaces
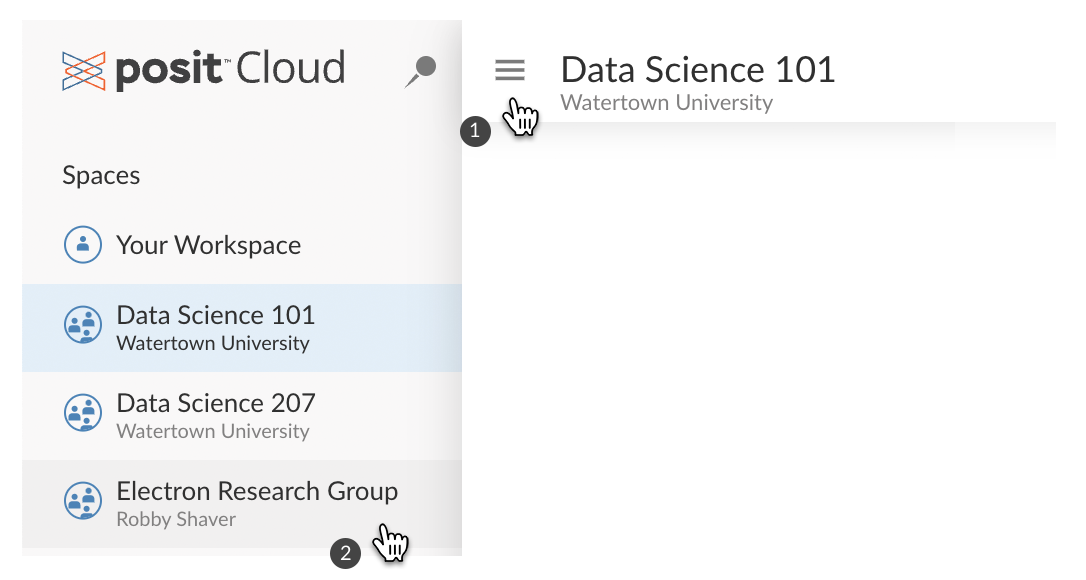
To navigate between spaces, go to the Posit Cloud navigation sidebar and select the space you’d like to go to.
Space Members

After creating a space, go to Space Members to manage its membership. You can add members to your space in three ways:
- To add members individually, choose the Invitation Required option, and send invitations to each person you’d like to add to the space via the Add Member button. Note that for security reasons, the invitation is good for 7 days from the time that it is sent.
- To allow many people to join the space, choose the Sharing Link option, copy the sharing link and then share that link with all the people you’d like to join the space, either via an email or by posting the link on a web page. Keep in mind that anyone with that link will be able to join your space. If you would like to disable a link you previously shared, choose Reset Sharing Link; this will prevent any additional people from joining the space using that link.
- Space membership can also be managed programatically. See API Access from R in the Advanced Topics section for details.
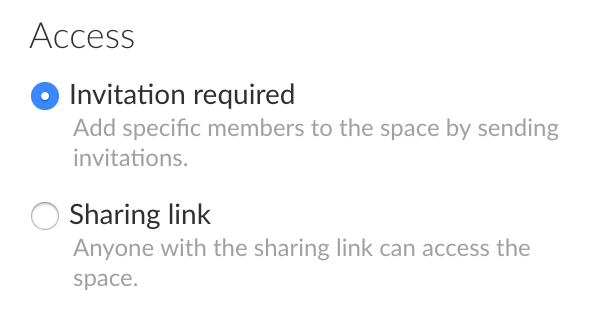
Note that you can switch the access option at any time - a common approach is to initially set the access option to Sharing Link, post the sharing link, then after all the people you want to join the space initially have done so, switch access to Invitation Only. The original sharing link will no longer allow additional people to join the space, but you can add any new members individually.
Roles
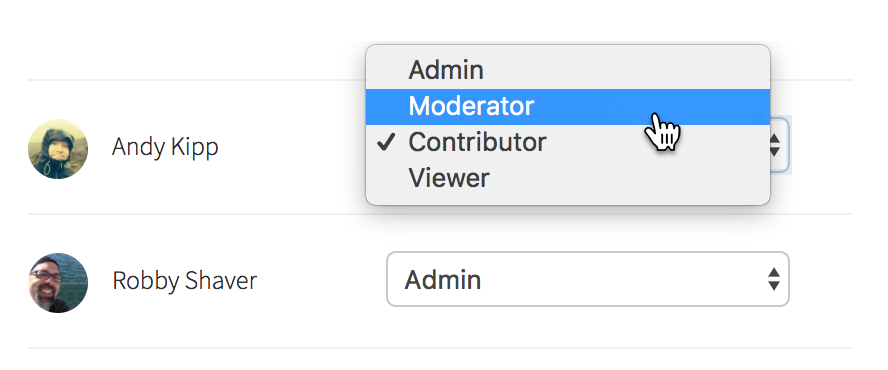
Each member of a space is assigned a role to determine what they are able to do within the space. The available roles are:
- Admin: can manage users, view, edit and manage all content, view space usage data, and archive or delete the space.
- Moderator: can view, edit and manage all content, and view space usage data.
- Contributor: can create, edit and manage their own content. This is the default.
- Viewer: can view content shared with everyone in the space. A viewer cannot create or save copies of projects.
Members are assigned an initial role when they are invited to or join a space, but roles can be changed by an Admin at any time. When you invite an individual member to an Invitation Required space, you set the initial role in the Add Member dialog box. When someone joins via a sharing link, their initial role is set to the current Initial Role setting in the members options panel. Admins can update a user’s role via the role selector in the members list.
Effective Admin Role
Note that the Owner, Admins, and Moderators of the account can manage all spaces owned by the account. This gives them an effective space role of Admin that supersedes any specific space role assigned to them.
Permissions
Changing permissions lets you fine-tune the Contributor and Viewer roles. The permissions are:
- Can see the members list: enables Contributors or Viewers to see who can access the space.
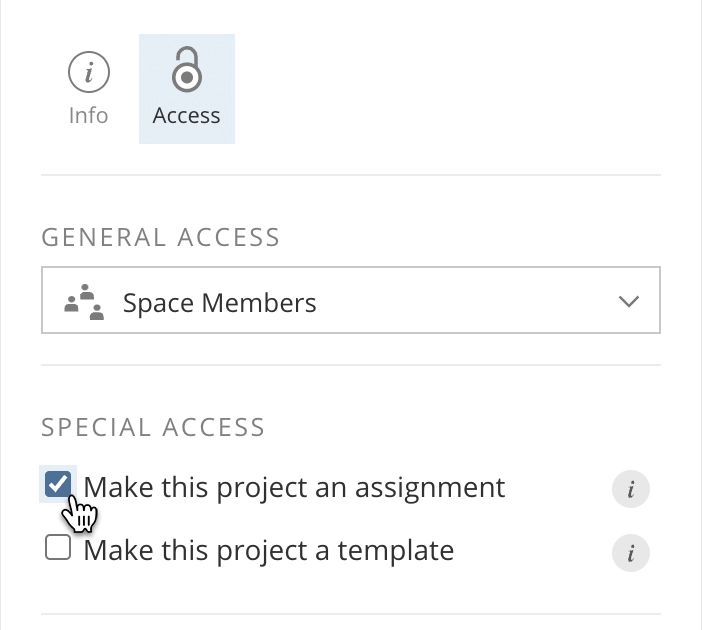
- Can change access to their content: enables Contributors to share their projects or outputs with everyone in the space.
- Can change resources for their content: enables Contributors to change RAM, CPU and scaling settings on their projects and outputs.
Remove Members
If you are an Admin of a space, you can remove any member from that space.
How To
Go to the Members area of the space. For the member you would like to remove, press the Delete icon. You will be prompted to confirm that you would like to remove them from the space, and to choose whether to leave their projects and outputs where they are, move them to the space’s archive, or move them to the space’s trash.
You can also remove members programatically via the Cloud API using the rscloud package.
Space Settings

Go to Space Settings (by clicking the gear icon to the right in the header) to change a space’s name.
Base Project
Base Projects have been replaced by Default Templates
Please see the Project Templates section for details. Existing Base Projects have been automatically converted to Default Templates, and will function as they did before.
Space Actions
Leave Space
If you are a member of a space, but no longer want to be, you can leave the space.
How To
Press the menu button ![]() and choose the Leave Space action.
and choose the Leave Space action.
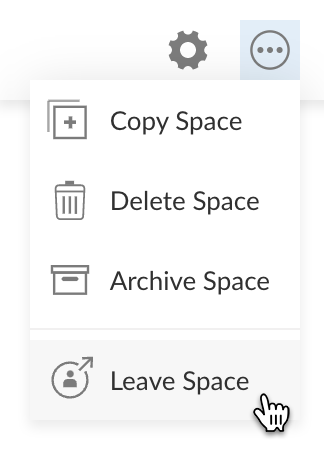
You will be prompted to confirm that you would like to leave the space, and to choose whether to leave your projects and outputs behind in the space, or move them to Your Workspace.
Copy Space
If you’d like to re-use materials from a space, e.g. to teach a new cohort of students, use the Copy Space command. All projects shared with everyone in the original space will be copied over to the new space. Data Connections will also be copied. Members of the original space are not copied over - you will be the only initial member of the new space.
How To
Press the menu button ![]() , choose Copy Space from the Space menu, and complete the action in the dialog that appears.
, choose Copy Space from the Space menu, and complete the action in the dialog that appears.
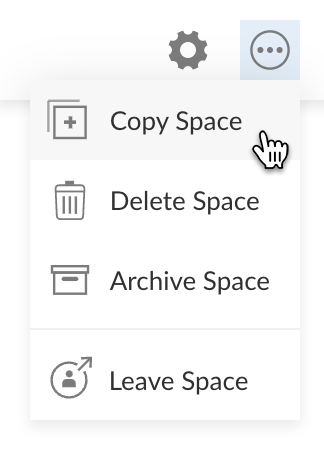
To copy a space from one account to another, you must have permission to transfer content out of the original space’s account. See the Control Account Content section for details on setting the transfer content permission.
Archive Space
If a space is no longer in use, you can archive it to remove it from active use, but retain it for possible future access.
Archiving a space does the following:
- All the content in the space is archived - they no longer count against any account limits and cannot be opened or updated.
- All the members of the space are removed from the space - and may also be removed from the account (see Manage Account Members for details).
- The space is removed from the navigation sidebar and no longer counts against any account space limits.
How To
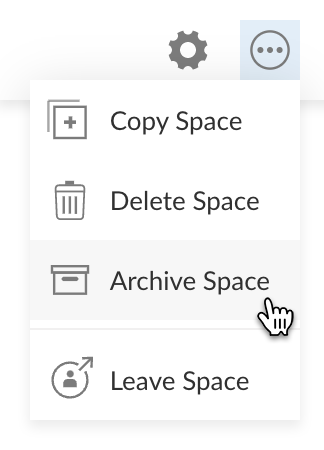
Press the menu button ![]() , choose Archive Space from the Space menu, and confirm the action in the dialog that appears.
, choose Archive Space from the Space menu, and confirm the action in the dialog that appears.
Restore Space
If you need to access an archived space and its contents, you can restore it.
Restoring a space does the following:
- All the projects and outputs in the space are restored - they will count against any account limits and can be opened and edited.
- You will be added as the only member of the space, with the role of Admin.
- The space is added to the navigation sidebar and will count against any account space limits.
How To
You must be an account Owner, Admin or Moderator to restore a space.
- Go to Account Spaces of the account that owns the space (see the Personal Account or Organization Accounts section).
- Select the Archived tab to list the archived spaces in the account.
- Select the space to restore from the list.
- Choose Restore Space from the menu of actions on the right.
Delete Space
If you no longer need a space and its content, you can delete it with the Delete Space command. All content in the space will be deleted.
How To
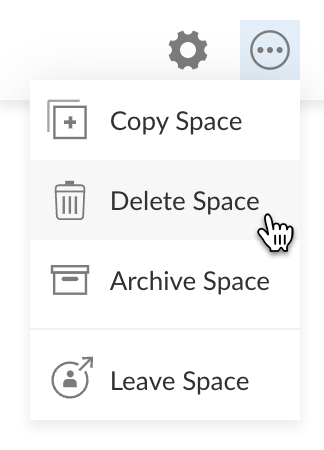
Press the menu button ![]() , choose Delete Space from the Space menu, and confirm the action in the dialog that appears.
, choose Delete Space from the Space menu, and confirm the action in the dialog that appears.
Content Access
Access to Projects & Outputs in Your Workspace
Only you can work on projects and outputs in Your Workspace, but you can choose to let content there be viewed by other Posit Cloud users.
To share a project or output with others, change the content’s access to “All Posit Cloud Users” in the Settings Access panel.

You can now copy the content’s address from your browser and distribute the link however you wish.

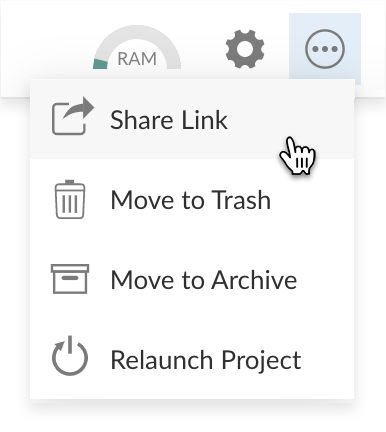
You can also use the Share Link command from the Project or Output menu for an open content item to email the link.
Note that ANY user with the link will be able to view your project or output.
When a project or output can only be accessed by you, a lock icon is displayed in the content listing.
![]()
When a content item can be accessed by anyone (i.e. by any user of Posit Cloud), a cloud icon is displayed in the listing.
![]()
When you access a project created by someone else in their personal workspace, Posit Cloud automatically creates a temporary copy of the original project for you. You can play with and make edits to it, but none of your changes will be reflected in the original. If you’d like to keep the changes you’ve made, save a copy of the project for yourself by pressing the Save a Permanent Copy button.

Collaborative Editing
Collaborative editing is a beta feature that allows multiple users to simultaneously edit the same project.
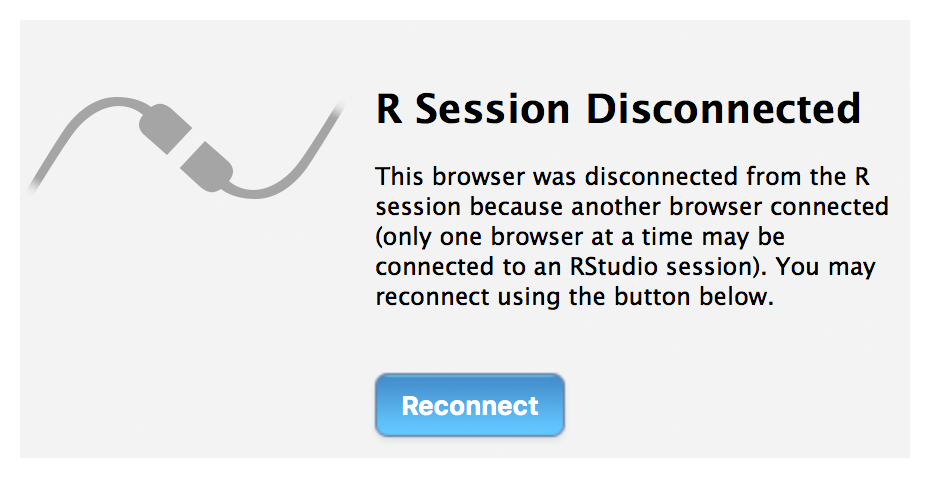
By default, Admins and Moderators in a space can access any project in the space, regardless of the project’s access setting. When an Admin or a Moderator opens another user’s project, they do not open a temporary copy and any changes they make will affect the original. If an Admin or Moderator opens a project while another user has it open, the other user will see the following message unless collaborative editing has been enabled.
If collaborative editing has been enabled, up to 5 users can simultaneously edit the project. You can see who else is working on a project - and the changes to saved files that any user makes are immediately displayed to the other users.
If collaborative editing has not been enabled, you will take over the other user’s session, and they will see the session disconnected message above.
To enable collaborative editing, see the Beta Features section.
Known Collaborative Editing Limitations
Following are the known limitations of collaborative editing:
- Members with the Admin or Moderator role in a space can use collaborative editing in projects with each other, and with the authors of projects regardless of role. Members with the Contributor role can use collaborative editing in projects they have authored, with Admins and Moderators. Contributors cannot use collaborative editing with each other.
- If a user installs packages, those packages are available to other users with the project open, but their Packages pane will not automatically update. Refreshing the Packages pane will cause all installed packages to be listed.
- You will see a Share Project … menu item in the IDE’s File menu. It is not how you share projects in Posit Cloud, and will be removed in the future.
- Collaborative editing is only available for RStudio projects. It is not supported in Jupyter projects, and we do not currently have plans to support it there.
Space Usage

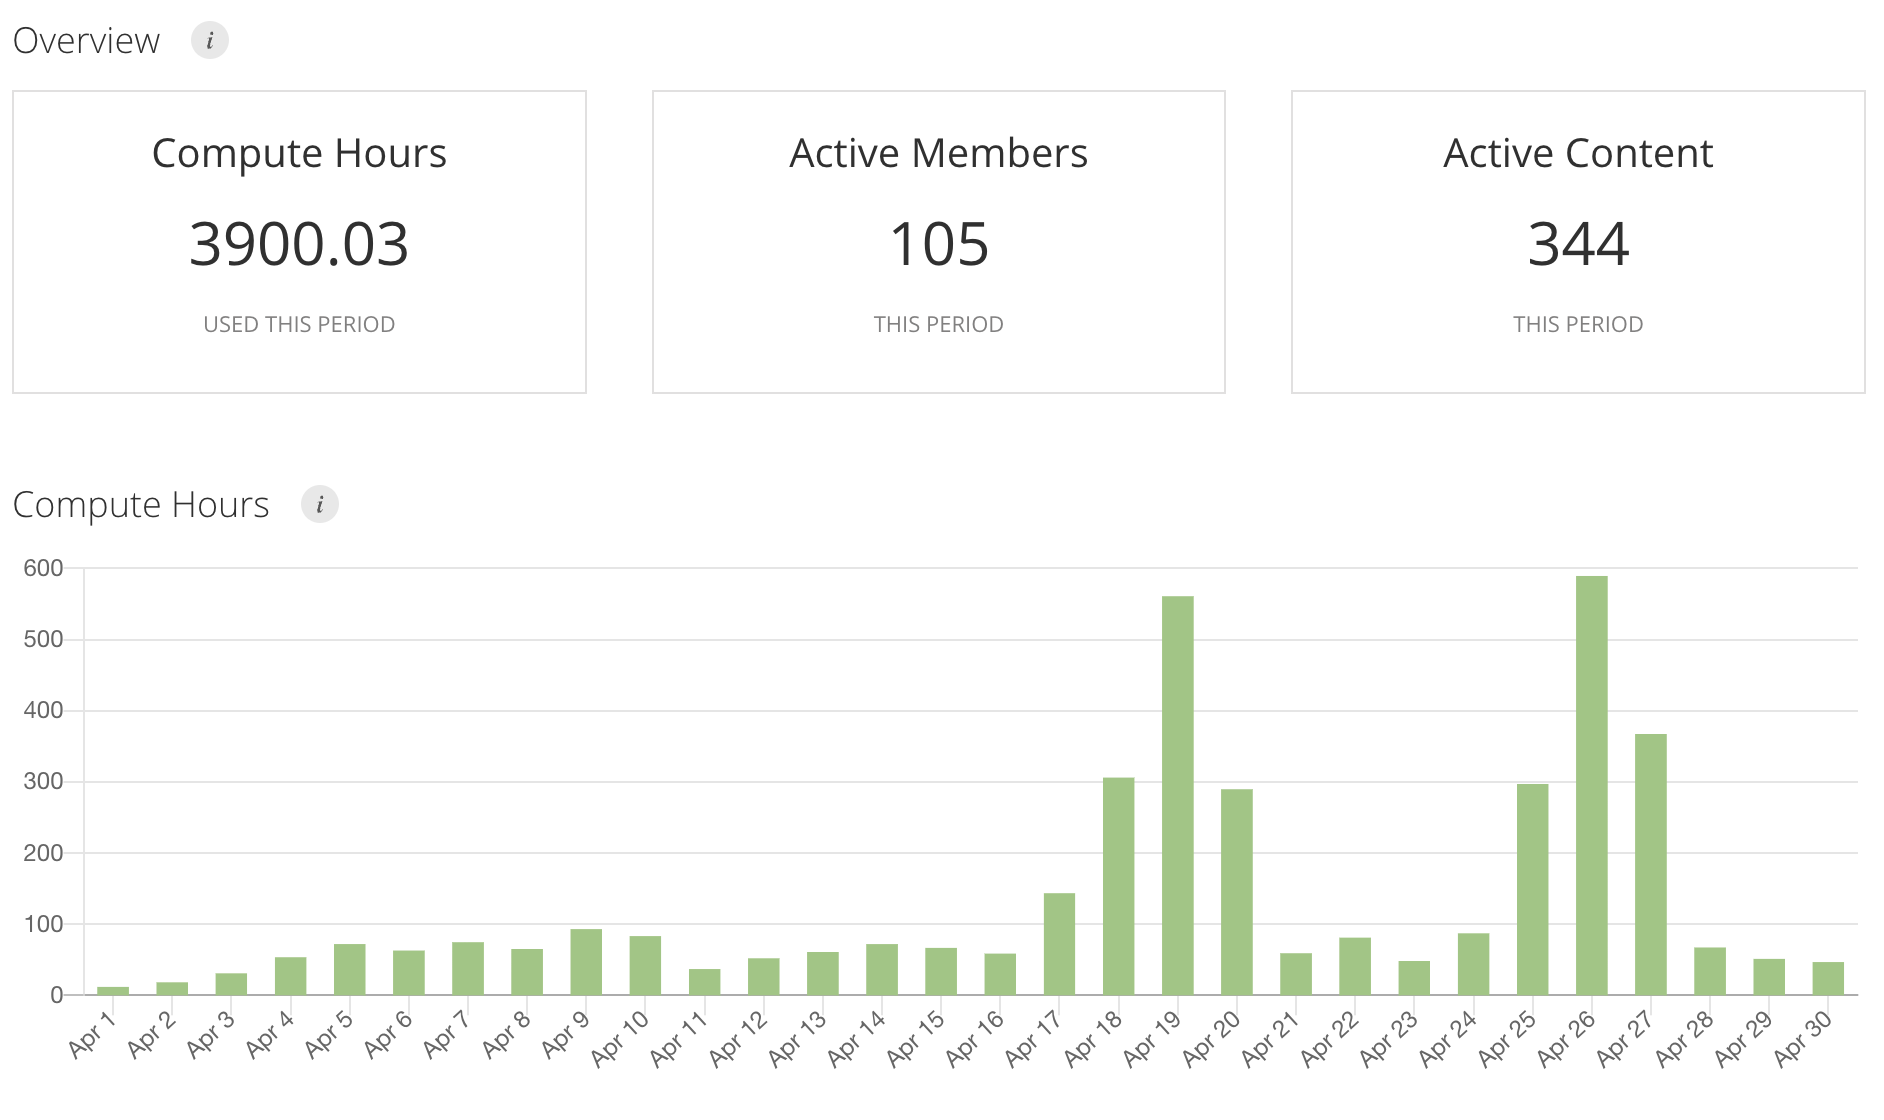
When a project is opened or code in it is executed, when an application is run, when an API is accessed, or when content is generated, Posit Cloud records that usage activity. Usage activity is associated with the space and the account in which it occurs, and is measured in compute hours. See the Compute Hours topic for more detail on how compute hours are calculated.
To view usage statistics for a space, go to Space Usage. You can view summary usage information for the space over a given period, and view the data for individual members and their projects within the space.
Organize Content with Lists
In a shared space, you can organize projects and outputs into lists to better present and keep track of your work.
The Admins and Moderators of a space can create, modify and delete lists.
Create List
How To
Press the New List action, then fill out and submit the form in the dialog that appears.
Add to List
You can add content to a list in either of two ways - either drag and drop the project or output onto the list, or press the menu button ![]() to open the item’s menu and choose Add to List.
to open the item’s menu and choose Add to List.
Remove from List
When viewing a list, you can remove a content item from that list by pressing the menu button ![]() to open the menu and choose Remove from List.
to open the menu and choose Remove from List.
Rearrange Projects in a List
You determine the order of content in a list - use drag and drop to change the position of any item in the list.
Rearrange Lists
You also control the order of the space’s lists - use drag and drop to change the position of any list relative to the other lists.
List Settings
You can rename or change the visibility of a list. Press the menu button ![]() to open the list’s menu and choose Settings.
to open the list’s menu and choose Settings.
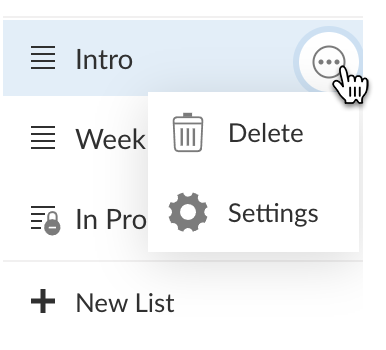
A list can be visible to all members of a space, or restricted. When visibility is restricted, the list has a small lock icon and can only be seen by the Admins and Moderators of the space.

Note that access to any given project or output is controlled by the item itself, not the list - putting a project or output in a list does not change who has access to it.
Delete List
Press the menu button ![]() to open the list’s menu and choose Delete. Note that the content in the list is NOT deleted - just the list itself.
to open the list’s menu and choose Delete. Note that the content in the list is NOT deleted - just the list itself.
