Python Environments in VS Code
When using VS Code for Python development, we recommend installing the Python extension. The Python extension enables many features that will be useful for Python developers, including support for managing and using virtual environments. This page focuses on VS Code-specific features for working with Python virtual environments.
Selecting an interpreter
VS Code will automatically detect when you are in a directory that contains Python files. You will know that VS Code has correctly detected a Python project when you see a Python interpreter appear in the bottom right corner.
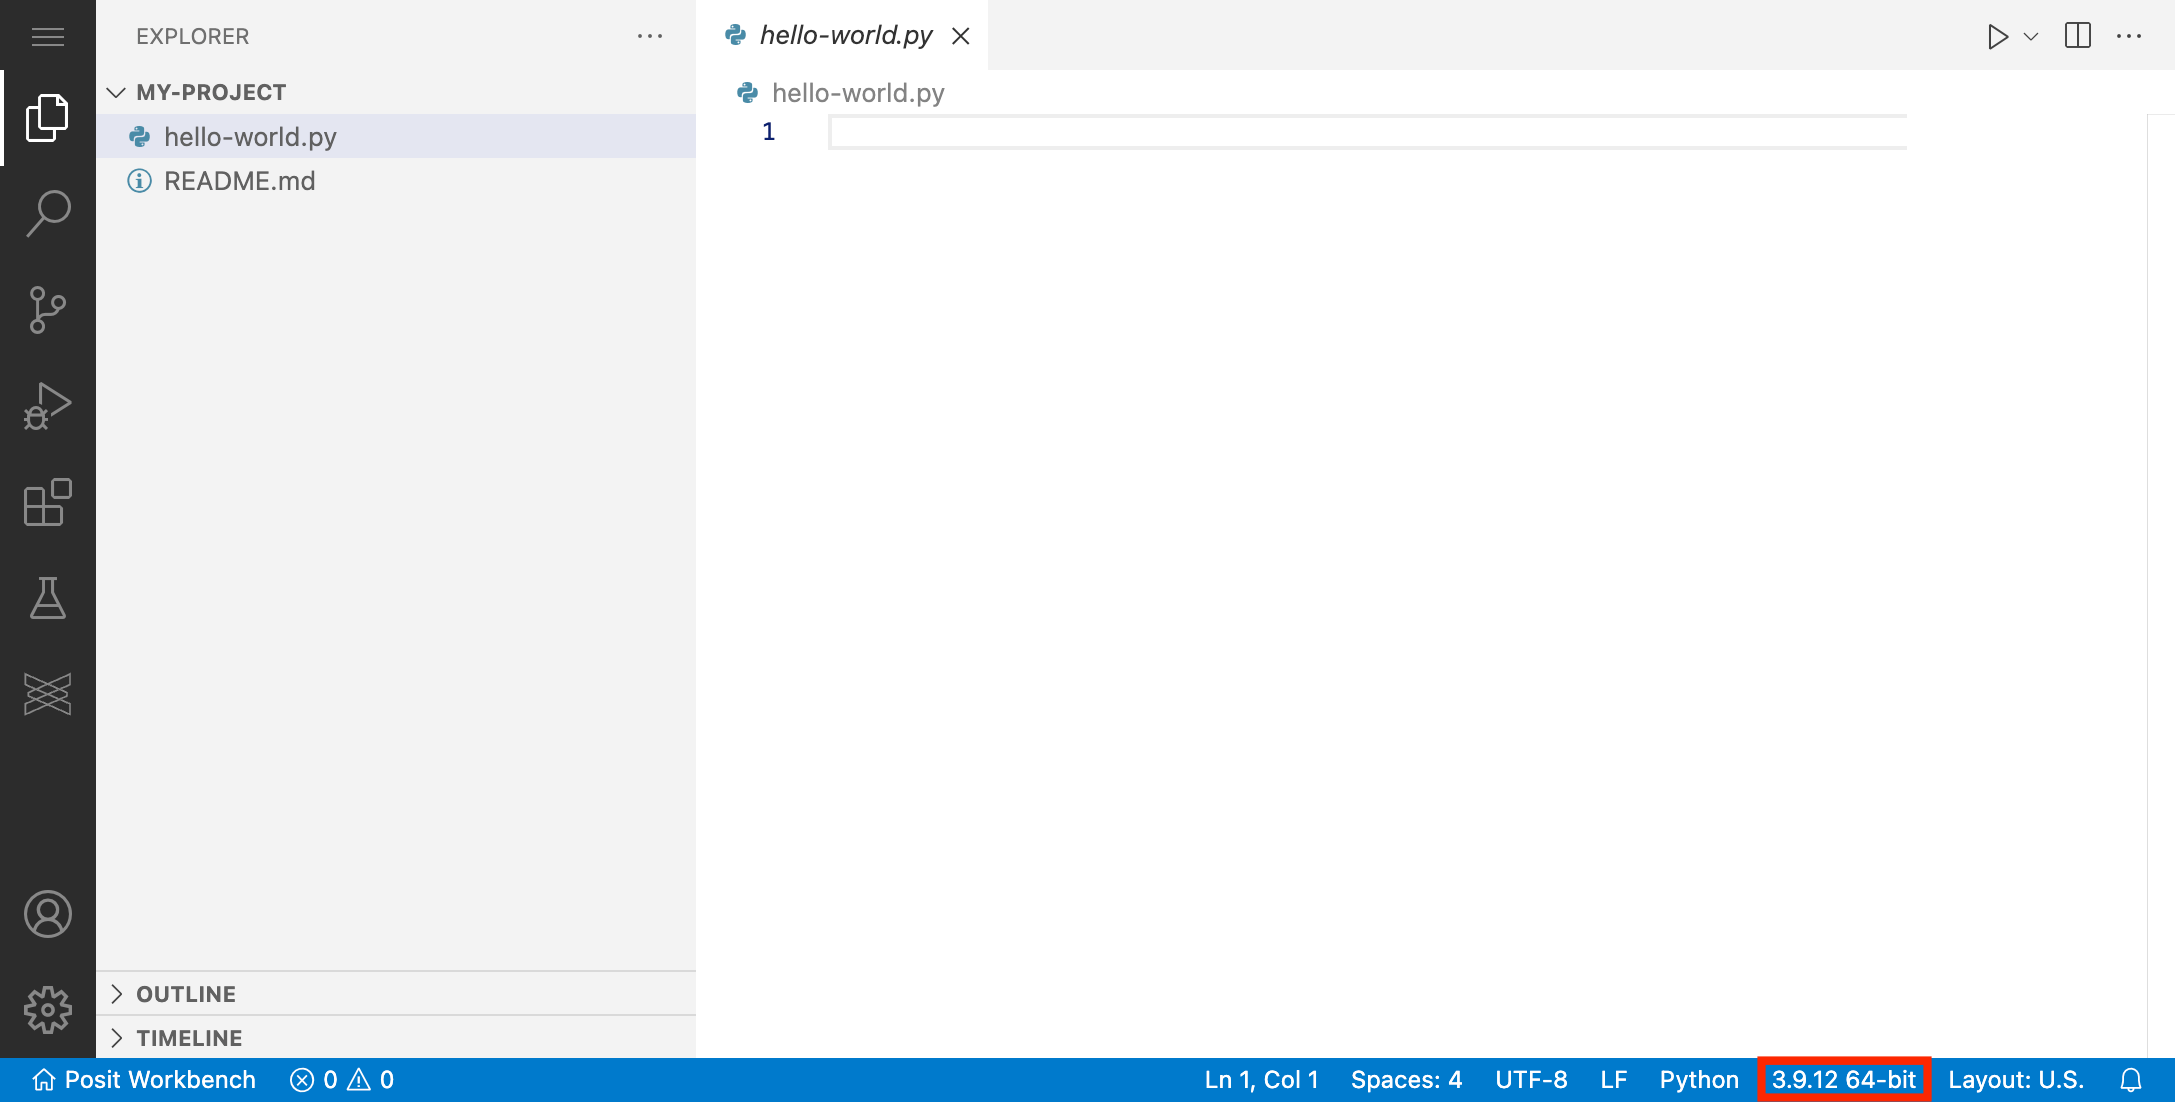
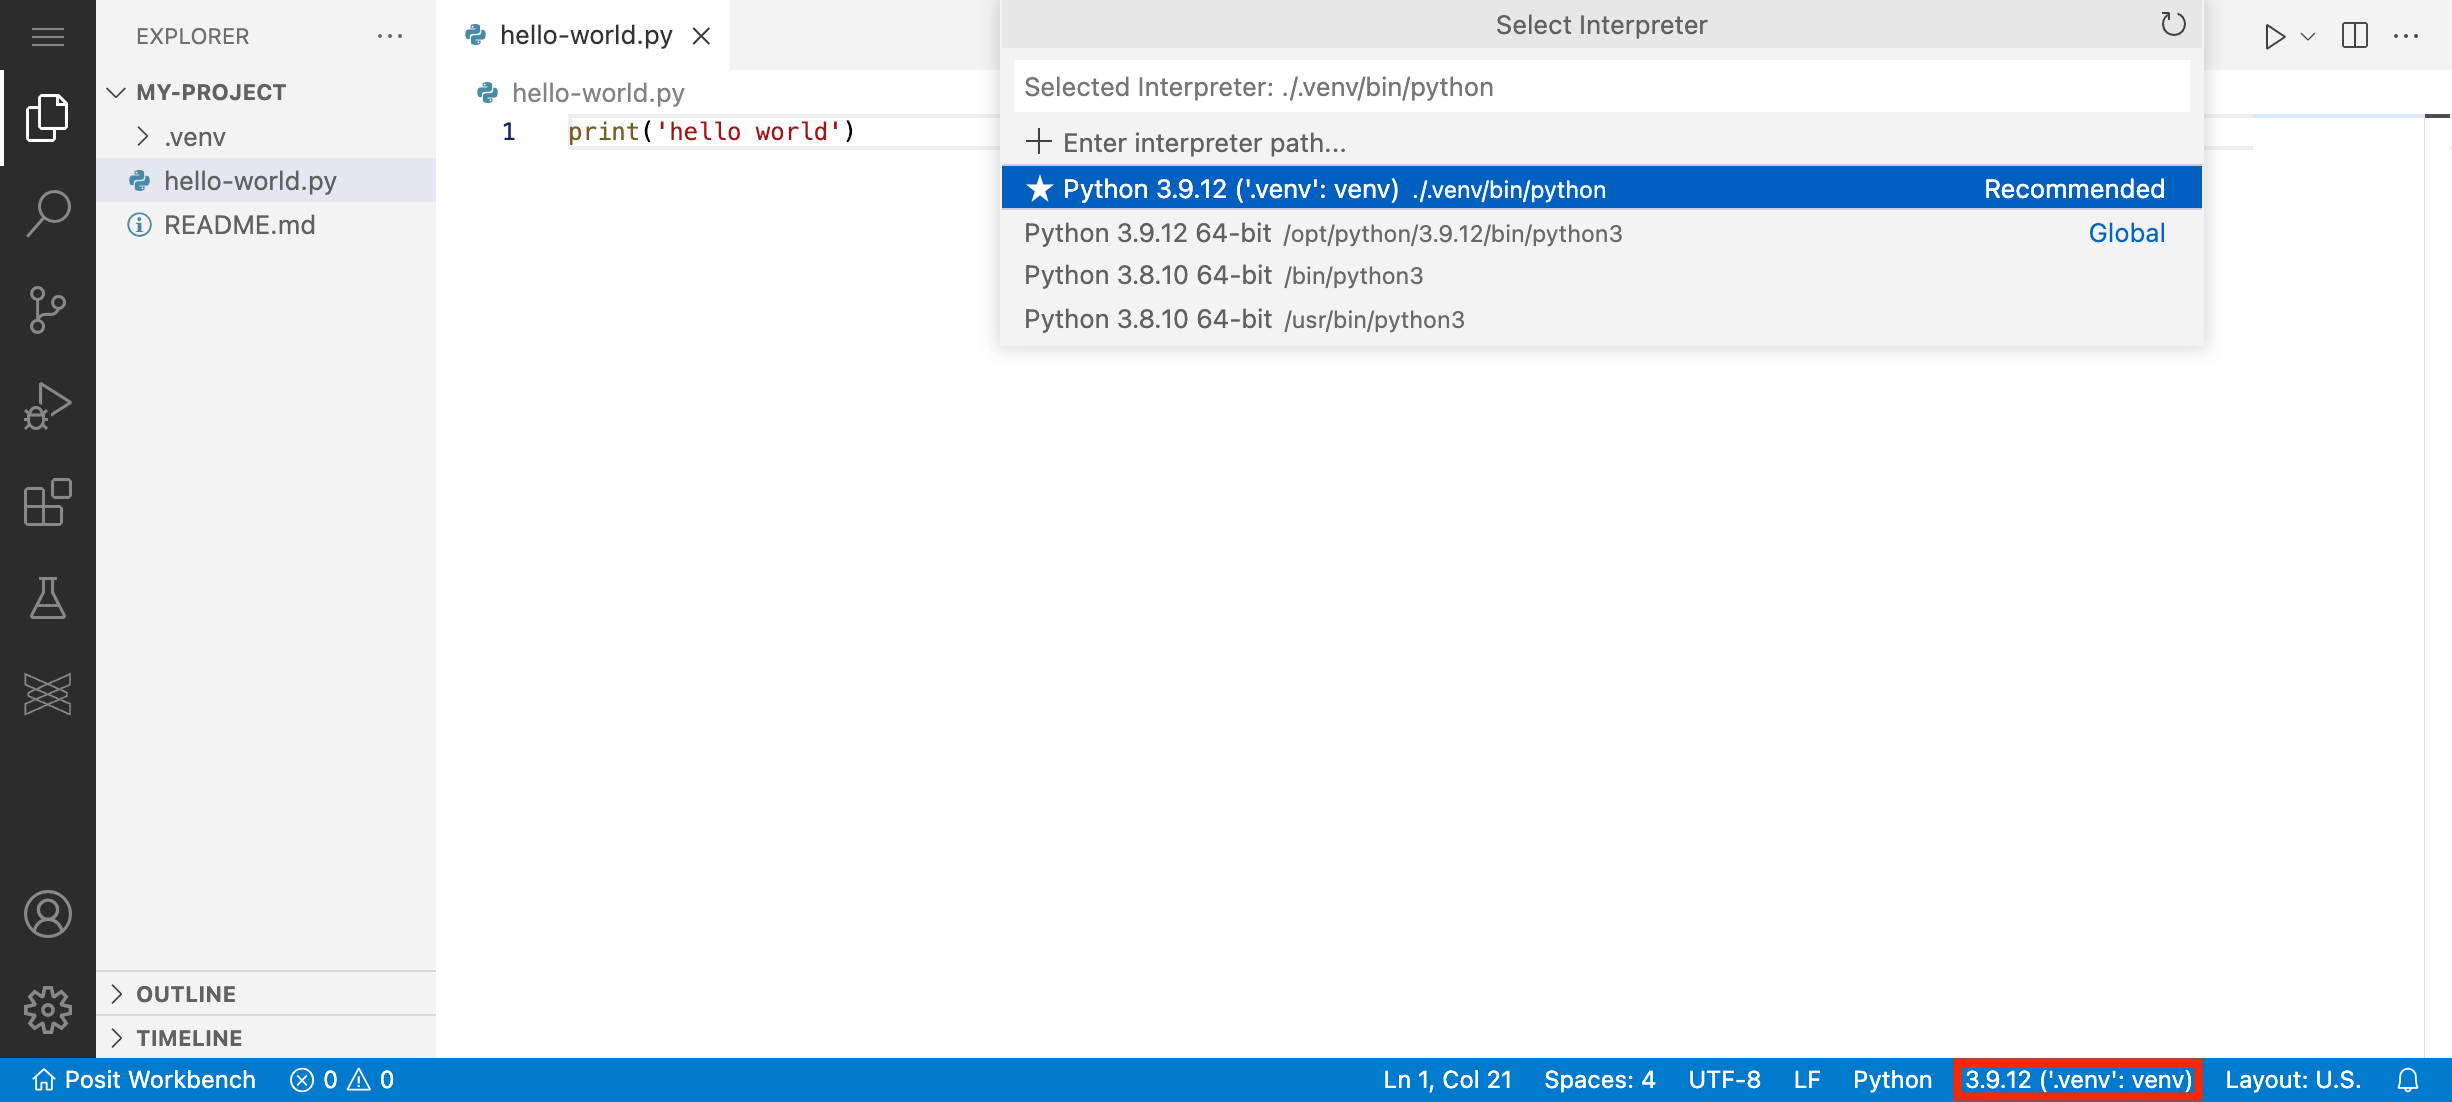
To change the selected interpreter open the Command Palette using Cmd + Shift + P on Mac or Ctrl + Shift + P on Windows. Then type “Python: Select Interpreter”. Alternatively, you can click on the current interpreter in the bottom right corner.
VS Code will automatically detect available interpreters and virtual environments. If VS Code does not automatically detect your desired interpreter, you can manually specify the path.
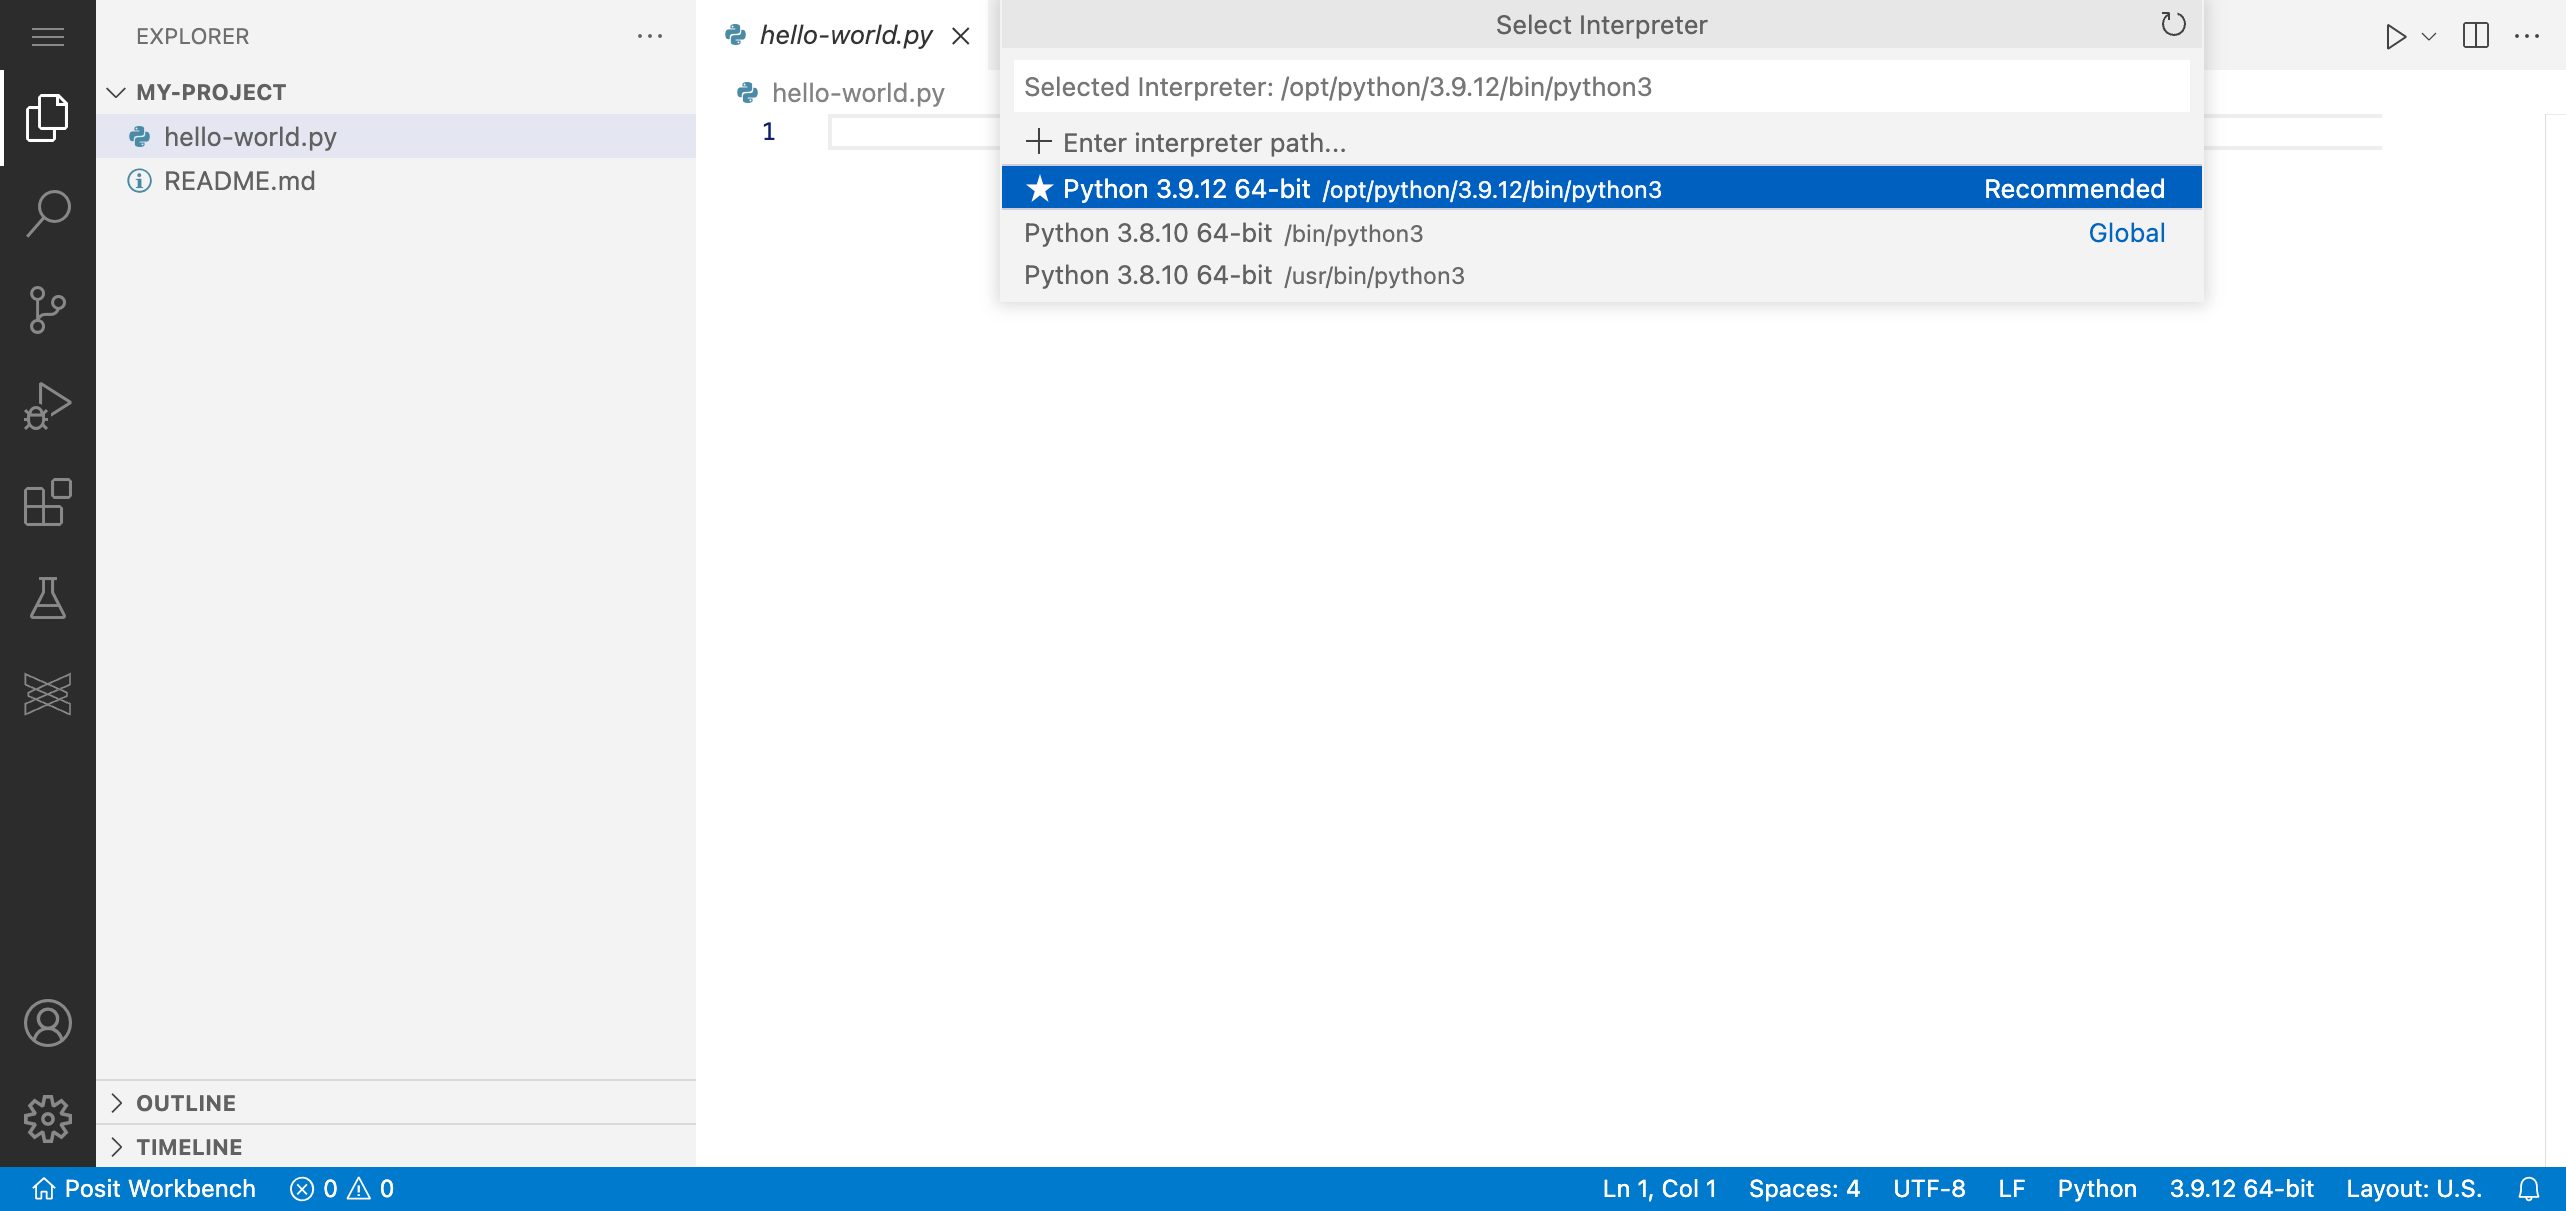
Now that you have selected an interpreter, VS Code will:
- Use this interpreter to execute Python code when you press the play button in the top right corner.
- Automatically activate this interpreter when you open a new terminal.
- Use this interpreter for Notebooks and Interactive Windows.
Project workflow
We recommend using a unique virtual environment for each project. This section walks you through the typical development flow of using virtual environments in VS Code.
Create a new project
Open a new VS Code Session in Workbench. Then create a new folder that will serve as the root directory of your project. You can do this using the terminal. Open the terminal by launching the Command Palette and then typing “Terminal: Create New Terminal”.
mkdir ~/my-project
touch ~/my-project/hello-world.py
echo "print('hello world')" > ~/my-project/hello-world.py
Then re-open VS Code inside the new project folder. Open the Command Palette and type “File: Open Folder…”. Then enter the path to the directory you just created “~/my-project”.
Create a virtual environment
Use the Command Palette to open a new terminal session with “Terminal: Create New Terminal”. Then create a new virtual environment by running the following commands in the terminal:
python -m venv .venv
source .venv/bin/activate
python -m pip install --upgrade pip setuptools wheelIf you want to enable the Jupyter Notebook features in VS Code you should also install ipykernel in your virtual environment:
python -m pip install ipykernelYou can verify the python command will now use your virtual environment by running:
which python
# /usr/home/<username>/my-project/.venv/bin/pythonWhen you create a virtual environment using python -m venv .venv, VS Code will use the version of Python associated with the python command.
- You can check what version by typing
python --versionin the terminal. - You can find the path to the interpreter by typing
which pythonin the terminal.
If you want to use a specific version of Python, you can create the virtual environment using the absolute path to the interpreter. For example, you could create a new virtual environment using Python version 3.10.4 with the following commands:
/opt/python/3.10.4/bin/python -m venv .venv
source .venv/bin/activate
python -m pip install --upgrade pip setuptools wheel
This assumes that Python 3.10.4 has already been installed in the /opt/python/3.10.4 directory. We recommend that admins install all versions of Python in /opt/python. If you are unsure where Python has been installed on your server please reach out to your server administrator.
Set the default project interpreter
Now you can configure VS Code always to use this virtual environment when working on this project. Open the Command Palette and type “Python: Select Interpreter”. VS Code should automatically recommend the virtual environment you just created. Select it using the arrow keys and press enter. If VS Code does not automatically detect or recommend the new virtual environment, you can manually enter the path: “./venv/bin/python”.
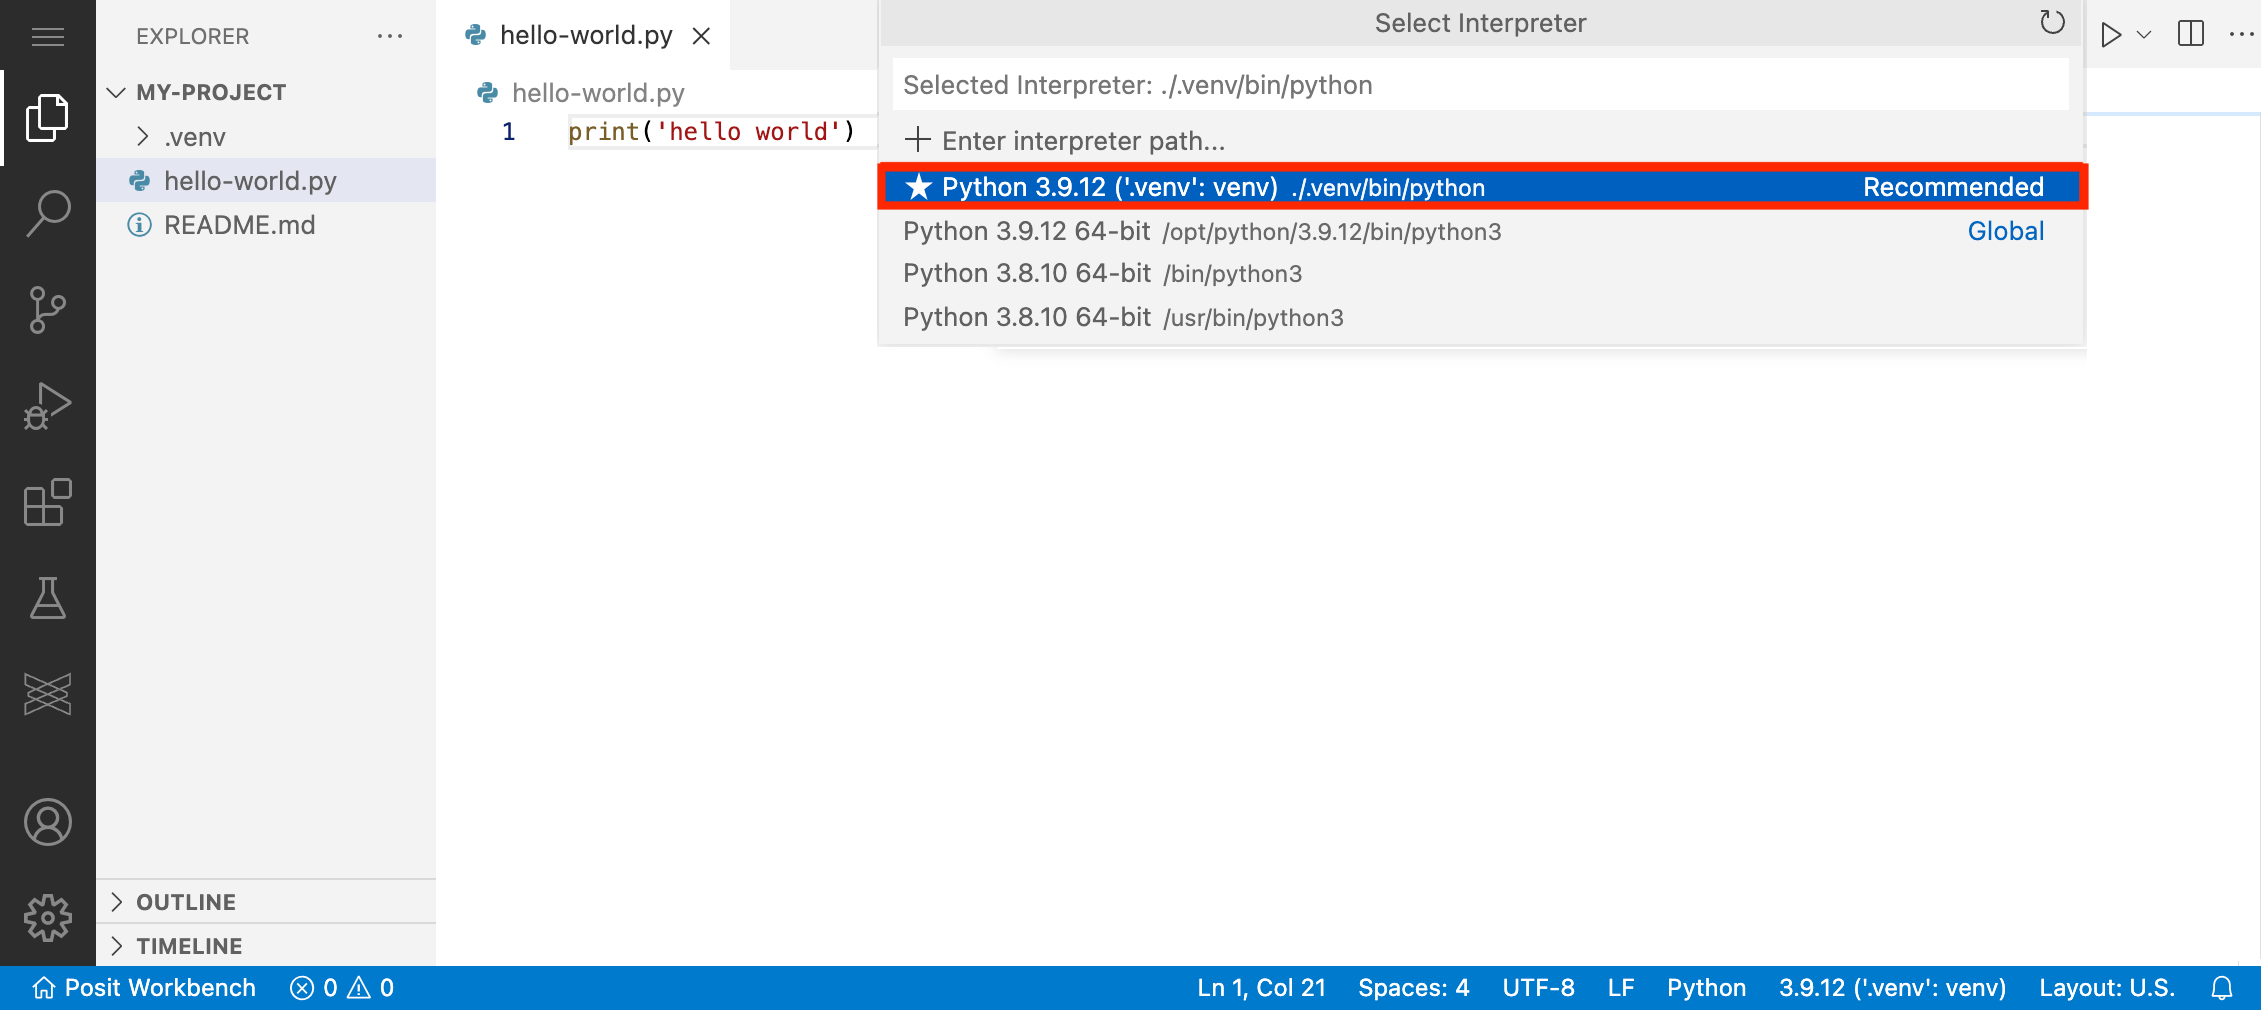
Alternatively, you can select the default project interpreter by clicking on the Python section of the Status Bar located at the bottom right of the window.
Run your code
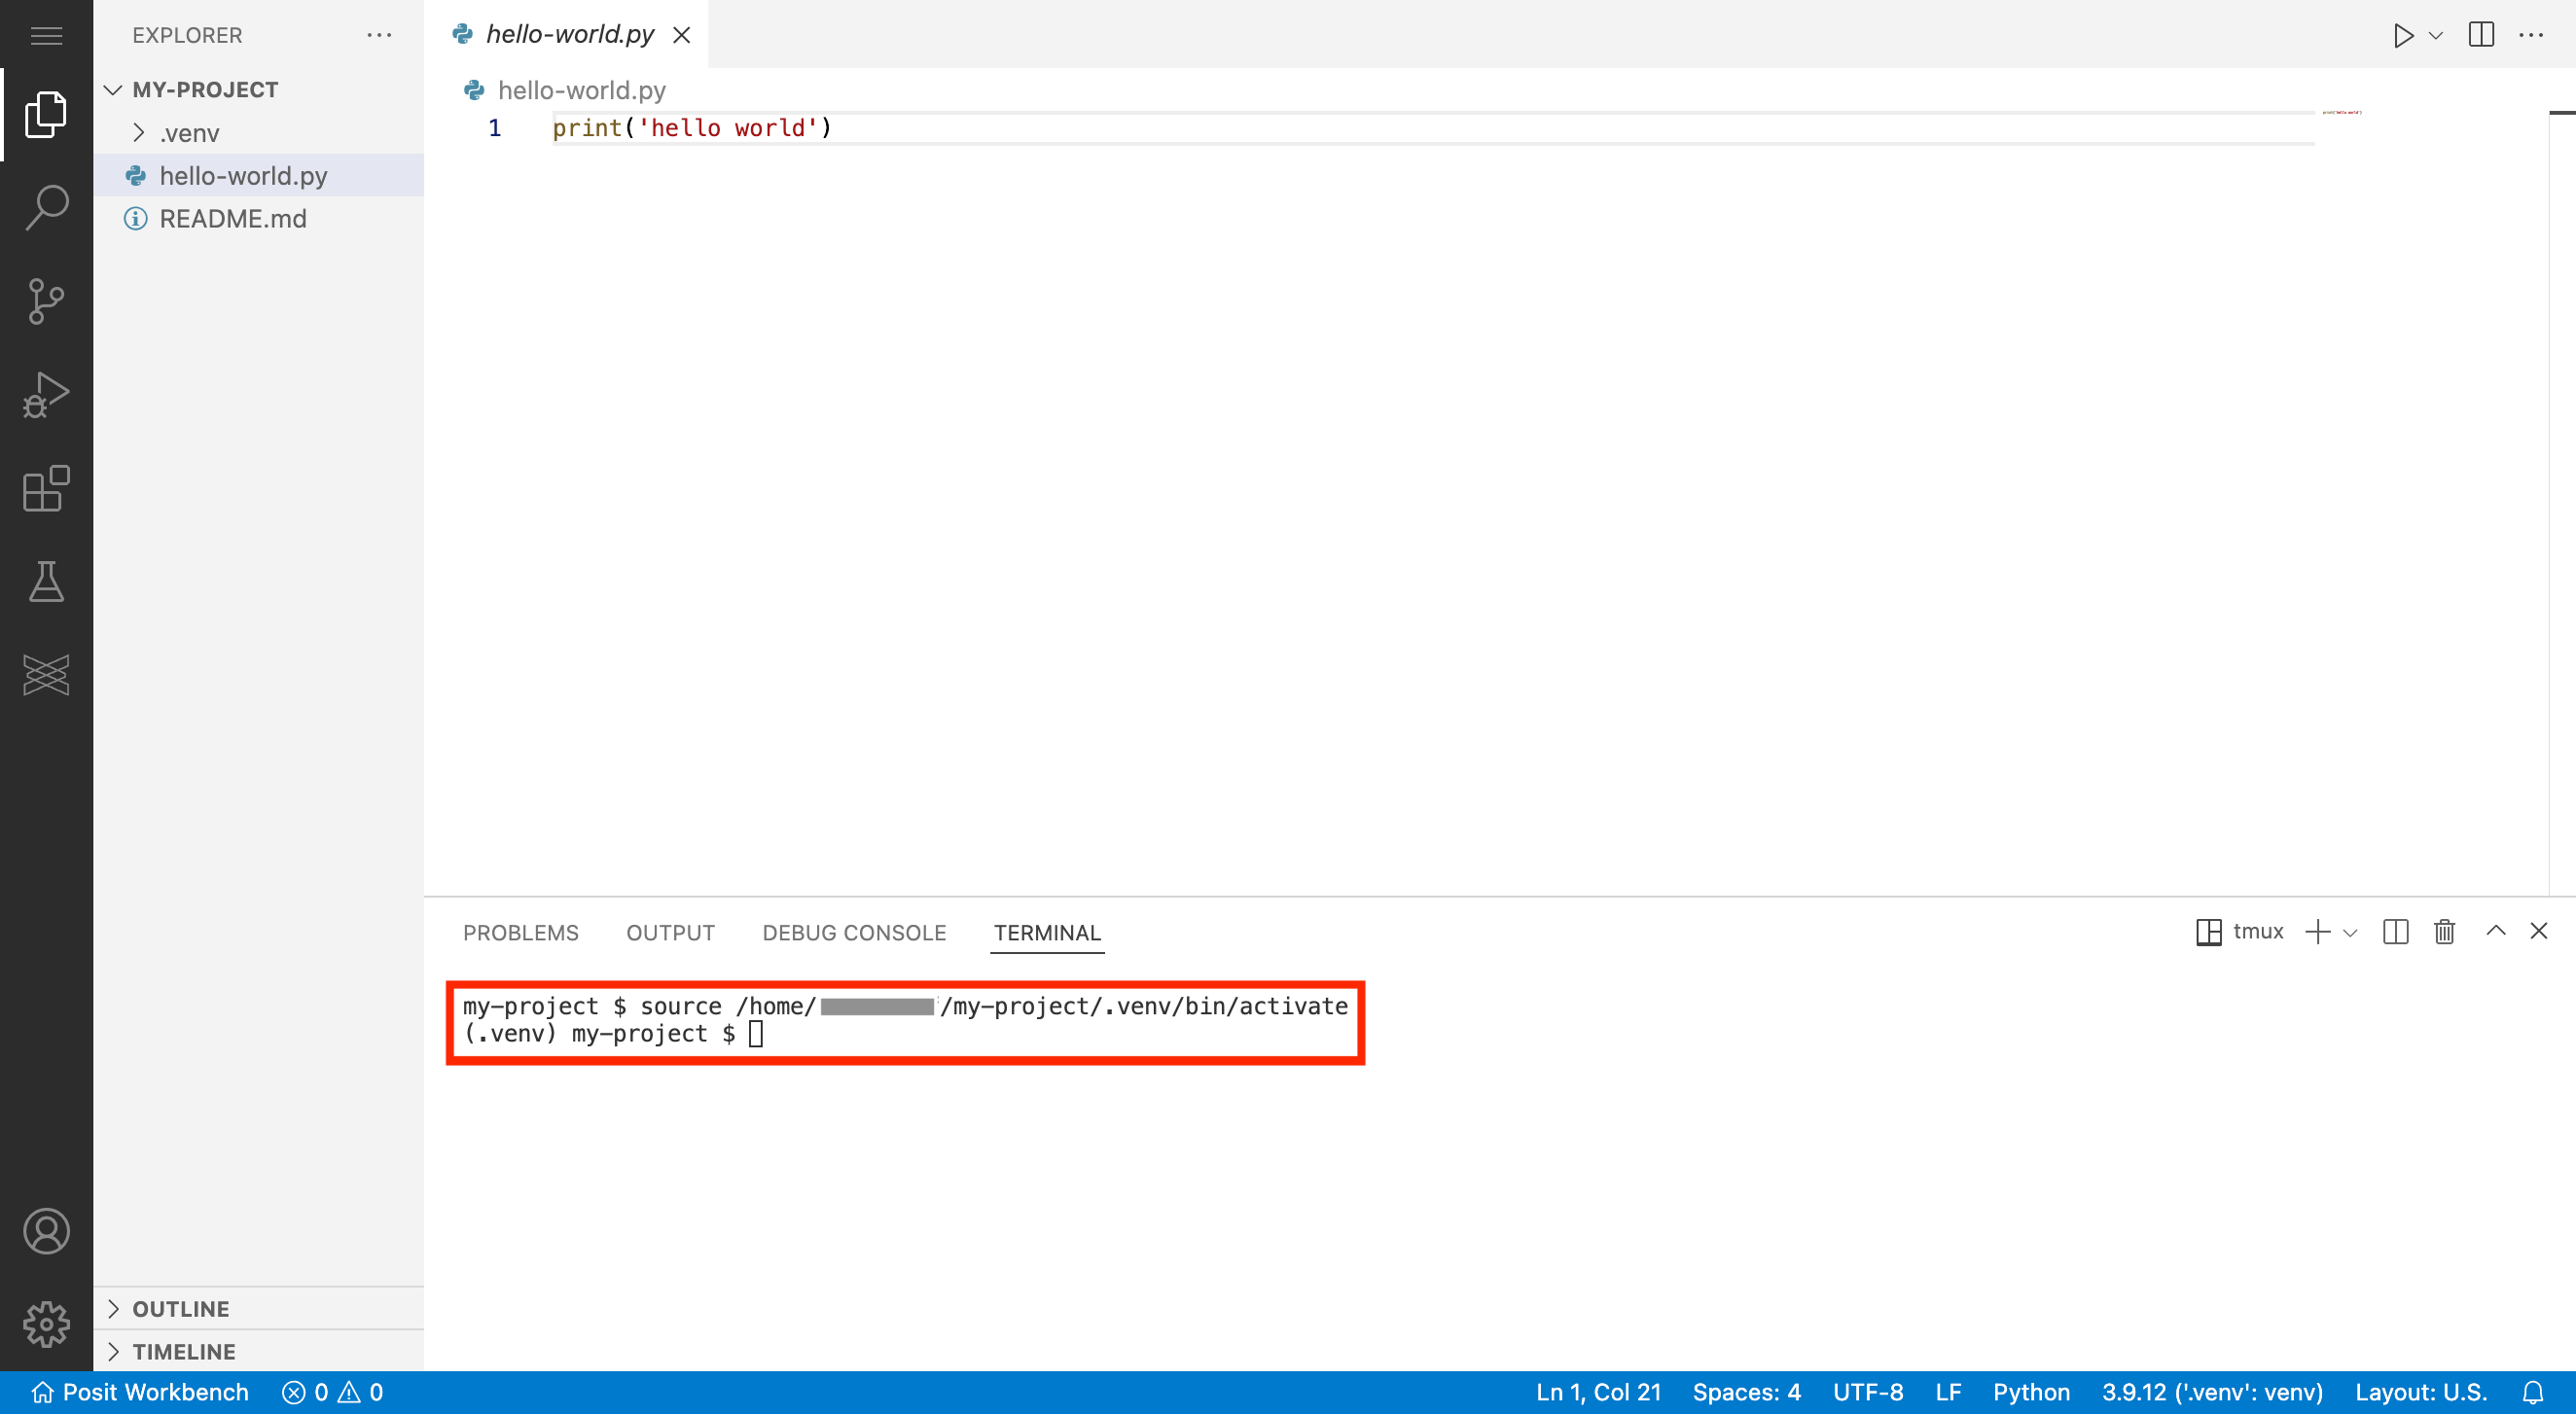
Once you have selected a default project Python interpreter, the virtual environment will be automatically activated and used whenever you open the project. Open a new terminal to see the changes take effect and watch VS Code automatically activate the virtual environment.
You can execute your Python code using the play button at the top right corner.

Alternatively, you can execute your Python code directly from the terminal.
python hello-world.py
# hello world